Next-Generation Firewall
Configure Multi-Factor Authentication
Table of Contents
Configure Multi-Factor Authentication
To use Multi-Factor
Authentication (MFA) for protecting sensitive services and
applications, you must configure Authentication Portal to display
a web form for the first authentication factor and to record Authentication
Timestamps. The firewall uses the timestamps to evaluate
the timeouts for Authentication
Policy rules. To enable additional authentication factors,
you can integrate the firewall with MFA vendors through RADIUS or
vendor APIs. After evaluating Authentication policy, the firewall
evaluates Security policy, so you must configure rules for both policy
types.
Palo Alto Networks provides support for MFA vendors through Applications content
updates. This means that if you use Panorama to push device group
configurations to firewalls, you must install the same Applications
updates on the firewalls as on Panorama to avoid mismatches
in vendor support.
MFA vendor API integrations are supported
for end-user authentication through Authentication Policy only.
For remote user authentication to GlobalProtect portals or gateways
or for administrator authentication to the PAN-OS or Panorama web
interface, you can only use MFA vendors supported through RADIUS or
SAML; MFA services through vendor APIs are not supported in these
use cases.
- Configure Authentication Portal in Redirect mode to display a web form for the first authentication factor, to record authentication timestamps, and to update user mappings.Configure one of the following server profiles to define how the firewall will connect to the service that authenticates users for the first authentication factor.
- Add a RADIUS server profile. This is required if the firewall integrates with an MFA vendor through RADIUS. In this case, the MFA vendor provides the first and all additional authentication factors, so you can skip the next step (configuring an MFA server profile). If the firewall integrates with an MFA vendor through an API, you can still use a RADIUS server profile for the first factor but MFA server profiles are required for the additional factors.
- Add a SAML IdP server profile.
- Add a Kerberos server profile.
- Add a TACACS+ server profile.
- Add an LDAP server profile.
In most cases, an external service is recommended for the first authentication factor. However, you can configure Configure Local Database Authentication as an alternative.Add an MFA server profile.The profile defines how the firewall connects to the MFA server. Add a separate profile for each authentication factor after the first factor. The firewall integrates with these MFA servers through vendor APIs. You can specify up to three additional factors. Each MFA vendor provides one factor, though some vendors let users choose one factor out of several.- Select and Add a profile.Enter a Name to identify the MFA server.Select the Certificate Profile that the firewall will use to validate the MFA server certificate when establishing a secure connection to the MFA server.Select the MFA Vendor you deployed.Configure the Value of each vendor attribute.The attributes define how the firewall connects to the MFA server. Each vendor Type requires different attributes and values; refer to your vendor documentation for details.Click OK to save the profile.Configure an authentication profile.The profile defines the order of the authentication factors that users must respond to.
- Select and Add a profile.Enter a Name to identify the authentication profile.Select the Type for the first authentication factor and select the corresponding Server Profile.Select Factors, Enable Additional Authentication Factors, and Add the MFA server profiles you configured.The firewall will invoke each MFA service in the listed order, from top to bottom.Click OK to save the authentication profile.Configure an authentication enforcement object.The object associates each authentication profile with an Authentication Portal method. The method determines whether the first authentication challenge (factor) is transparent or requires a user response.Select the Authentication Profile you configured and enter a Message that tells users how to authenticate for the first factor. The message displays in the Authentication Portal web form.If you set the Authentication Method to browser-challenge, the Authentication Portal web form displays only if Kerberos SSO authentication fails. Otherwise, authentication for the first factor is automatic; users won’t see the web form.Configure an Authentication policy rule.The rule must match the services and applications you want to protect and the users who must authenticate.
- Select and Add a rule.Enter a Name to identify the rule.Select Source and Add specific zones and IP addresses or select Any zones or IP addresses.The rule applies only to traffic coming from the specified IP addresses or from interfaces in the specified zones.Select User and select or Add the source users and user groups to which the rule applies (default is any).Select Destination and Add specific zones and IP addresses or select any zones or IP addresses.The IP addresses can be resources (such as servers) for which you want to control access.Select Service/URL Category and select or Add the services and service groups for which the rule controls access (default is service-http).Select or Add the URL categories for which the rule controls access (default is any). For example, you can create a custom URL category that specifies your most sensitive internal sites.Select Actions and select the Authentication Enforcement object you created.Specify the Timeout period in minutes (default 60) during which the firewall prompts the user to authenticate only once for repeated access to services and applications.Timeout is a tradeoff between tighter security (less time between authentication prompts) and the user experience (more time between authentication prompts). More frequent authentication is often the right choice for access to critical systems and sensitive areas such as a data center. Less frequent authentication is often the right choice at the network perimeter and for businesses for which the user experience is key.Click OK to save the rule.Customize the MFA login page.The firewall displays this page to tell users how to authenticate for MFA factors and to indicate the authentication status (in progress, succeeded, or failed).
- Select and select MFA Login Page.Select the Predefined response page and Export the page to your client system.On your client system, use an HTML editor to customize the downloaded response page and save it with a unique filename.Return to the MFA Login Page dialog on the firewall, Import your customized page, Browse to select the Import File, select the Destination (virtual system or shared location), click OK, and click Close.Configure a Security policy rule that allows users to access the services and applications that require authentication.
- Create a Security Policy Rule.Commit your changes.The automated correlation engine on the firewall uses several correlation objects to detect events on your network that could indicate credential abuse relating to MFA. To review the events, select .Verify that the firewall enforces MFA.
- Log in to your network as one of the source users specified in the Authentication rule.Request a service or application that matches one of the services or applications specified in the rule.The firewall displays the Authentication Portal web form for the first authentication factor. The page contains the message you entered in the authentication enforcement object. For example:
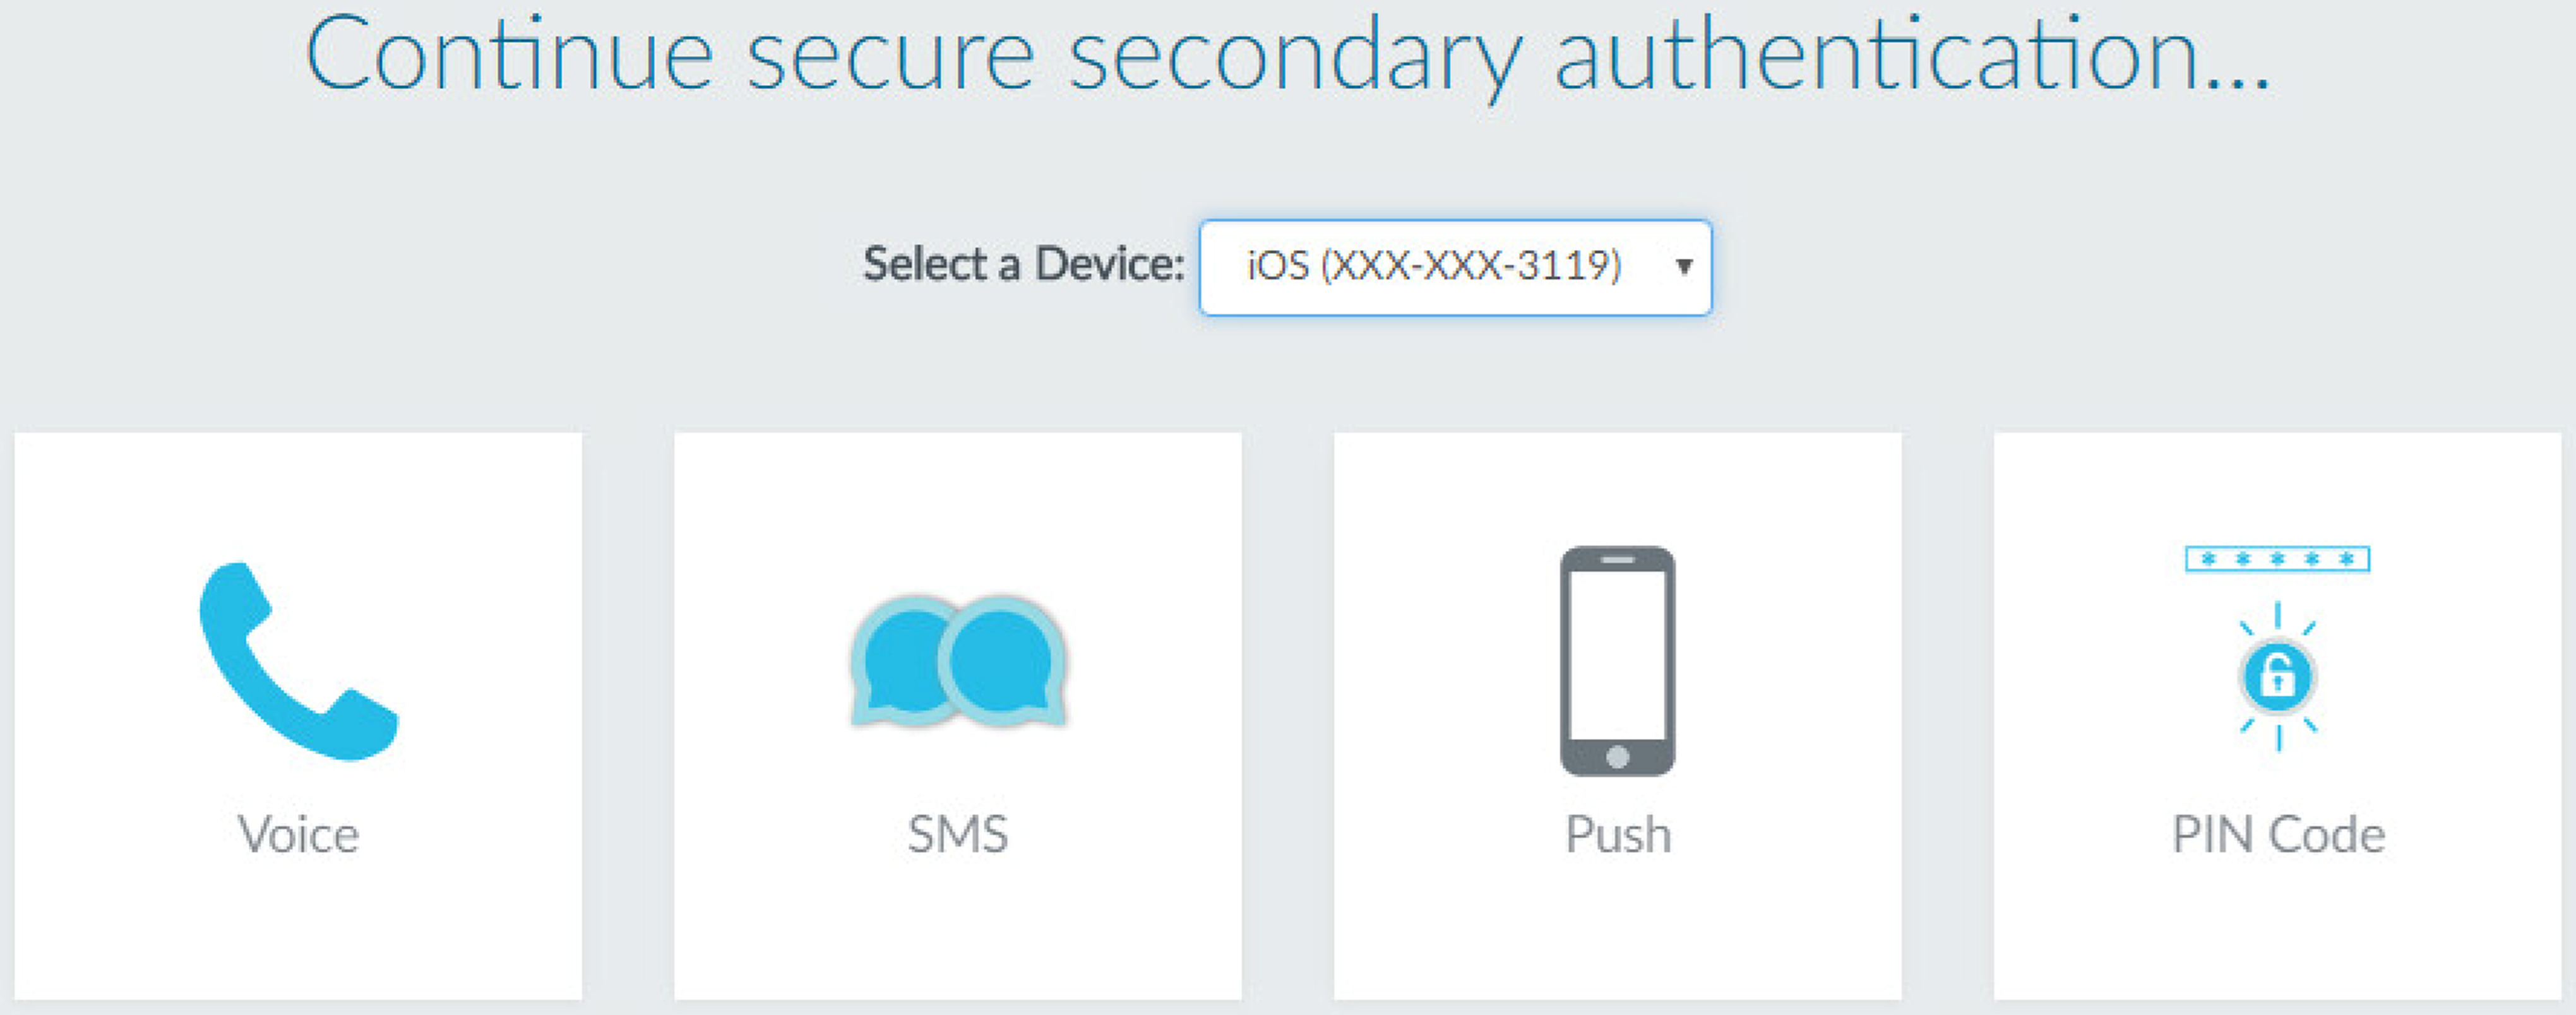
![]() Enter your user credentials for the first authentication challenge.The firewall then displays an MFA login page for the next authentication factor. For example, the MFA service might prompt you to select the Voice, SMS, push, or PIN code (OTP) authentication method. If you select push, your phone prompts you to approve the authentication.
Enter your user credentials for the first authentication challenge.The firewall then displays an MFA login page for the next authentication factor. For example, the MFA service might prompt you to select the Voice, SMS, push, or PIN code (OTP) authentication method. If you select push, your phone prompts you to approve the authentication.![]() Authenticate for the next factor.The firewall displays an authentication success or failure message. If authentication succeeded, the firewall displays an MFA login page for the next authentication factor, if any.Repeat this step for each MFA factor. After you authenticate for all the factors, the firewall evaluates Security policy to determine whether to allow access to the service or application.End the session for the service or application you just accessed.Start a new session for the same service or application. Be sure to perform this step within the Timeout period you configured in the Authentication rule.The firewall allows access without re-authenticating.Wait until the Timeout period expires and request the same service or application.The firewall prompts you to re-authenticate.
Authenticate for the next factor.The firewall displays an authentication success or failure message. If authentication succeeded, the firewall displays an MFA login page for the next authentication factor, if any.Repeat this step for each MFA factor. After you authenticate for all the factors, the firewall evaluates Security policy to determine whether to allow access to the service or application.End the session for the service or application you just accessed.Start a new session for the same service or application. Be sure to perform this step within the Timeout period you configured in the Authentication rule.The firewall allows access without re-authenticating.Wait until the Timeout period expires and request the same service or application.The firewall prompts you to re-authenticate.