Next-Generation Firewall
Enable Advanced Routing
Table of Contents
Enable Advanced Routing
Enable the Advanced Routing Engine.
| Where Can I Use This? | What Do I Need? |
|---|---|
|
Although a supported firewall can have a configuration that
uses the legacy routing engine and a configuration that uses the
Advanced Routing Engine, only one routing engine is in effect at
a time. Each time you change the engine that the firewall will use
(you enable or disable Advanced Routing to access the advanced engine
or legacy engine, respectively), you must commit the configuration
and reboot the firewall for the change to take effect.
Before you switch to the Advanced Routing
Engine, make a backup of your current configuration.
Similarly,
if you configure Panorama with a template that enables or disables Advanced
Routing, after you commit and push the template to devices, you
must reboot the devices in the template for the change to take effect.
When configuring Panorama, create device
groups and Templates for devices that all use the same Advanced
Routing setting (all enabled or all disabled). Panorama won’t push
configurations with Advanced Routing enabled to lower-end firewalls
that don’t support Advanced Routing. For those firewalls, Panorama
will push a legacy configuration if one is present.
The
Advanced Routing Engine supports multiple logical routers (known
as virtual routers on the legacy routing engine). The number of
logical routers supported depends on the firewall model and is the
same as the number of virtual routers supported on the legacy routing
engine. The Advanced Routing Engine has more convenient menu options
and there are many settings that you can easily configure in a profile
(authentication, timers, address family, or redistribution profile)
that you apply to a BGP peer group or peer, for example. There are
also many static route, OSPF, OSPFv3, RIPv2, multicast, and BFD
settings on the Advanced Routing Engine.
The Advanced Routing
Engine supports RIB filtering, which means you can create a route
map to match static routes or routes received from other routing protocols
and thus filter which routes are installed in the RIB for the logical
router. This function is useful on firewalls with a smaller RIB
or FIB capacity; you can still propagate the necessary routing updates
without using memory needed elsewhere.
- Make a backup of your current configuration before you enable Advanced Routing.Enable the Advanced Routing Engine.
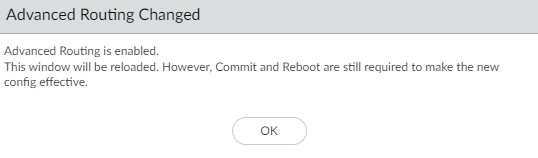
- Select and edit the General Settings.Enable Advanced Routing.
![]() Before you click OK, make sure you have made a backup of your configuration for the legacy routing engine.Click OK.A warning appears:
Before you click OK, make sure you have made a backup of your configuration for the legacy routing engine.Click OK.A warning appears:![]() Select Yes to have the migration script convert each virtual router to a logical router and migrate your configuration to the advanced routing engine. (Select Skip to restart the system with an empty configuration. Select Cancel to cancel the process to enable Advanced Routing.)Click OK to approve the migration.
Select Yes to have the migration script convert each virtual router to a logical router and migrate your configuration to the advanced routing engine. (Select Skip to restart the system with an empty configuration. Select Cancel to cancel the process to enable Advanced Routing.)Click OK to approve the migration.![]() The virtual routers, links to the logical routers, and their color-coded status are listed. Resolve any issues that require user intervention. Select Continue
The virtual routers, links to the logical routers, and their color-coded status are listed. Resolve any issues that require user intervention. Select Continue![]() Click Yes to accept the migrated configuration.
Click Yes to accept the migrated configuration.![]() (PAN-OS 11.0.2 and later 11.1 releases) Click OK.
(PAN-OS 11.0.2 and later 11.1 releases) Click OK.![]() Commit and then select and Reboot Device. Then log back into the firewall.If the migration is not successful, generate the technical support file, log in to Palo Alto Networks Customer Support Portal, and report your issues to get help with your product.(Optional) After successful migration, you can delete all virtual routers using the configuration mode CLI command:
Commit and then select and Reboot Device. Then log back into the firewall.If the migration is not successful, generate the technical support file, log in to Palo Alto Networks Customer Support Portal, and report your issues to get help with your product.(Optional) After successful migration, you can delete all virtual routers using the configuration mode CLI command:- Access the CLI.
- Execute the following command to remove all configurations from the legacy routing engine:
username@hostname# delete network virtual-router <vr-name>You can delete virtual routers if you are going to make changes in the logical router configuration, which makes the virtual router configuration obsolete, causing commit failures. Although deleting virtual routers will avoid commit failures, be aware that deleting virtual routers will also permanently remove all configuration from the legacy routing engine and you won't be able to get the configuration back. - Commit the changes to the
firewall.
username@hostname# commit
When configuring in Panorama, you can select Network > Virtual Routers to delete all virtual routers. Commit the changes and push them to the relevant firewalls before continuing.Log back into the firewall.Select Network.Notice the menu items, which are more industry-standard and more detailed than the single item (Virtual Routers) on the legacy menu. Routing includes Logical Routers and Routing Profiles, which include BGP, BFD, OSPF, OSPFv3, RIPv2, Filters, and Multicast.![]() Select Interfaces and configure one or more Layer 3 interfaces with a static IP address or as a DHCPv4 client to received a dynamically assigned address.(Optional) Create an Admin Role Profile to control granular access to logical routers and routing profiles for an Advanced Routing Engine.
Select Interfaces and configure one or more Layer 3 interfaces with a static IP address or as a DHCPv4 client to received a dynamically assigned address.(Optional) Create an Admin Role Profile to control granular access to logical routers and routing profiles for an Advanced Routing Engine.- Select and Add an Admin Role Profile by Name.Select Web UI.Enable, Disable, or select Read Only the following options: Network, Routing, Logical Routers, Routing Profiles, BGP, BFD, OSPF, OSPFv3, RIPv2, Filters, and Multicast (default is Enable).
![]() Click OK.Assign the role to an administrator. Configure a Firewall Administrator Account.Commit the changes.Continue by configuring a logical router.
Click OK.Assign the role to an administrator. Configure a Firewall Administrator Account.Commit the changes.Continue by configuring a logical router.