Next-Generation Firewall
Create Multicast Routing Profiles
Table of Contents
Create Multicast Routing Profiles
Use multicast routing profiles for PIM Interface Timers, IGMP Interface Queries, and
MSDP for an Advanced Routing Engine.
| Where Can I Use This? | What Do I Need? |
|---|---|
|
One of these licenses for Strata Cloud Manager managed NGFWs:
|
On an Advanced Routing Engine, create the following routing profiles to apply to an
IPv4 multicast configuration:
- Multicast IPv4 PIM Interface Timer Profiles—Use on the PIM General tab (Interface General Timer) and on the PIM Interfaces tab to override the Interface General Timer.
- Multicast IPv4 IGMP Interface Query Profiles—Use on the IGMP tab for a Dynamic IGMP interface.
Create the following Multicast Source Discovery Protocol (MSDP) profiles to apply to
an MSDP
configuration.
- MSDP Authentication Profiles—Use on the MSDP General tab to apply a profile globally, and on the MSDP Peer tab to override the Global Authentication Profile. MSDP uses MD5 authentication.
- MSDP Timer Profiles—Use on the MSDP General tab.
Decide whether you are configuring IPv4 multicast routing for PAN-OS or Strata Cloud
Manager.
PAN-OS
Create routing profiles for IPv4 multicast and MSDP for an PAN-OS firewall that uses
the Advanced Routing Engine.
Perform this task to create routing profiles for an IPv4 multicast routing
configuration and an MSDP configuration on a PAN-OS firewall.
- Create a multicast IPv4 PIM Interface Timer profile.
- Select .Add a Multicast IPv4 PIM Interface Timer Profile by Name. (maximum of 63 characters). The name must start with an alphanumeric character, underscore (_), or hyphen (-), and can contain a combination of alphanumeric characters, underscore, or hyphen. No dot (.) or space is allowed.Specify the Assert Interval—Number of seconds between PIM Assert messages that the logical router sends to other PIM routers on the multiaccess network when they are electing a PIM forwarder; range is 1 to 65,534; default is 177.Specify the Hello Interval—Number of seconds between PIM Hello messages that the logical router sends to its PIM neighbors from each interface in the interface group; range is 1 to 180; default is 30.Specify the Join Prune Interval—Number of seconds between PIM Join messages (and between PIM Prune messages) that the logical router sends upstream toward a multicast source; range is 60 to 600; default is 60.
![]() Click OK.Create a multicast IPv4 IGMP Interface Query profile.
Click OK.Create a multicast IPv4 IGMP Interface Query profile.- Select .Add a Multicast IPv4 IGMP Interface Query Profile by Name (maximum of 63 characters). The name must start with an alphanumeric character, underscore (_), or hyphen (-), and can contain a combination of alphanumeric characters, underscore, or hyphen. No dot (.) or space is allowed.Specify the Max Query Response Time—maximum number of seconds allowed for a receiver to respond to an IGMP membership Query message before the logical router determines that the receiver no longer wants to receive multicast packets for the group; range is 1 to 25; default is 10.Specify the Query Interval—number of seconds between IGMP membership Query messages that the logical router sends to a receiver to determine whether the receiver still wants to receive the multicast packets for a group; range is 1 to 1,800; default is 125.Specify the Last Member Query Interval—number of seconds allowed for a receiver to respond to a Group-Specific Query that the logical router sends after a receiver sends a Leave Group message; range is 1 to 25; default is 1.If you enable leave group immediately when a leave message is received, when there is only one member in a multicast group and the logical router receives an IGMP Leave message for that group, this setting causes the logical router to remove that group and outgoing interface from the multicast routing information base (mRIB) and multicast forwarding information base (mFIB) immediately, rather than waiting for the Last Member Query Interval to expire. Enabling this setting saves network resources. (Default is disabled.)
![]() Click OK.Create an MSDP Authentication Profile.
Click OK.Create an MSDP Authentication Profile.- Select .Add a Multicast MSDP Authentication Profile by Name (maximum of 63 characters). The name must start with an alphanumeric character, underscore (_), hyphen (-), or dot (.), and can contain a combination of alphanumeric characters, underscore, hyphen, or dot. No space is allowed.Enter the Secret (alphanumeric characters, !, @, #, %, and ^ are allowed).Confirm Secret.Click OK.Create an MSDP Timer Profile.
- Select .Add a Multicast MSDP Timer Profile by Name (maximum of 63 characters). The name must start with an alphanumeric character, underscore (_), hyphen (-), or dot (.) and can contain a combination of alphanumeric characters, underscore, or hyphen or dot. No space is allowed.Enter the Keep Alive Interval in seconds; range is 1 to 60; default is 60. After an MSDP transport connection is established with a peer, each side of the connection sends Keepalive messages to the other side at this interval to keep the MSDP session active. If the timer expires, the peer sends a Keepalive message and resets the timer. If no Keepalive or SA message is received for the Message Timeout interval, the MSDP session is reset.Enter the Message Timeout interval in seconds, which is the interval at which the MSDP peer will wait for Keepalive messages from other peers before declaring them down. Range is 1 to 75; default is 75.Enter the Connection Retry Interval in seconds, which is the interval that peers will wait after a peering session is reset before trying to reestablish the peering session. Range is 1 to 60; default is 30.Click OK.Commit your changes.
Strata Cloud Manager
Perform this task to create multicast routing profiles for an Advanced Routing Engine on Strata Cloud Manager.When you configure IP multicast for an Advanced Routing Engine on Strata Cloud Manager, create multicast IPv4 PIM Interface Timer profiles and multicast IPv4 IGMP Interface Query profiles.When you configure MSDP, create multicast MSDP authentication profiles and multicast MSDP Timer profiles.- Select .For Configuration Scope, select Folders and then select All Firewalls, a specific folder, or the specific firewalls you want to configure. (Don’t choose Global.)Select .Create a multicast IPv4 PIM Interface Timer profile.
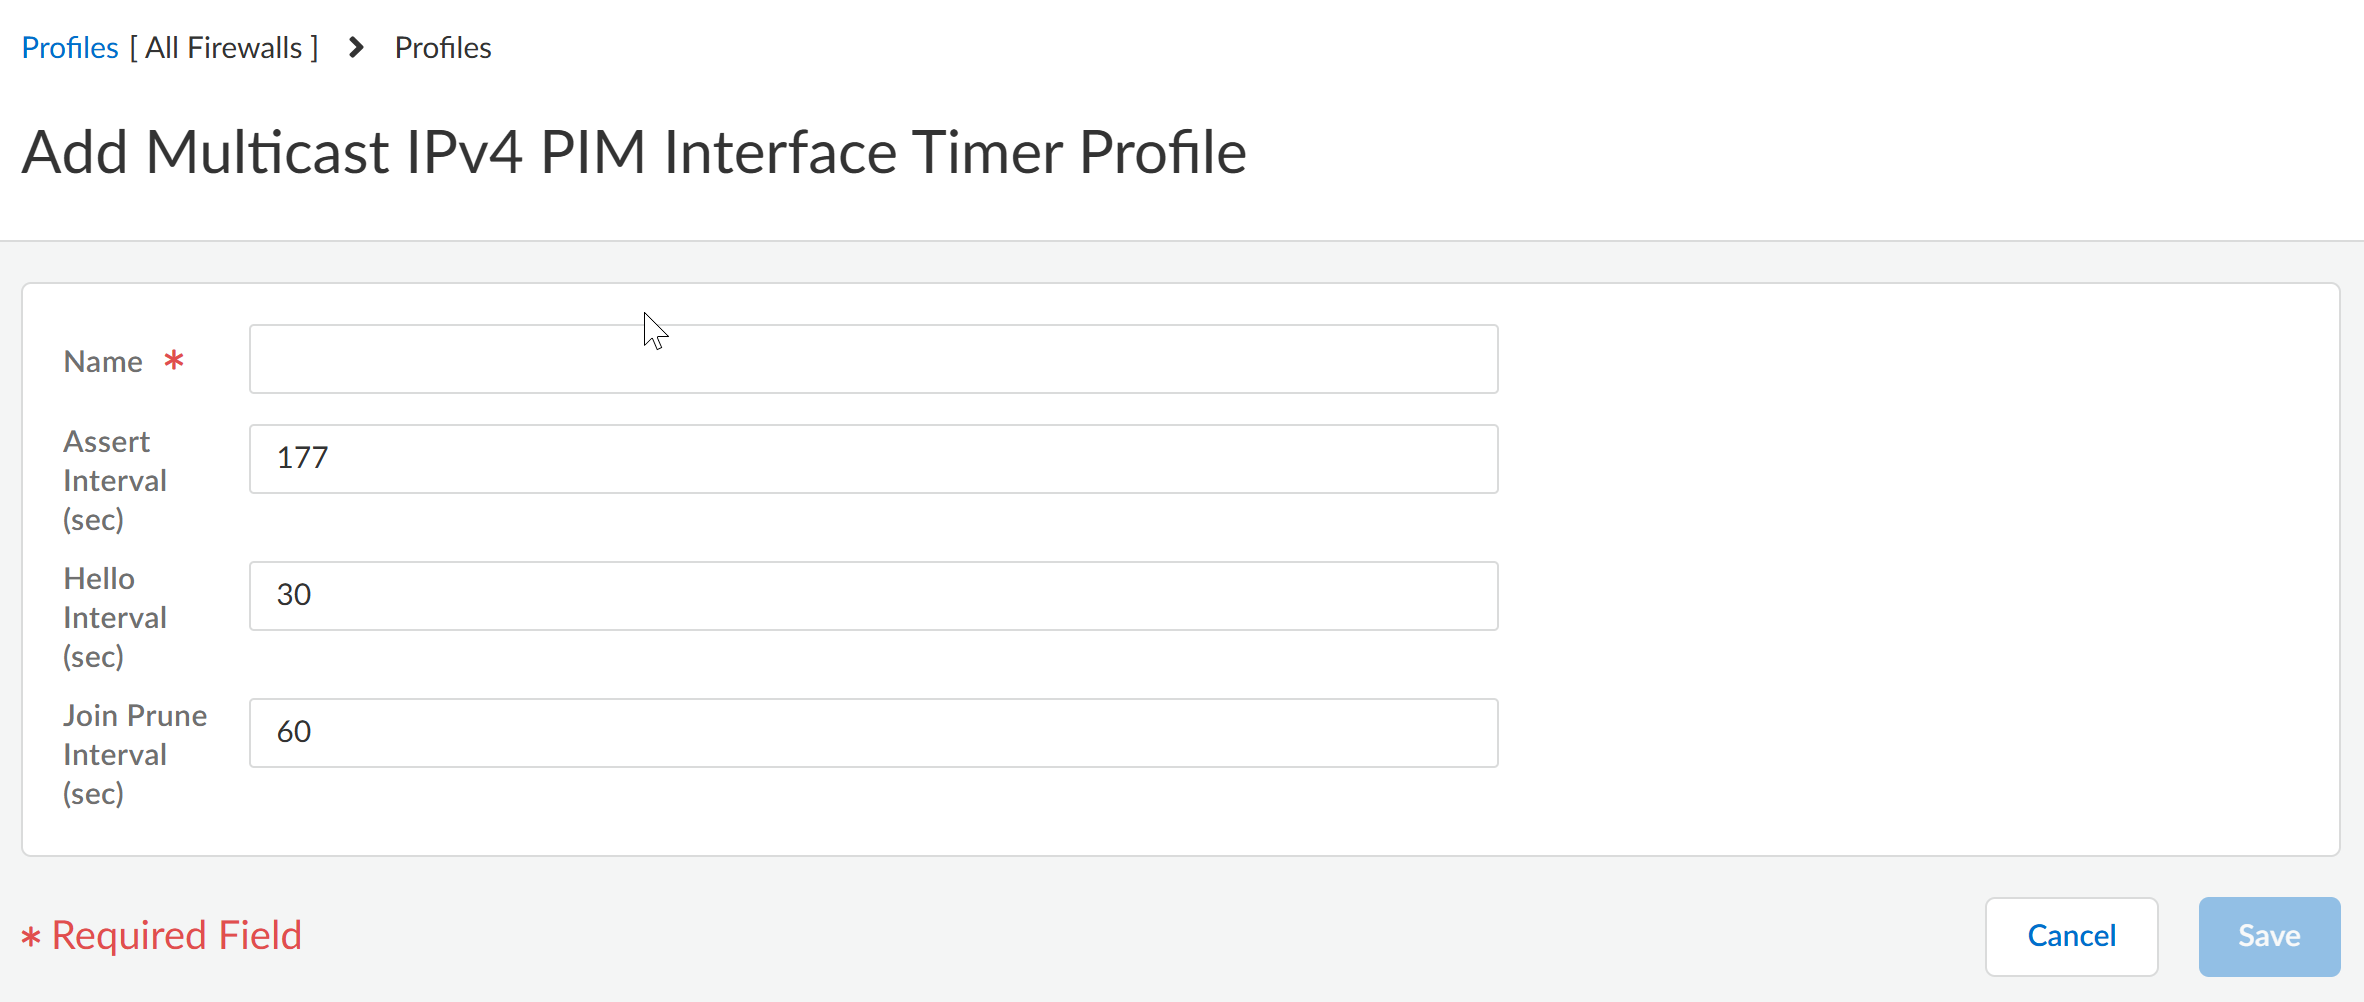
- Add Multicast IPv4 PIM Interface Timer Profile.Enter a Name for the profile (a maximum of 63 alphanumeric, dot [.], hyphen [-], or underscore [_] characters).Specify the Assert Interval (sec)—number of seconds between PIM Assert messages that the logical router sends to other PIM routers on the multiaccess network when they are electing a PIM forwarder; the range is 1 to 65,534; the default is 177.Specify the Hello Interval (sec)—number of seconds between PIM Hello messages that the logical router sends to its PIM neighbors from each interface in the interface group; the range is 1 to 180; the default is 30.Specify the Join Prune Interval (sec)—number of seconds between PIM Join messages (and between PIM Prune messages) that the logical router sends upstream toward a multicast source; the range is 60 to 600; the default is 60.
![]() Save the profile.Create a multicast IPv4 IGMP Interface Query profile.
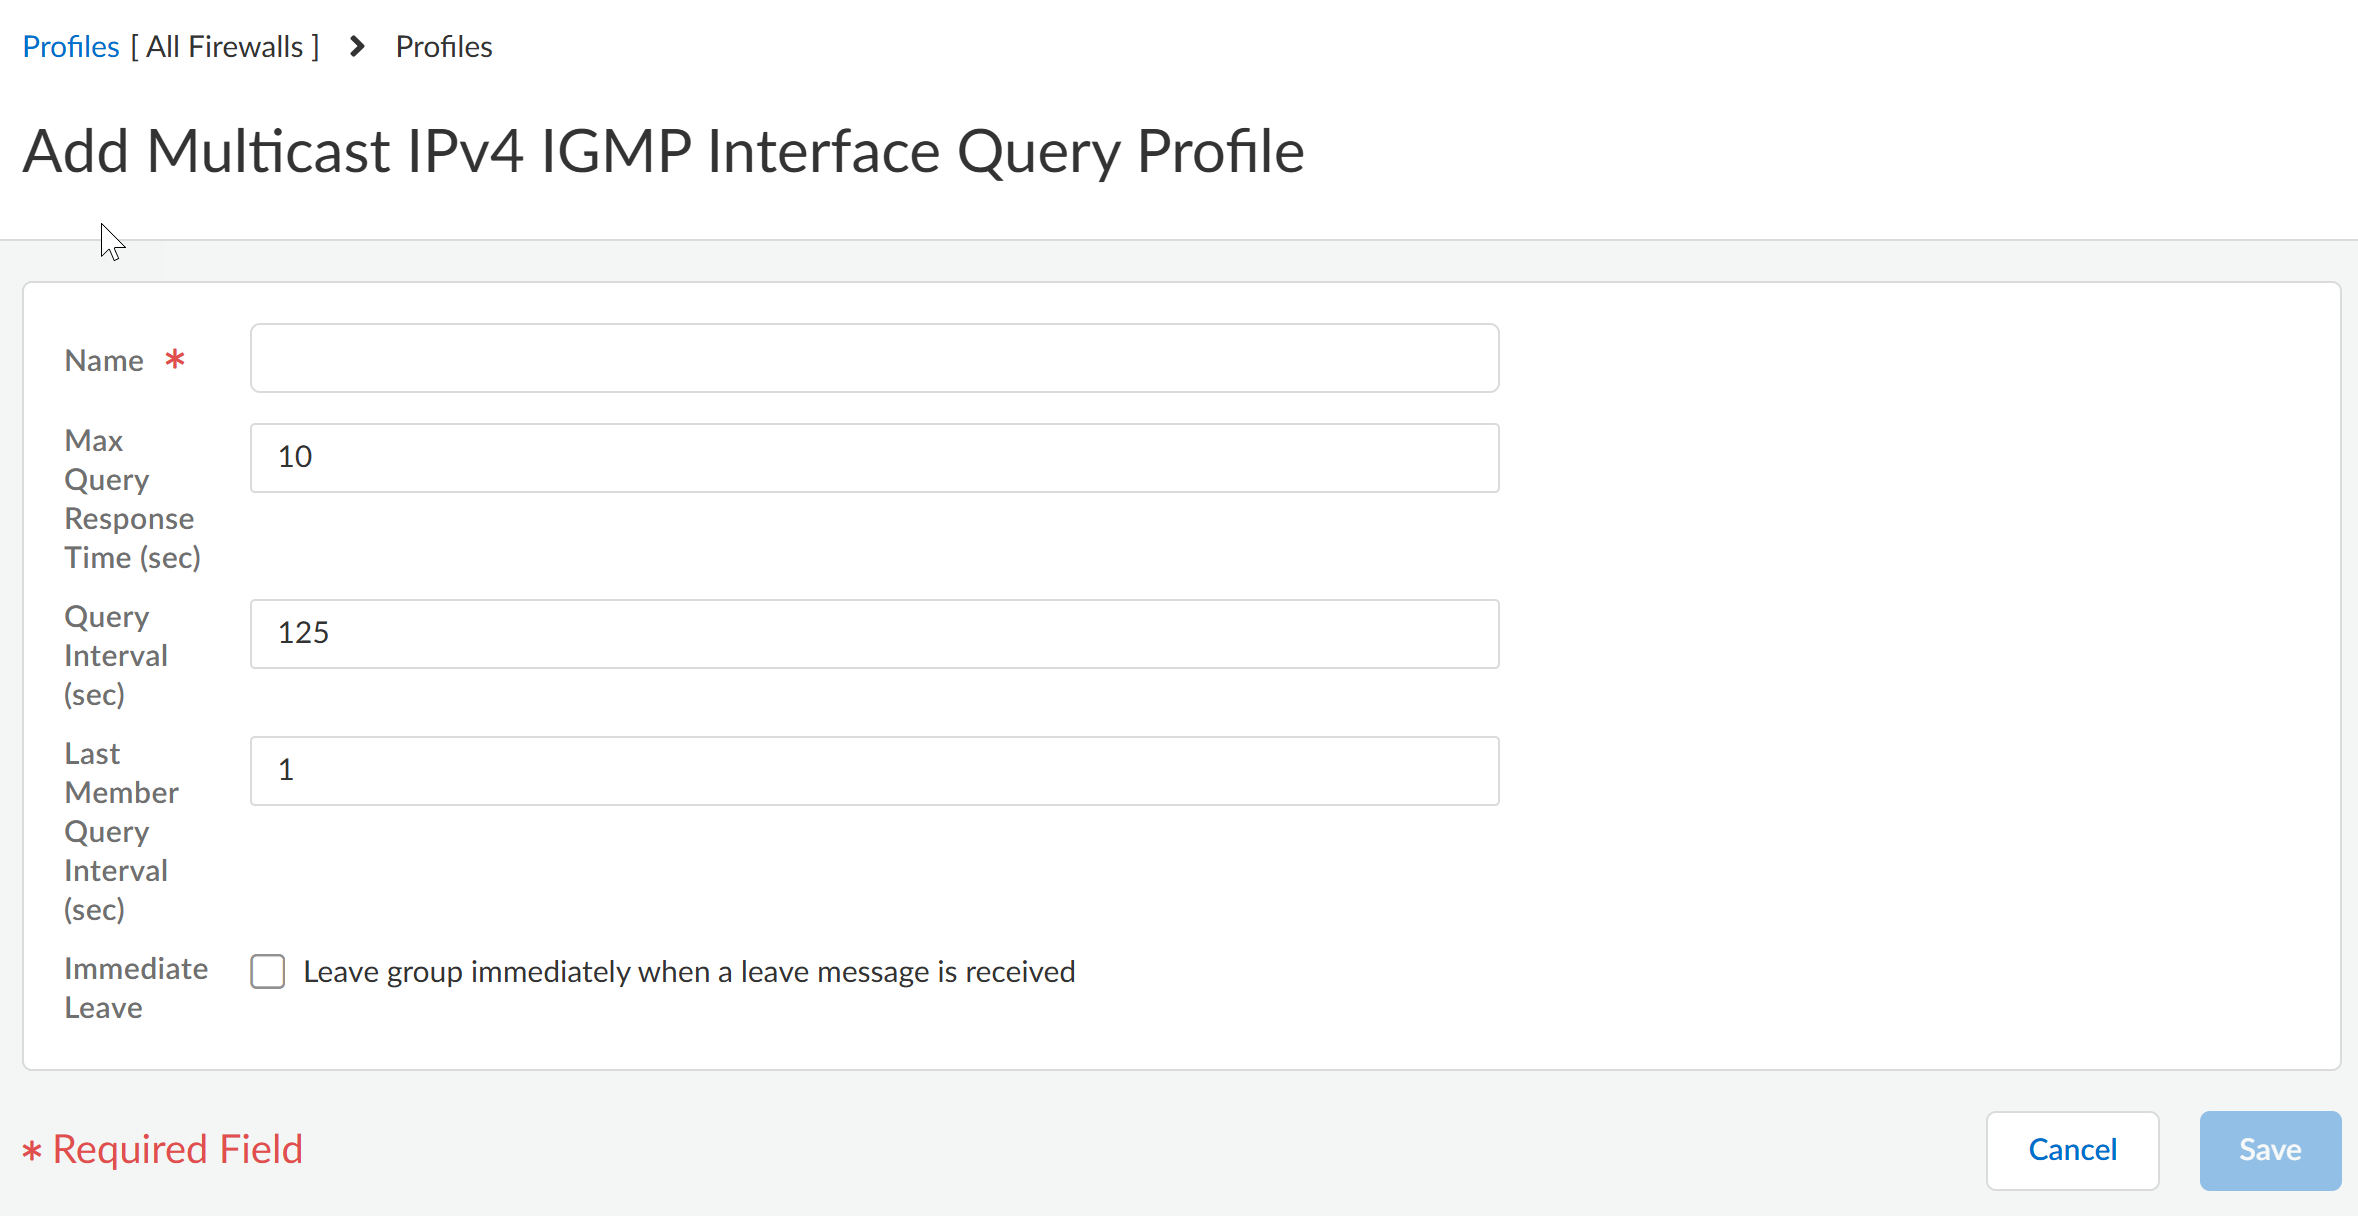
Save the profile.Create a multicast IPv4 IGMP Interface Query profile.- Add Multicast IPv4 IGMP Interface Query Profile.Enter a Name for the profile (a maximum of 63 alphanumeric, dot [.], hyphen [-], or underscore [_] characters).Specify the Max Query Response Time (sec)—maximum number of seconds allowed for a receiver to respond to an IGMP membership Query message before the logical router determines that the receiver no longer wants to receive multicast packets for the group; the range is 1 to 25; the default is 10.Specify the Query Interval (sec)—number of seconds between IGMP membership Query messages that the logical router sends to a receiver to determine whether the receiver still wants to receive the multicast packets for a group; the range is 1 to 1,800; the default is 125.Specify the Last Member Query Interval (sec)—number of seconds allowed for a receiver to respond to a Group-Specific Query that the logical router sends after a receiver sends a Leave Group message; the range is 1 to 25; the default is 1.If you enable Immediate Leave—leave group immediately when a leave message is received, when there is only one member in a multicast group and the logical router receives an IGMP Leave message for that group, this setting causes the logical router to remove that group and outgoing interface from the multicast routing information base (mRIB) and multicast forwarding information base (mFIB) immediately, rather than waiting for the Last Member Query Interval to expire. Enabling this setting saves network resources. (The default is disabled.)
![]() Save the profile.Create an MSDP Authentication profile.
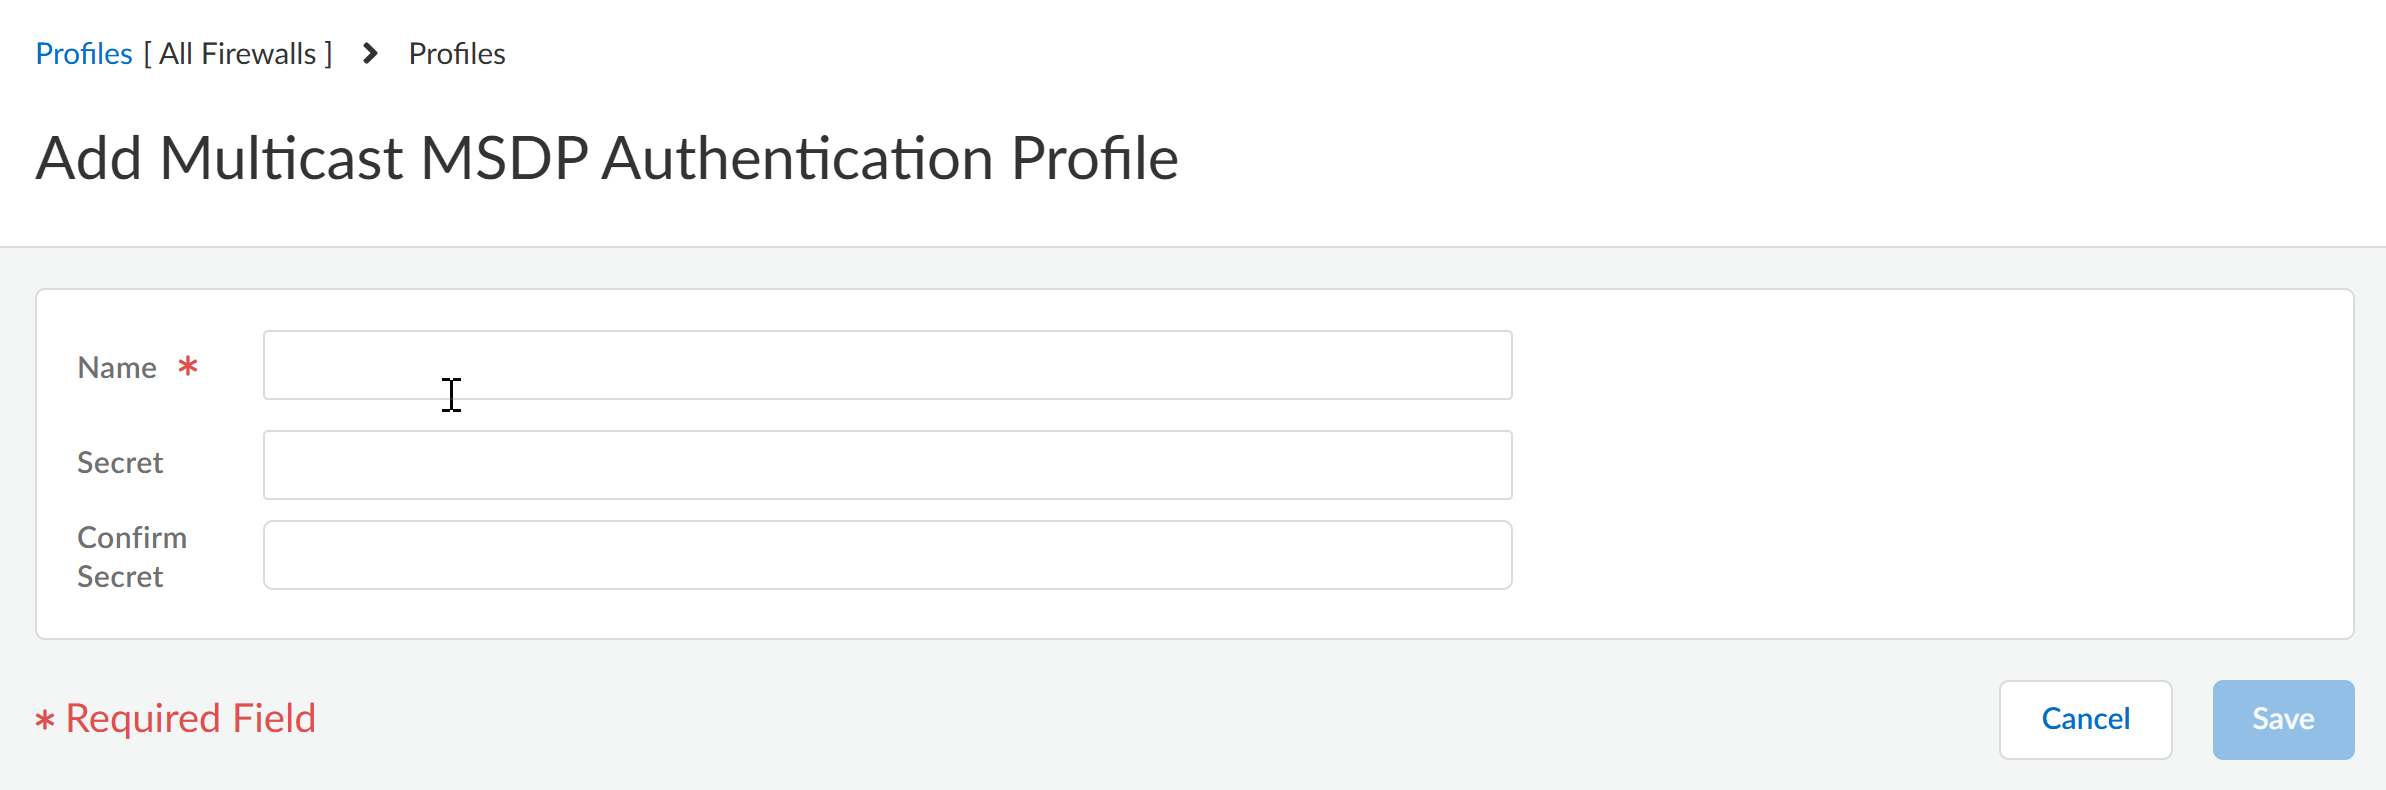
Save the profile.Create an MSDP Authentication profile.- Add Multicast MSDP Authentication Profile.Enter a Name for the profile (a maximum of 63 alphanumeric, dot [.], hyphen [-], or underscore [_] characters).Enter the Secret (alphanumeric characters, !, @, #, %, and ^ are allowed).Confirm Secret.
![]() Save the profile.Create an MSDP Timer profile.
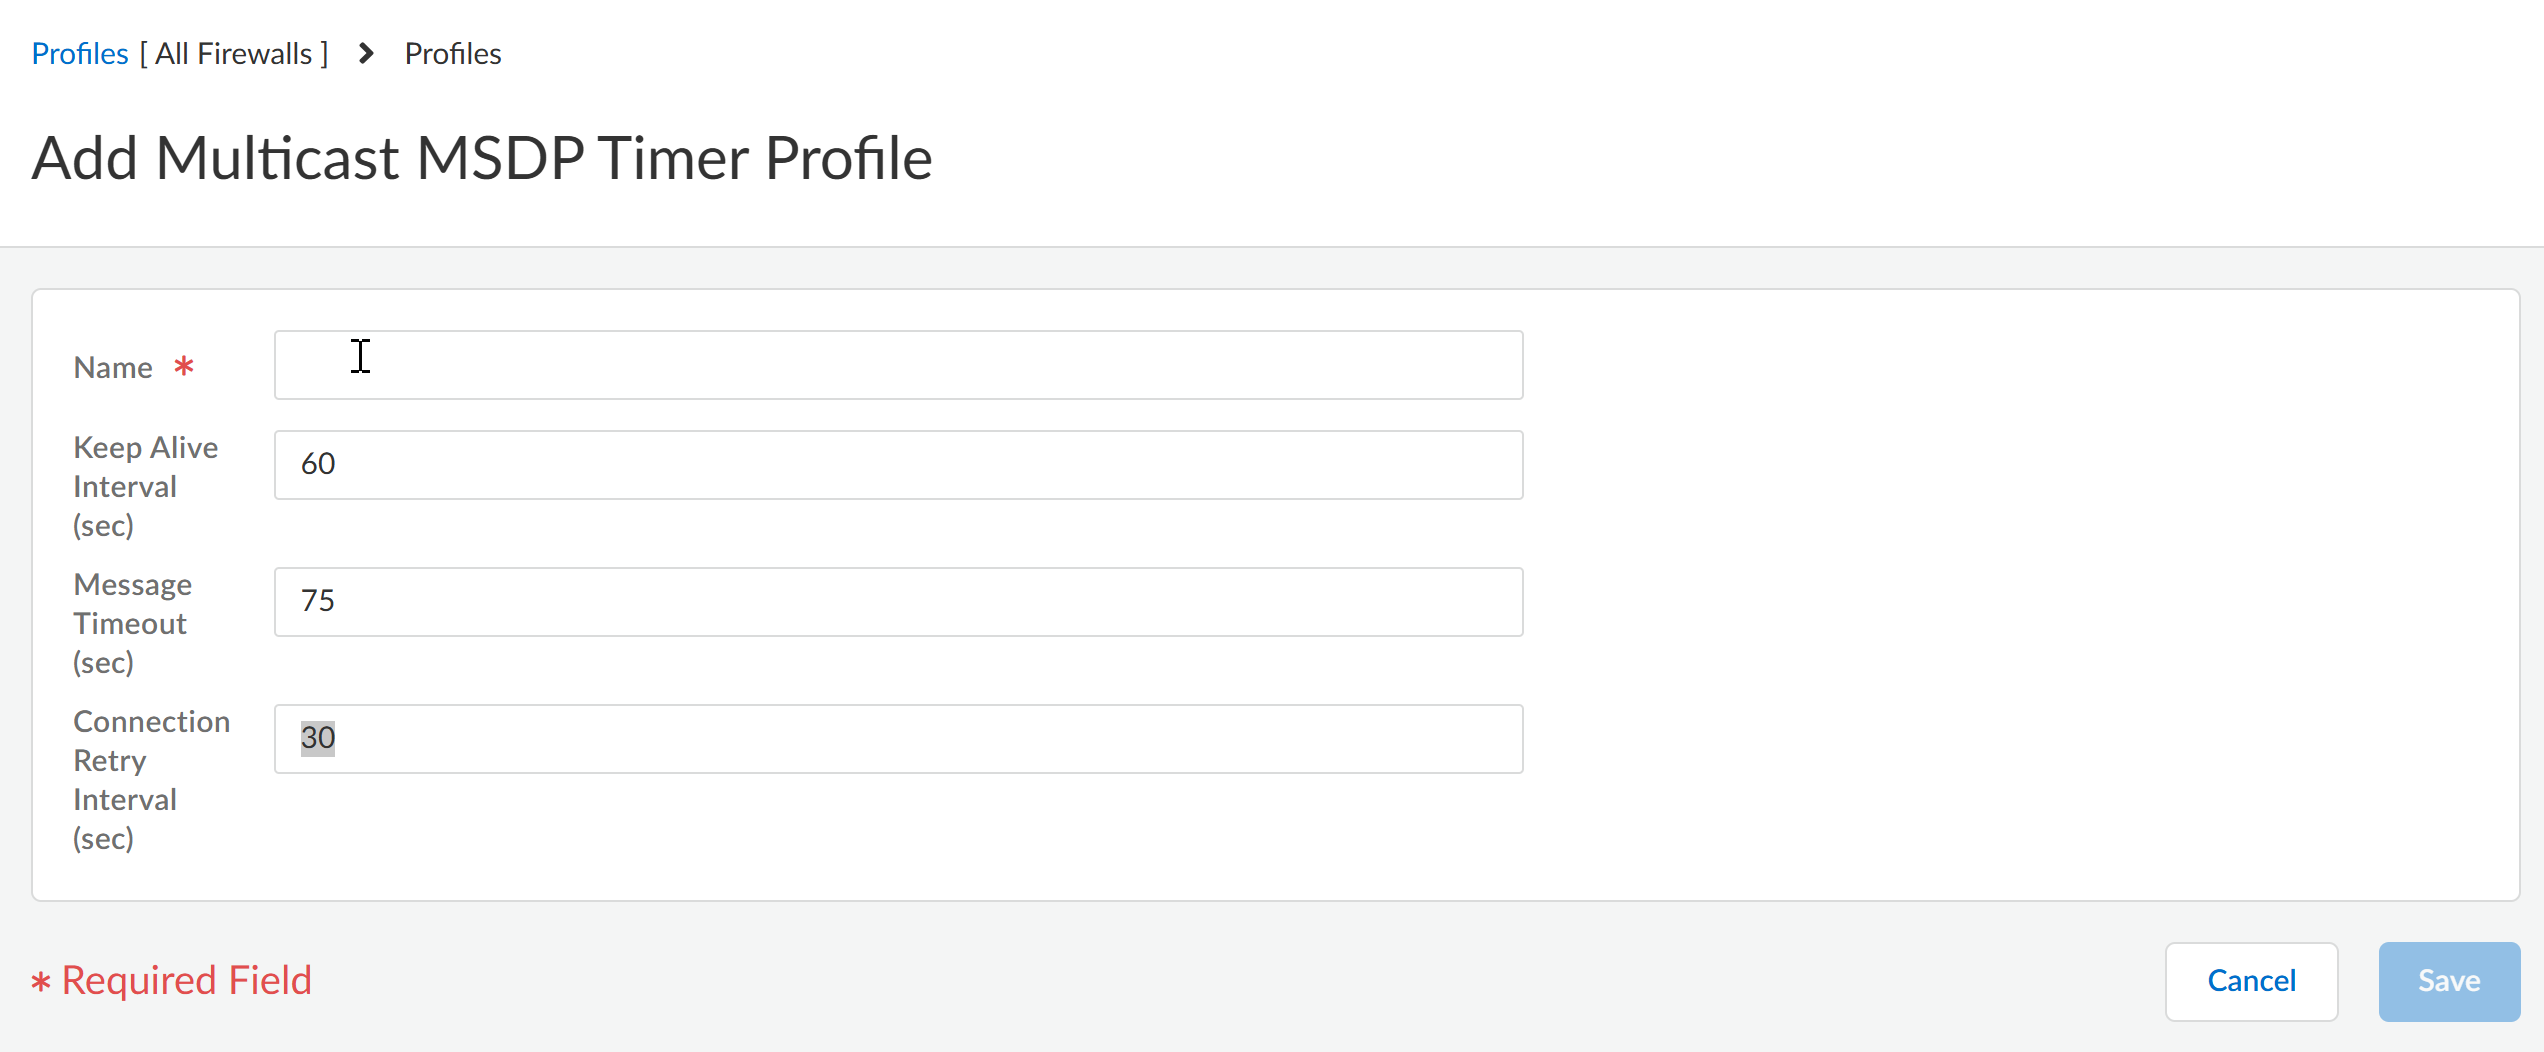
Save the profile.Create an MSDP Timer profile.- Add Multicast MSDP Timer Profile.Enter a Name for the profile (a maximum of 63 alphanumeric, dot [.], hyphen [-], or underscore [_] characters).Enter the Keep Alive Interval in seconds; the range is 1 to 60; the default is 60. After an MSDP transport connection is established with a peer, each side of the connection sends Keepalive messages to the other side at this interval to keep the MSDP session active. If the timer expires, the peer sends a Keepalive message and resets the timer. If no Keepalive or SA message is received for the Message Timeout interval, the MSDP session is reset.Enter the Message Timeout interval in seconds, which is the interval at which the MSDP peer will wait for Keepalive messages from other peers before declaring them down. The range is 1 to 75; the default is 75.Enter the Connection Retry Interval in seconds, which is the interval that peers will wait after a peering session is reset before trying to reestablish the peering session. The range is 1 to 60; the default is 30.
![]() Save the profile.Push Config and Push the configuration. Select the Admin Scope and enter a Description for the configuration. Select Push again.
Save the profile.Push Config and Push the configuration. Select the Admin Scope and enter a Description for the configuration. Select Push again.