Create a Security Policy Rule
Table of Contents
Create a Security Policy Rule
Before you create a Security policy rule,
make sure you understand that the set of IPv4 addresses is treated
as a subset of the set of IPv6 addresses, as described in detail
in Policy.
- (Optional) Delete the default Security policy rule.By default, the firewall includes a security rule named rule1 that allows all traffic from Trust zone to Untrust zone. You can either delete the rule or modify the rule to reflect your zone naming conventions.Add a rule.
- Select and Add a new rule.In the General tab, enter a descriptive Name for the rule.Select a Rule Type.Define the matching criteria for the source fields in the packet.
- In the Source tab, select a Source Zone.Specify a Source IP Address or leave the value set to any.If you decide to Negate a region as a Source Address, ensure that all regions that contain private IP addresses are added to the Source Address to avoid connectivity loss between those private IP addresses.Specify a Source User or leave the value set to any.Define the matching criteria for the destination fields in the packet.
- In the Destination tab, set the Destination Zone.Specify a Destination IP Address or leave the value set to any.If you decide to Negate a region as the Destination Address, ensure that all regions that contain private IP addresses are added to the Destination Address to avoid connectivity loss between those private IP addresses.As a best practice, use address objects as the Destination Address to enable access to only specific servers or specific groups of servers especially for commonly exploited services, such as DNS and SMTP. By restricting users to specific destination server addresses, you can prevent data exfiltration and command-and-control traffic from establishing communication through techniques such as DNS tunneling.Specify the application that the rule will allow or block.As a best practice, always use application-based security policy rules instead of port-based rules and always set the Service to application-default unless you are using a more restrictive list of ports than the standard ports for an application.
- In the Applications tab, Add the Application you want to safely enable. You can select multiple applications or you can use application groups or application filters.In the Service/URL Category tab, keep the Service set to application-default to ensure that any applications that the rule allows are allowed only on their standard ports.(Optional) Specify a URL category as match criteria for the rule.In the Service/URL Category tab, select the URL Category.If you select a URL category, only web traffic will match the rule and only if the traffic is destined for that specified category.Define what action you want the firewall to take for traffic that matches the rule.Configure the log settings.
- By default, the rule is set to Log at Session End. You can disable this
setting if you don’t want any logs generated when traffic matches this
rule or you can select Log at Session Start for
more detailed logging.Log At Session Start consumes more resources than logging only at the session end. In most cases, you only Log At Session End. Enable both Log At Session Start and Log At Session End only for troubleshooting, for long-lived tunnel sessions such as GRE tunnels (you can't see these sessions in the ACC unless you log at the start of the session), and to gain visibility into Operational Technology/Industrial Control Systems (OT/ICS) sessions, which are also long-lived sessions.
- Select a Log Forwarding profile.
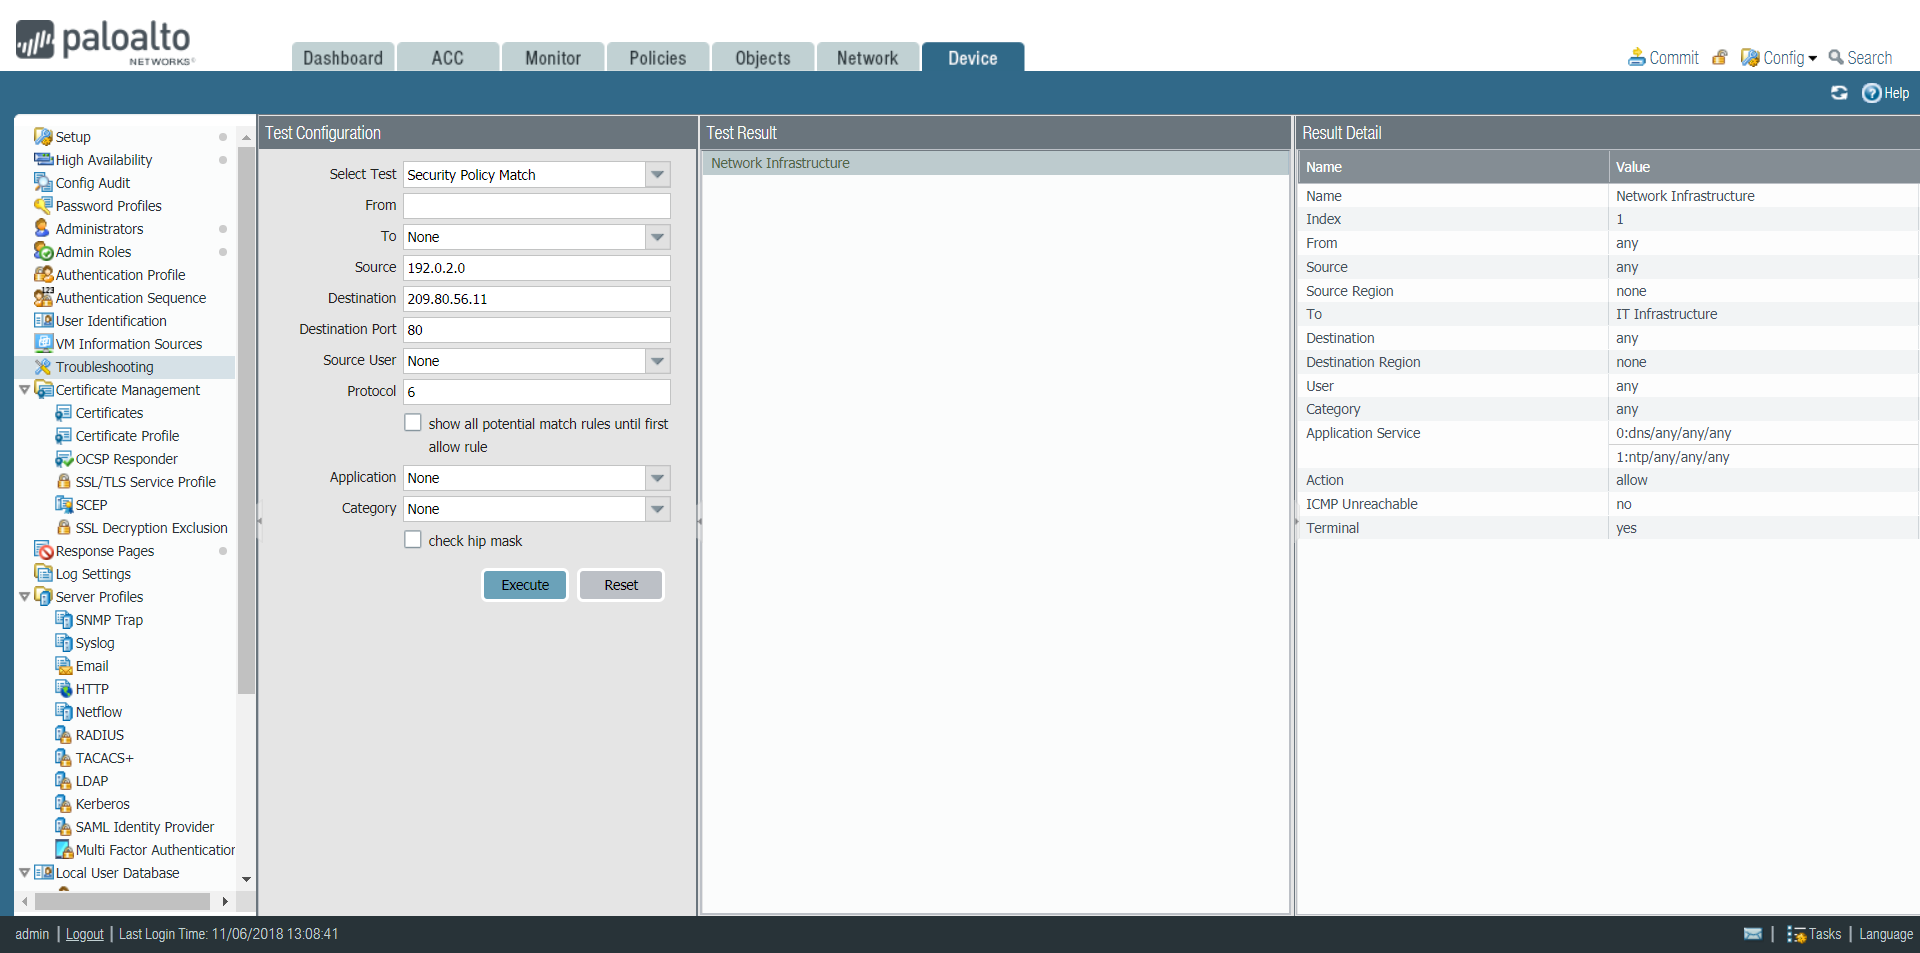
As a best practice, do not select the check box to Disable Server Response Inspection (DSRI). Selecting this option prevents the firewall from inspecting packets from the server to the client. For the best security posture, the firewall must inspect both the client-to-server flows and the server-to-client flows to detect and prevent threats.Attach security profiles to enable the firewall to scan all allowed traffic for threats.Make sure you create best practice security profiles that help protect your network from both known and unknown threats.In the Actions tab, select Profiles from the Profile Type drop-down and then select the individual security profiles to attach to the rule.Alternatively, select Group from the Profile Type drop-down and select a security Group Profile to attach.Click Commit to save the policy rule to the running configuration on the firewall.To verify that you have set up your basic security policies effectively, test whether your security policy rules are being evaluated and determine which security policy rule applies to a traffic flow.The output displays the best rule that matches the source and destination IP address specified in the CLI command.For example, to verify the policy rule that will be applied for a server in the data center with the IP address 208.90.56.11 when it accesses the Microsoft update server:- Select , and select Security Policy Match from the Select Test drop-down.Enter the Source and Destination IP addresses.Enter the Protocol.Execute the security policy match test.
![]() After waiting long enough to allow traffic to pass through the firewall, View Policy Rule Usage to monitor the policy rule usage status and determine the effectiveness of the policy rule.
After waiting long enough to allow traffic to pass through the firewall, View Policy Rule Usage to monitor the policy rule usage status and determine the effectiveness of the policy rule.