Prisma Access
Onboard a Remote Network (Strata Cloud Manager)
Table of Contents
Expand All
|
Collapse All
Prisma Access Docs
-
- 6.1 Preferred and Innovation
- 6.0 Preferred and Innovation
- 5.2 Preferred and Innovation
- 5.1 Preferred and Innovation
- 5.0 Preferred and Innovation
- 4.2 Preferred
- 4.1 Preferred
- 4.0 Preferred
- 3.2 Preferred and Innovation
- 3.1 Preferred and Innovation
- 3.0 Preferred and Innovation
- 2.2 Preferred
-
-
- 4.0 & Later
- Prisma Access China
-
-
Onboard a Remote Network (Strata Cloud Manager)
To onboard a remote network site to Prisma Access, specify the location and
define the amount of bandwidth to allocate to the connection.
Here’s how to add a new remote network site to Prisma Access. You’ll start by
specifying the location and defining the amount of bandwidth to allocate to the
connection.
- Launch Prisma Access (Managed by Strata Cloud Manager).Make sure that you have allocated bandwidth to the location where you’ll deploy the remote network. See Planning Checklist for Remote Networks.Go to ConfigurationNGFW and Prisma AccessConfiguration ScopePrisma AccessRemote NetworksAdd Remote Networks.
![]() Select the Transport Type: IPsec or PA Connect.For PA Connect transport type, perform the following:
Select the Transport Type: IPsec or PA Connect.For PA Connect transport type, perform the following:- Give the remote network a descriptive Site Name.Select the Region in which the site is located, and the closest Prisma Access Location.SP Connection/Interconnect and Bandwidth are auto populated and non-editable.Configure Routing as Static RoutesFor static routes to route traffic to and from your HQ or data center, Add the IP subnets or IP addresses that you want to secure at the branch.If you make any changes to the IP subnets on your HQ or data center network, you must manually update the static routes.Enable or disable IPv6.For IPsec transport type, perform the following:
- Give the remote network a descriptive Site Name.Select the Region in which the site is located, and the closest Prisma Access Location.(Only if you’re planning to use BGP for dynamic routing) Enable ECMP Load Balancing so that the remote network site can use up to four IPSec tunnels.BGP is required for ECMP load balancing; QoS and static routes are not supported.When you enable ECMP, Remote Network traffic is load balanced over the tunnels you configure.Configure Advanced Settings.
- (Optional) Use
Static Entries to resolve FQDNs to
specific IP addresses.This functionality can be useful if you have guest internet services at your organization and you want your guests to safely use search engines, preventing them from searching for potentially inappropriate or offensive material that could be against company policy. To do so, enter a unique Name for the static entry rule, an FQDN, and the IP Address where the FQDN request should be directed.
![]()
- If you want Prisma Access to proxy DNS requests, configure values for UDP Queries Retries (the Interval (Sec) to retry the query in seconds and the number of retry Attempts to perform.
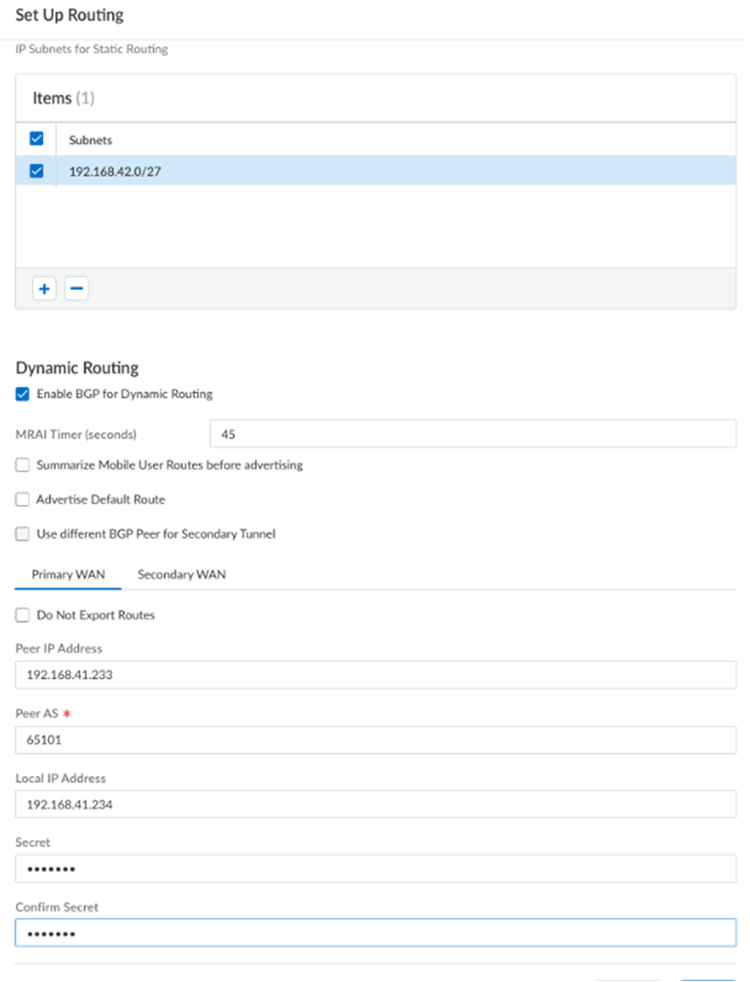
Connect a Remote Network Site to Prisma Access, where you’ll create an IPSec VPN tunnel to connect the remote network site to Prisma Access.Configure static routing.For static routes to route traffic to and from your HQ or data center, Add the IP subnets or IP addresses that you want to secure at the branch.If you make any changes to the IP subnets on your HQ or data center network, you must manually update the static routes.Configure dynamic routing.- For dynamic routing to advertise HQ or data center subnets, Enable BGP for Dynamic Routing.
- (Optional) Select an MRAI Timer value.BGP routing offers a timer you can use to tailor BGP routing convergence in your network called the Minimum Route Advertisement Interval (MRAI). MRAI acts to rate-limit updates on a per-destination basis, and the BGP routers wait for at least the configured MRAI time before sending an advertisement for the same prefix. A smaller number gives you faster convergence time but creates more advertisements in your network. A larger number decreases the number of advertisements that can be sent, but can also make routing convergence slower. You decide the number to put in your network for the best balance between faster routing convergence and fewer advertisements.Configure an MRAI range of between 1 and 600 seconds, with a default value of 30 seconds.
- To reduce the number of mobile user IP subnet advertisements over BGP to your customer premises equipment (CPE), specify Prisma Access to summarize the subnets before it advertises them by selecting Summarize Mobile User Routes before advertising.By default, Prisma Access advertises the mobile users IP address pools in blocks of /24 subnets; if you summarize them, Prisma Access advertises the pool based on the subnet you specified. For example, Prisma Access advertises a public user mobile IP pool of 10.8.0.0/20 using the /20 subnet, rather than dividing the pool into subnets of 10.8.1.0/24, 10.8.2.0/24, 10.8.3.0/24, and so on, before advertising them. Summarizing these advertisements can reduce the number of routes stored in CPE routing tables. For example, you can use IP pool summarization with cloud VPN gateways (Virtual Private Gateways (VGWs) or Transit Gateways (TGWs)) that can accept a limited number of routes.
- (Optional) to have Prisma Access originate a default route advertisement for the remote network using eBGP, select Advertise Default Route. Be sure that your network does not have another default route being advertised by BGP, or you could introduce routing issues in your network.
- (Optional) If you configured a secondary WAN and you need to change the peer address for the secondary (backup) BGP peer, select Use different BGP Peer for Secondary Tunnel and enter a unique Peer and, optionally, Local IP address for the secondary WAN.
- (Optional) Select Do Not Export Routes to prevent Prisma Access from forwarding routes into the HQ or data center.By default, Prisma Access advertises all BGP routing information, including local routes and all prefixes it receives from other service connections, remote networks, and mobile user subnets. Select this check box to prevent Prisma Access from sending any BGP advertisements, but still use the BGP information it receives to learn routes from other BGP neighbors.Because Prisma Access does not send BGP advertisements, if you select this option you must configure static routes on your on-premises equipment to establish routes back to Prisma Access.
- Enter the Peer IP Address assigned as the Router ID of the eBGP router on the HQ or data center network.
- Enter the Peer AS, the autonomous system (AS) for your network.Use and RFC 6996-compliant BGP Private AS number.
- Enter the Local IP Address that Prisma Access uses as its Local IP address for BGP.A local address is only required if your HQ or data center device requires it for BGP peering to be successful. Make sure the address you specify does not conflict or overlap with IP addresses in the infrastructure subnet or subnets in the remote network.A maximum of 250 local IP addresses is supported per remote network. As a result, note the following maximums for remote networks when using BGP local addresses:
- 250 remote networks (primary tunnel only) with a local BGP IP address configured250 remote networks (primary and secondary tunnel) with a local BGP IP address configured125 remote networks using ECMP with 2 links with a local BGP IP address configured83 remote networks using ECMP with 3 links with a local BGP IP address configured62 remote networks using ECMP with 4 links with a local BGP IP address configured
- Enter a Secret password to authenticate BGP peer communications.
- Select Confirm Secret.
![]()
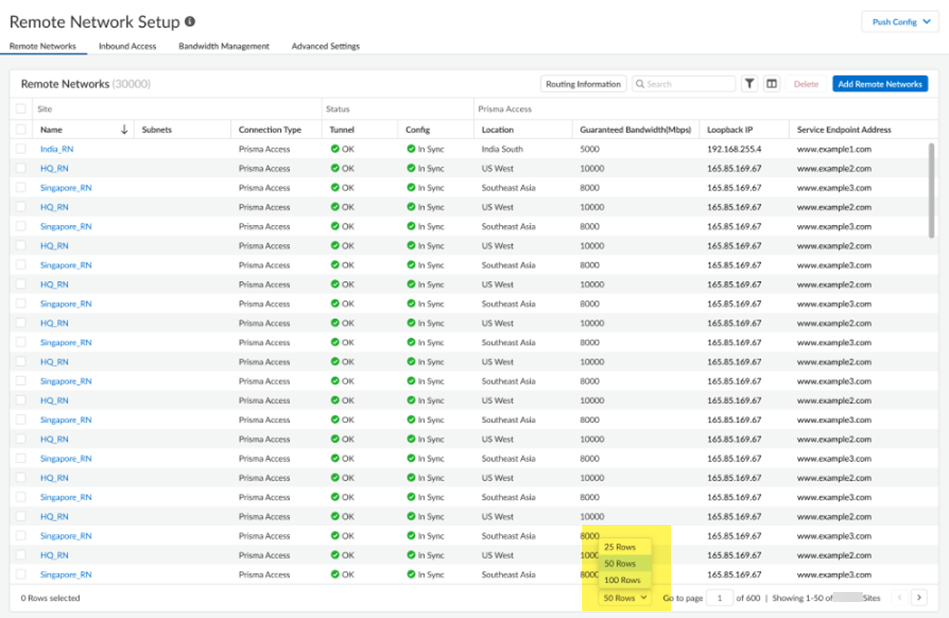
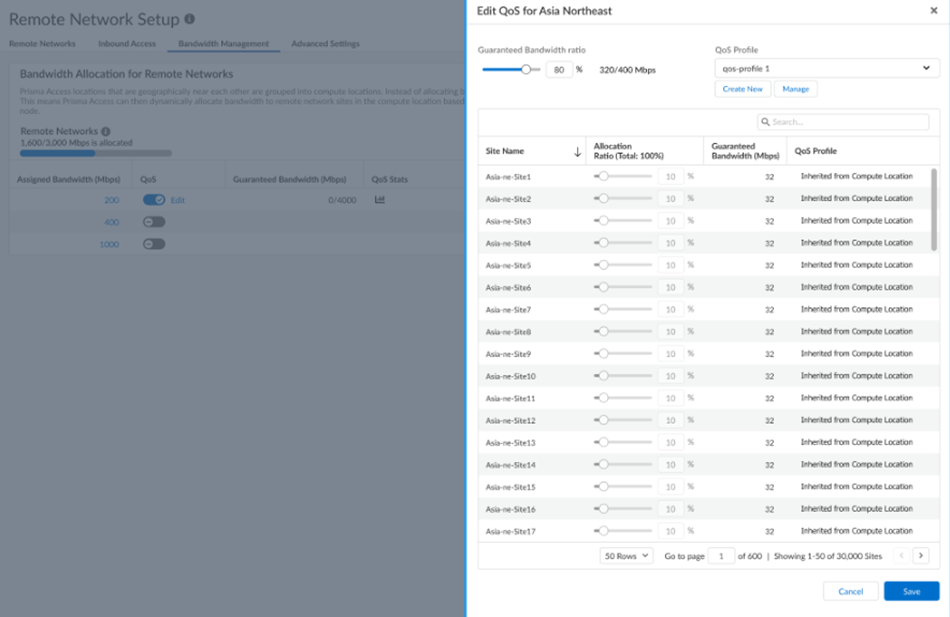
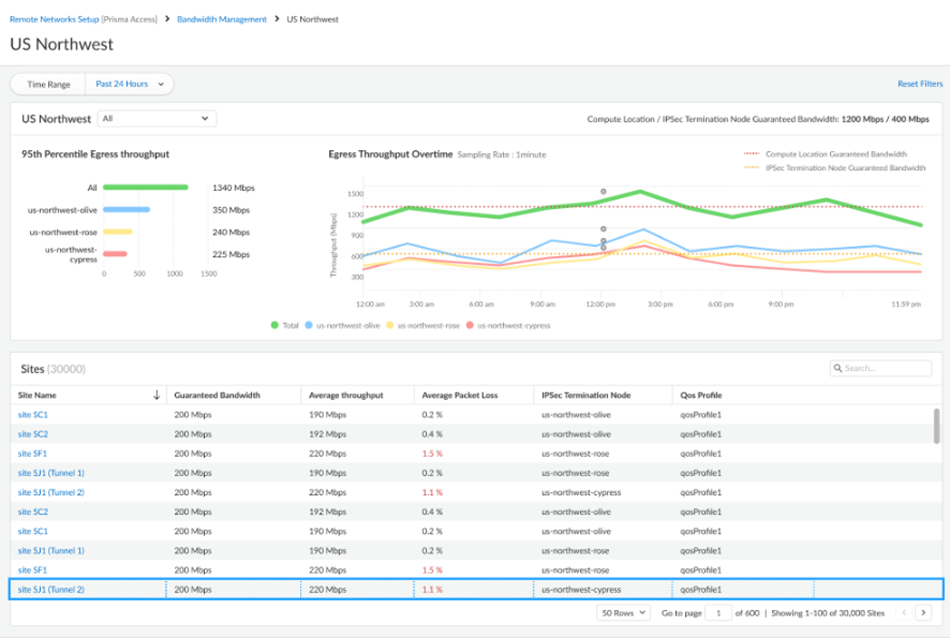
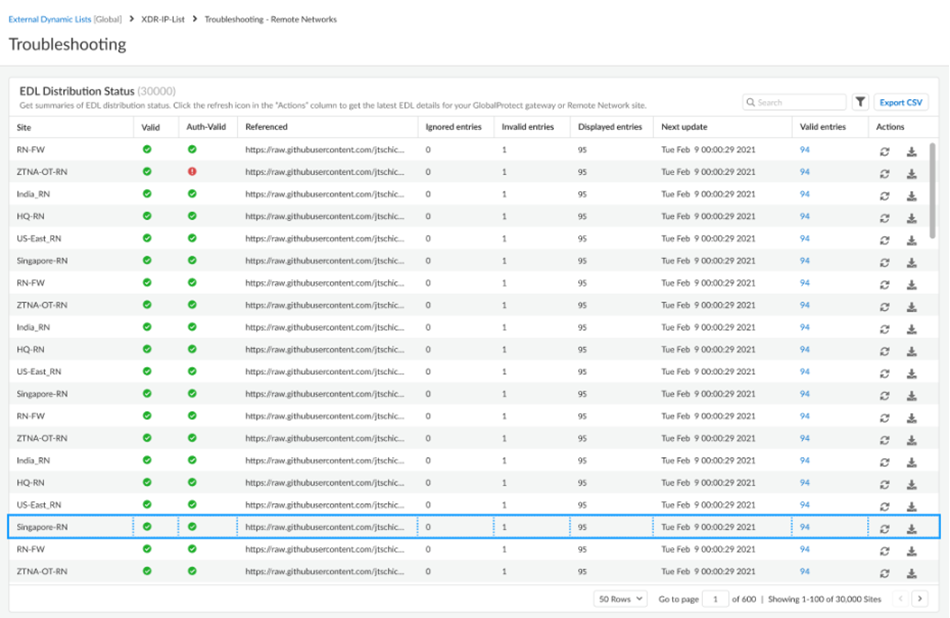
Starting with Prisma Access 5.2, you can onboard a maximum of 25,000 remote networks and 50,000 IKE gateways per tenant in a Prisma Access deployment. To accommodate this enhancement, the following changes have been made to the Strata Cloud Manager web interface:- Pagination is added so that you can choose how many rows to display in a
given page.
![]()
- Filtering is enabled for remote networks.After you apply filtering, you can sort the resulting output by name.
![]()
- A new Group By field is added. If you select a
group by Compute Location, all groups display but
are collapsed, and the page size you selected applies to the groups. If
you select a compute location to expand it, the rows display based on
the page size you selected.
![]()
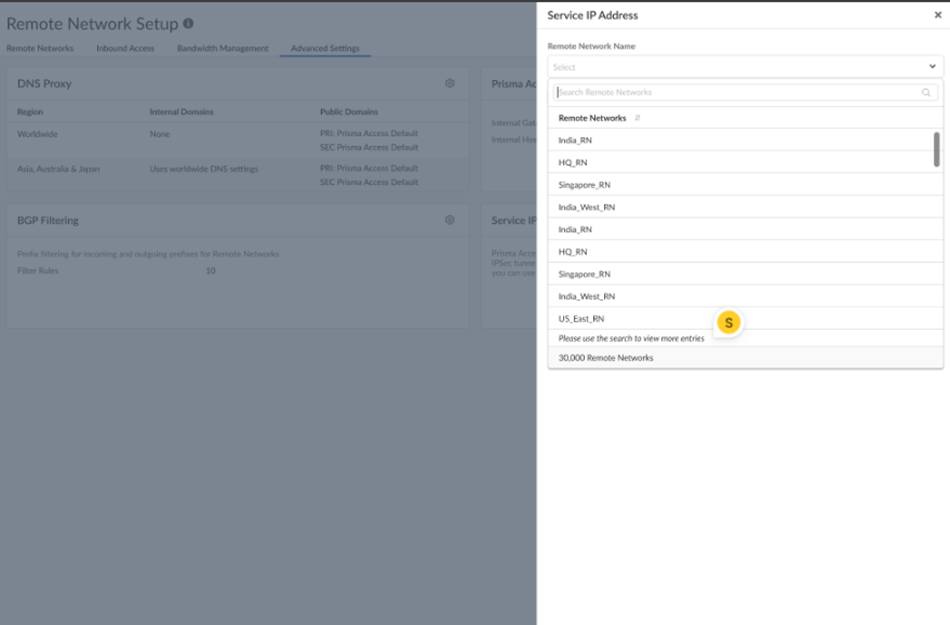
- When remote networks are displayed in a drop-down, the web interface displays the first 500 items. You can find the desired Remote Network in the list by typing in the text box.In addition, the total number of remote networks displays.
![]()
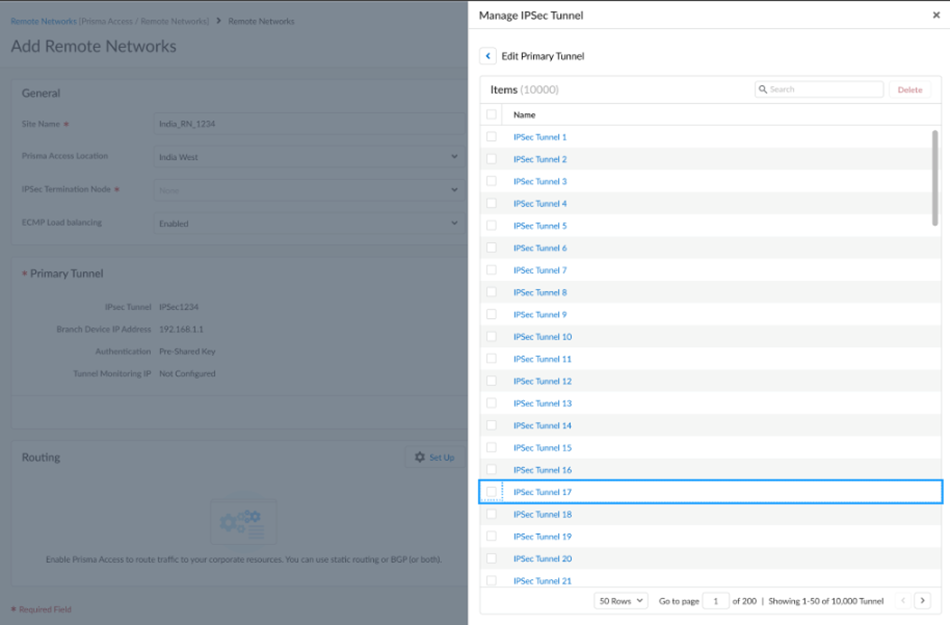
- The following additional pages have pagination applied:
- IPSec Tunnels:
![]()
- QoS:
![]()
- QoS Statistics:
![]()
- Troubleshooting—Remote Networks under
External Dynamic Lists:
![]()
- IPSec Tunnels:


