Prisma Access
Cloud Identity Engine
Table of Contents
Expand All
|
Collapse All
Prisma Access Docs
-
- 6.1 Preferred and Innovation
- 6.0 Preferred and Innovation
- 5.2 Preferred and Innovation
- 5.1 Preferred and Innovation
- 5.0 Preferred and Innovation
- 4.2 Preferred
- 4.1 Preferred
- 4.0 Preferred
- 3.2 Preferred and Innovation
- 3.1 Preferred and Innovation
- 3.0 Preferred and Innovation
- 2.2 Preferred
-
-
- 4.0 & Later
- Prisma Access China
-
-
Cloud Identity Engine
In addition to using the Cloud Identity Engine to retrieve user and group information, you can
use the Cloud Identity Engine to populate user group names in security policy rules.
This integration eliminates the need to configure an on-premises or VM-series
next-generation firewall as a Master Device for this purpose; however,
Master Devices are still supported.
You
can also use Cloud Identity Engine to populate group names in Panorama
Managed multi-tenant deployments,
which is not possible when using a Master Device.
To enable
the Cloud Identity Engine to populate group names in security policy
rules, complete the following steps.
- In the Cloud Identity Engine, activate the Cloud Identity Engine and add an on-premises or cloud-based directory, if you have not already done so.Configure the Cloud Identity Engine as a mapping source.
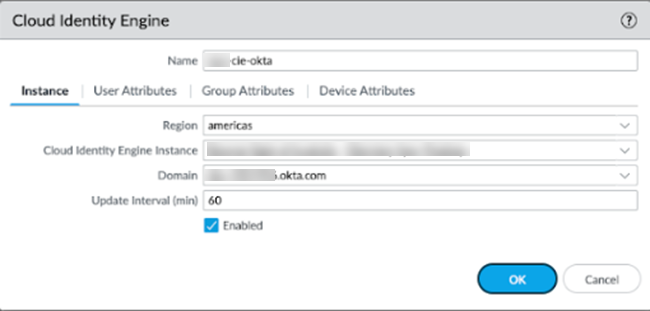
- From the Panorama that manages Prisma Access, select PanoramaUser IdentificationCloud Identity Engine and Add a profile.For the Instance, specify the following parameters:
- Region—Select the regional endpoint for your tenant.The region you select must match the region you select when you activated your Cloud Identity Engine tenant.
- Cloud Identity Engine Instance—Select the Cloud Identity Engine instance to associate with the profile.
- Domain—Select the domain that contains the directories you want to use.
- Update Interval (min)—Enter the number of minutes that you want Panorama to wait between updates from the Cloud Identity Engine app to Panorama (also known as a refresh interval). The default is 60 minutes and the range is 5—1440.
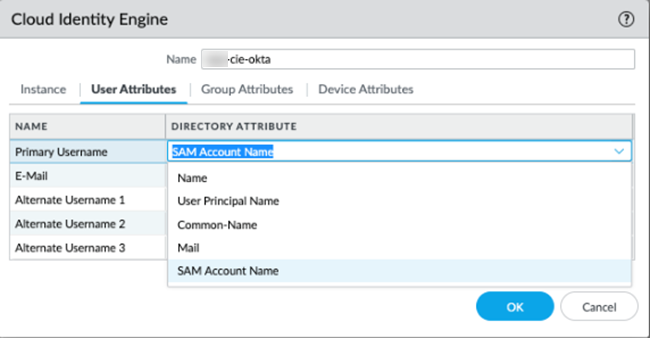
Verify that the profile is Enabled.![]() For the User Attributes, select the format for the Primary Username. You can optionally select the formats for the E-Mail and an Alternate Username. You can configure up to three alternate username formats if your users log in using multiple username formats.When you view users in security policy rules, the username displays in the primary username format you select here.
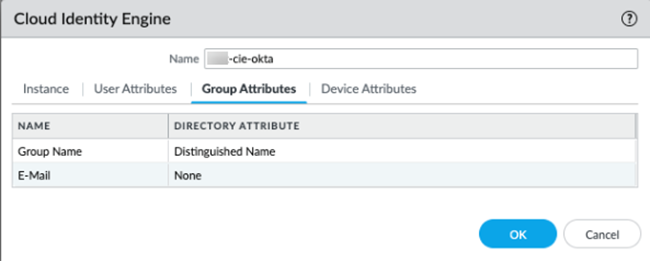
For the User Attributes, select the format for the Primary Username. You can optionally select the formats for the E-Mail and an Alternate Username. You can configure up to three alternate username formats if your users log in using multiple username formats.When you view users in security policy rules, the username displays in the primary username format you select here.![]() For the Group Attributes, select the format for the Group Name.
For the Group Attributes, select the format for the Group Name.![]() Leave the Device Attributes as None.
Leave the Device Attributes as None.![]() Click OK then Commit and Push your changes.Attach your profile to your Prisma Access configuration.
Click OK then Commit and Push your changes.Attach your profile to your Prisma Access configuration.- Go to the Settings for the deployment you are adding.
- For a Mobile Users—GlobalProtect deployment, select PanoramaCloud ServicesConfigurationMobile Users—GlobalProtect and click the gear to edit the Settings.
- For a Mobile Users—Explicit Proxy deployment, select PanoramaCloud ServicesConfigurationMobile Users—Explicit Proxy and click the gear to edit the Settings.
- For a Mobile Users—Remote Networks deployment, select PanoramaCloud ServicesConfigurationMobile Users—Remote Networks and click the gear to edit the Settings.
Select Cloud Identity Engine.Select the Cloud Identity Engine profile you created.![]() Select CommitCommit to Panorama and Commit your changes.Verify that Prisma Access has the mapping information from the Cloud Identity Engine.
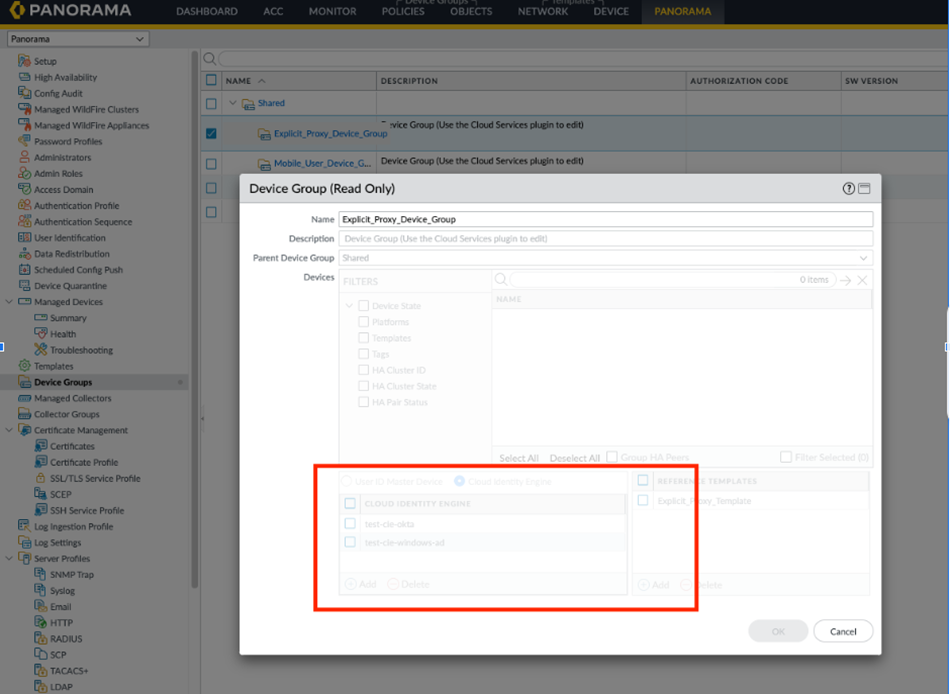
Select CommitCommit to Panorama and Commit your changes.Verify that Prisma Access has the mapping information from the Cloud Identity Engine.- Select PanoramaDevice Groups<template-name>, where <template-name> is the template for the deployment you are configuring, and verify that the Cloud Identity Engine profile is attached to the device group.The following example shows that the device group is successfully attached to the Explicit_Proxy_Device_Group.
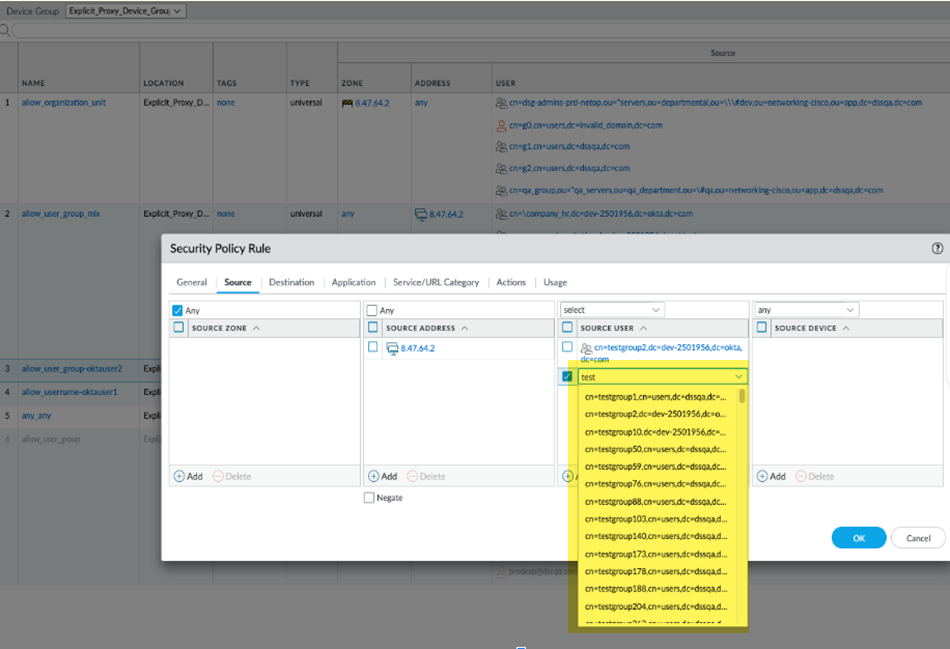
![]() Select ObjectsSecurityPre Rules, Add a security policy rule, and verify that the groups are populated in the user area.
Select ObjectsSecurityPre Rules, Add a security policy rule, and verify that the groups are populated in the user area.![]()

