Prisma SD-WAN
Configure a Loopback Interface
Table of Contents
Configure a Loopback Interface
Let us learn to configure a loopback interface.
| Where Can I Use This? | What Do I Need? |
|---|---|
|
|
Loopback is a logical, virtual interface used
to emulate a WAN port to provide LAN functionality. You can free up
a physical port previously used for LAN/WAN configuration by designating
a loopback interface. You can configure a maximum of four loopback
interfaces per device.
ION devices on versions 4.5.3 or
later at a site, support loopback interface. A loopback interface
can only be used as a WAN port on interfaces with no hardware bypass
circuitry. Interfaces with no hardware bypass circuitry per device
are as follows:
- ION 1000—All ports.
- ION 1200—All ports.
- ION 2000—Ports 1–3.
- ION 7000—Ports 1–4, 9–14.
- Virtual IONs—All non-controller ports.
A loopback
interface may be brought up or down administratively and may not
contain any sub-interfaces or IP configurations.
- You can update or delete a loopback interface. However, you cannot delete if it is part of a bypass pair.
- Decouple a port coupled with another port before a loopback interface can be coupled to create a bypass pair.
- The only valid option in the Use These Ports For drop-down is Private Layer 2 for a bypass pair that is made up of a physical LAN port and a loopback interface as the WAN port.
- The network policy rules assigned to such a site must not have any rules using the Direct on private WAN path. Valid paths are Direct on public or VPN on public. Traffic is dropped if a direct on private path is used.
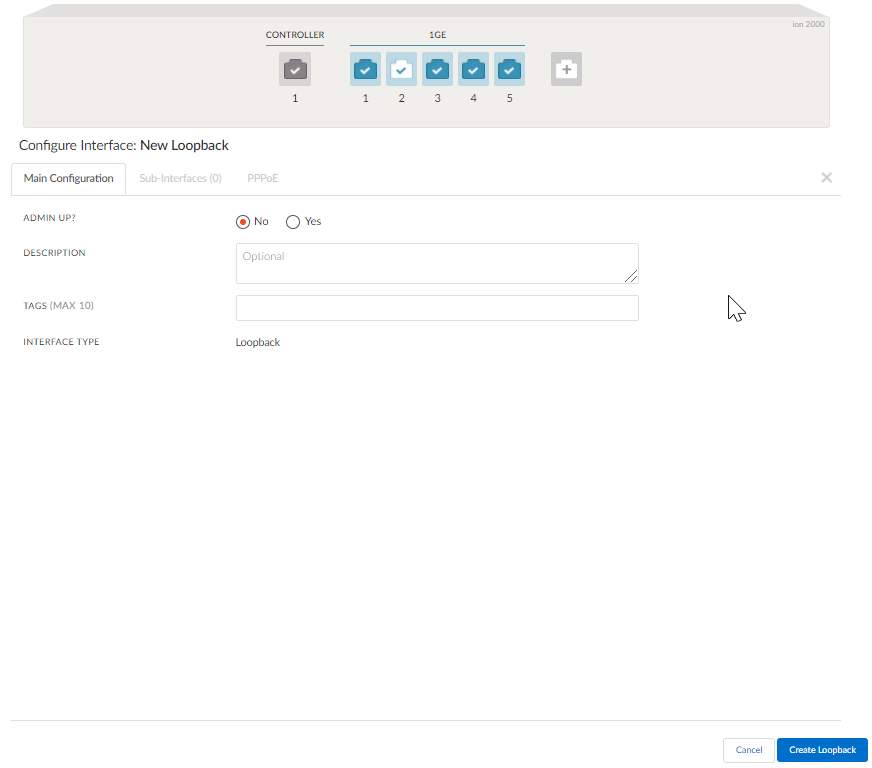
- Select , select the device you want to configure.Select the Interfaces tab.On the interface configuration page for a device, click the + add icon to add a loopback interface and select Add.
![]() For Admin Up, select No or Yes to administratively bring the interface up or down.Enter a Description and select Create Loopback.The system assigns a default loopback ID to the interface. A confirmation message displays that the loopback interface is successfully created.Next, select a port to be configured with a loopback interface.For Admin Up, select No or Yes to administratively bring the interface up or down. The default is Yes.(Optional) Enter a Description.From the Interface Type drop-down, select Bypass Pair.From the Pair With drop-down, select the Loopback Interface.A confirmation message displays.Select Done to create a bypass pair with the loopback interface successfully.A confirmation message displays the port's successful creation and the loopback interface.For Use These Ports For, select Private L2 from the drop-down.This is the only valid option for a bypass pair that is made of a physical LAN port and a loopback interface for the WAN port.Select the Circuit Label from the drop-down.(Optional) If you choose Copy Settings from Another Port, select the bypass pair to copy the settings. If not, you may leave it blank.Similar to configuring bypass pairs, for Attached Networks, enter a VLAN ID, IP Address at Router, optional Network Context, and toggle the scope tp Local or Global scope.Save Bypass Pair.The port and the loopback interface are displayed under Interfaces.
For Admin Up, select No or Yes to administratively bring the interface up or down.Enter a Description and select Create Loopback.The system assigns a default loopback ID to the interface. A confirmation message displays that the loopback interface is successfully created.Next, select a port to be configured with a loopback interface.For Admin Up, select No or Yes to administratively bring the interface up or down. The default is Yes.(Optional) Enter a Description.From the Interface Type drop-down, select Bypass Pair.From the Pair With drop-down, select the Loopback Interface.A confirmation message displays.Select Done to create a bypass pair with the loopback interface successfully.A confirmation message displays the port's successful creation and the loopback interface.For Use These Ports For, select Private L2 from the drop-down.This is the only valid option for a bypass pair that is made of a physical LAN port and a loopback interface for the WAN port.Select the Circuit Label from the drop-down.(Optional) If you choose Copy Settings from Another Port, select the bypass pair to copy the settings. If not, you may leave it blank.Similar to configuring bypass pairs, for Attached Networks, enter a VLAN ID, IP Address at Router, optional Network Context, and toggle the scope tp Local or Global scope.Save Bypass Pair.The port and the loopback interface are displayed under Interfaces.![]()