Use Case 1: Firewall Requires DNS Resolution
Table of Contents
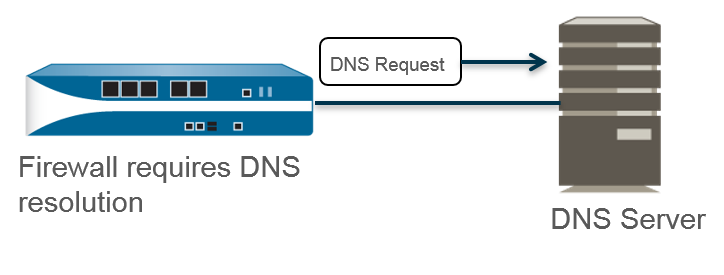
Use Case 1: Firewall Requires DNS Resolution
In this use case, the firewall is the client
requesting DNS resolutions of FQDNs for Security policy rules, reporting,
management services (such as email, Kerberos, SNMP, syslog, and
more), and management events such as software update services, dynamic
software updates, and WildFire. In dynamic environments, FQDNs change
more frequently; accurate DNS resolutions allow the firewall to
enforce accurate policing, provide reporting and management services, and
handle management events. The shared, global DNS services perform
the DNS resolution for the management plane functions.
- Configure the primary and secondary DNS servers you want the firewall to use for DNS resolutions.You must manually configure at least one DNS server on the firewall or it won’t be able to resolve hostnames; the firewall cannot use DNS server settings from another source, such as an ISP.
- Edit the Services settings ( for firewalls that support multiple virtual systems; for those that don’t).On the Services tab, for DNS, select Servers and enter the Primary DNS Server address and Secondary DNS Server address.Proceed to Step 3.Alternatively, you can configure a DNS Proxy Object if you want to configure advanced DNS functions such as split DNS, DNS proxy overrides, DNS proxy rules, static entries, or DNS inheritance.
- Edit the Services settings ( for firewalls that support multiple virtual systems; for those that don’t).On the Services tab, for DNS, select DNS Proxy Object.From the DNS Proxy list, select the DNS proxy that you want to use to configure global DNS services, or select DNS Proxy to configure a new DNS proxy object as follows:
- Enable and then enter a Name for the DNS proxy object.
- On firewalls that support multiple virtual systems, for Location, select Shared for global, firewall-wide DNS proxy services.Shared DNS proxy objects don’t use DNS server profiles because they don’t require a specific service route belonging to a tenant virtual system.
- Enter the Primary DNS server IP address. Optionally enter a Secondary DNS server IP address.
Select the Advanced tab. Ensure that Cache is enabled and Cache EDNS Responses is enabled (both are enabled by default).Click OK.(Optional) Set a Minimum FQDN Refresh Time (sec) to limit how frequently the firewall refreshes FQDN cache entries.By default, the firewall refreshes each FQDN in its cache based on the individual TTL for the FQDN in a DNS record, as long as the TTL is greater than or equal to this minimum FQDN refresh setting (or as long as the TTL is greater than or equal to the default setting of 30 seconds if you don’t configure a minimum FQDN refresh time). To set a minimum FQDN refresh time, enter a value in seconds (range is 0 to 14,400; default is 30). A setting of 0 means the firewall refreshes FQDNs based on the TTL value in the DNS records; the firewall doesn’t enforce a minimum FQDN refresh time. The firewall uses the higher of the DNS TTL time and the minimum FQDN refresh time.If the TTL for the FQDN in DNS is short, but your FQDN resolutions don’t change as frequently as the TTL timeframe so don’t need a faster refresh, you should set a Minimum FQDN Refresh Time to avoid making FQDN refresh attempts more often than necessary.(Optional) Specify an FQDN Stale Entry Timeout (min), which is the number of minutes that the firewall continues to use stale FQDN resolutions in the event of an unreachable DNS server (range is 0 to 10,080; default is 1,440).A setting of 0 means the firewall does not continue to use a stale FQDN entry.Make sure the FQDN stale entry timeout is short enough not to allow incorrect traffic forwarding (which can pose a security risk), but long enough to allow traffic continuity without causing an unplanned network outage.Click OK and Commit.