Prisma Access
Configure Mobile Users using Cloud Identity Engine (Recommended) (Strata Cloud Manager)
Table of Contents
Expand All
|
Collapse All
Prisma Access Docs
-
- 6.1 Preferred and Innovation
- 6.0 Preferred and Innovation
- 5.2 Preferred and Innovation
- 5.1 Preferred and Innovation
- 5.0 Preferred and Innovation
- 4.2 Preferred
- 4.1 Preferred
- 4.0 Preferred
- 3.2 Preferred and Innovation
- 3.1 Preferred and Innovation
- 3.0 Preferred and Innovation
- 2.2 Preferred
-
-
- 4.0 & Later
- Prisma Access China
-
-
Configure Mobile Users using Cloud Identity Engine (Recommended) (Strata Cloud Manager)
Configure the Cloud Ideneity Engine in Strata Cloud Manager.
You first configure SAML in Microsoft Entra ID (formerly Azure Active Directory (Azure AD), then
import the metadata XML file (the file
that contains SAML registration information) from Microsoft Entra ID and upload it to a
SAML Identity Provider you create in Prisma Access. You
then create an Authentication Profile that references the IdP
server profile, add the authentication profile into the Explicit Proxy or
GlobalProtect configuration, and commit and push your changes.
If you are a GlobalProtect mobile user, upgrade your GlobalProtect app to a minimum
version of 6.0.
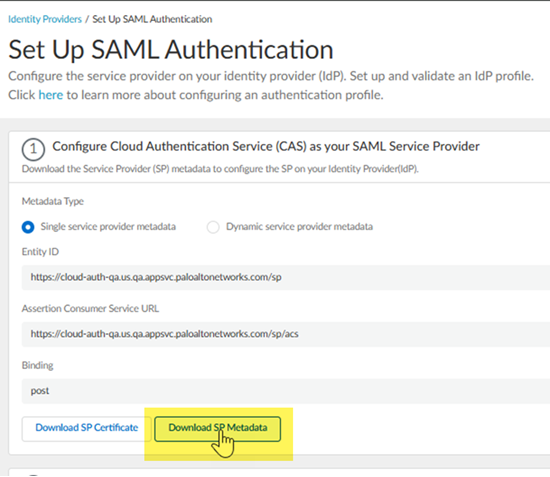
- Open the Cloud Identity Engine app associated with your tenant.If you use the Hub to log in to Cloud Identity Engine, make sure that you select the correct tenant.Download the SP Metadata in the Cloud Identity Engine app.
- Go to AuthenticationAuthentication TypesAdd New Authentication Type.
![]() Set Up a SAML 2.0 authentication type.
Set Up a SAML 2.0 authentication type.![]() Download SP Metadata.
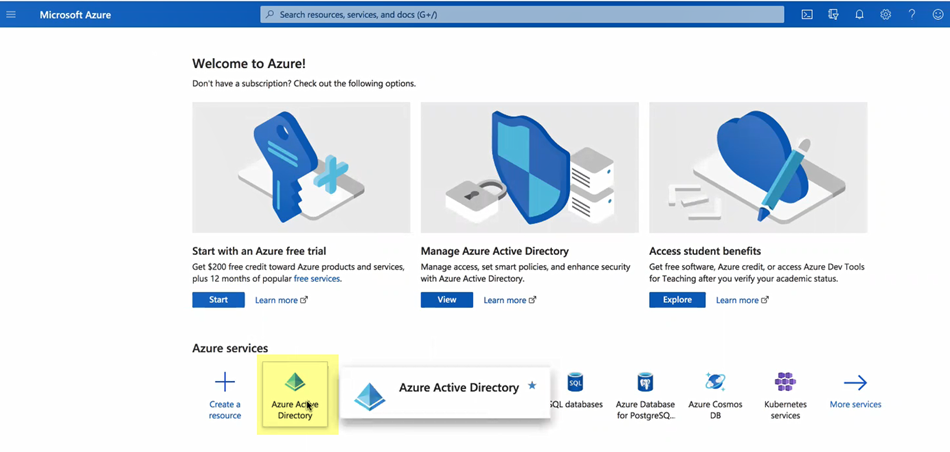
Download SP Metadata.![]() Log in to the Azure Portal and select Microsoft Entra ID.Make sure you complete all the necessary steps in the Azure portal.
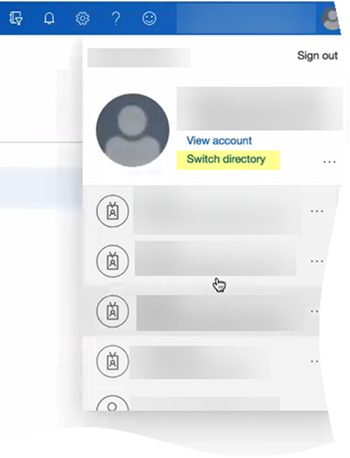
Log in to the Azure Portal and select Microsoft Entra ID.Make sure you complete all the necessary steps in the Azure portal.![]() If you have more than one directory, Switch directory to select the directory you want to use with the Cloud Identity Engine.
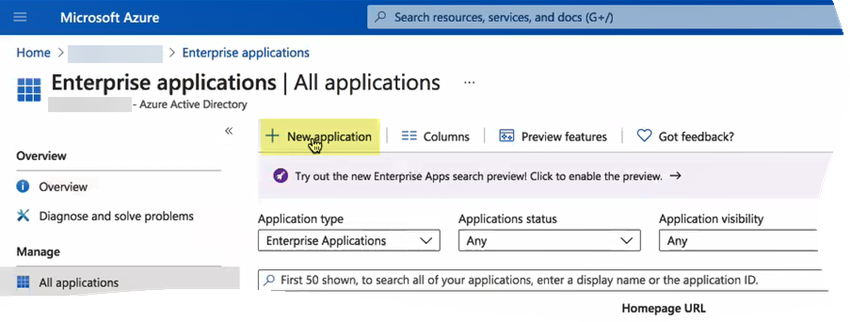
If you have more than one directory, Switch directory to select the directory you want to use with the Cloud Identity Engine.![]() Select Enterprise applications and click New application.
Select Enterprise applications and click New application.![]() Search for Palo Alto Networks Cloud Identity Engine - Cloud Authentication Service and create the Microsoft Entra ID single-sign on integration.Customize the app name if required while creating the application.After the application loads, select Users and groups, then Add user/group to Assign them to this application.Select the users and groups you want to have use the Azure IdP in the Cloud Identity Engine for authentication.Be sure to assign the account you are using so you can test the configuration when it is complete. You may need to refresh the page after adding accounts to successfully complete the test.Set up single sign-on then select SAML.Upload Metadata File by browsing to the metadata file that you downloaded from the Cloud Identity Engine app in step 2.c and click Add.After the metadata uploads, enter your regional endpoint as the Sign-on URL using the following format: https://<RegionUrl>.paloaltonetworks.com/sp/acs (where <RegionUrl> is your regional endpoint).This list shows the Cloud Identity Engine region-based URLs to use.Alternatively, copy the reply URL to the sign on URL.Save your configuration.Download the Federation Metadata XML under SAML Certificates.Add Azure as an authentication type in the Cloud Identity Engine app.
Search for Palo Alto Networks Cloud Identity Engine - Cloud Authentication Service and create the Microsoft Entra ID single-sign on integration.Customize the app name if required while creating the application.After the application loads, select Users and groups, then Add user/group to Assign them to this application.Select the users and groups you want to have use the Azure IdP in the Cloud Identity Engine for authentication.Be sure to assign the account you are using so you can test the configuration when it is complete. You may need to refresh the page after adding accounts to successfully complete the test.Set up single sign-on then select SAML.Upload Metadata File by browsing to the metadata file that you downloaded from the Cloud Identity Engine app in step 2.c and click Add.After the metadata uploads, enter your regional endpoint as the Sign-on URL using the following format: https://<RegionUrl>.paloaltonetworks.com/sp/acs (where <RegionUrl> is your regional endpoint).This list shows the Cloud Identity Engine region-based URLs to use.Alternatively, copy the reply URL to the sign on URL.Save your configuration.Download the Federation Metadata XML under SAML Certificates.Add Azure as an authentication type in the Cloud Identity Engine app.- In Cloud Identity Engine app, select AuthenticationAuthentication TypesAdd New.Set Up a SAML 2.0 authentication type.Enter a Profile Name.Select Azure as your IDP Vendor.Upload Metadata from step 2.l to Add Metadata.
![]() Click to Upload.Test SAML Setup to verify the profile configuration.Select the SAML attributes you want Prisma Access to use for authentication and Submit the IdP profile.Add an authentication profile.
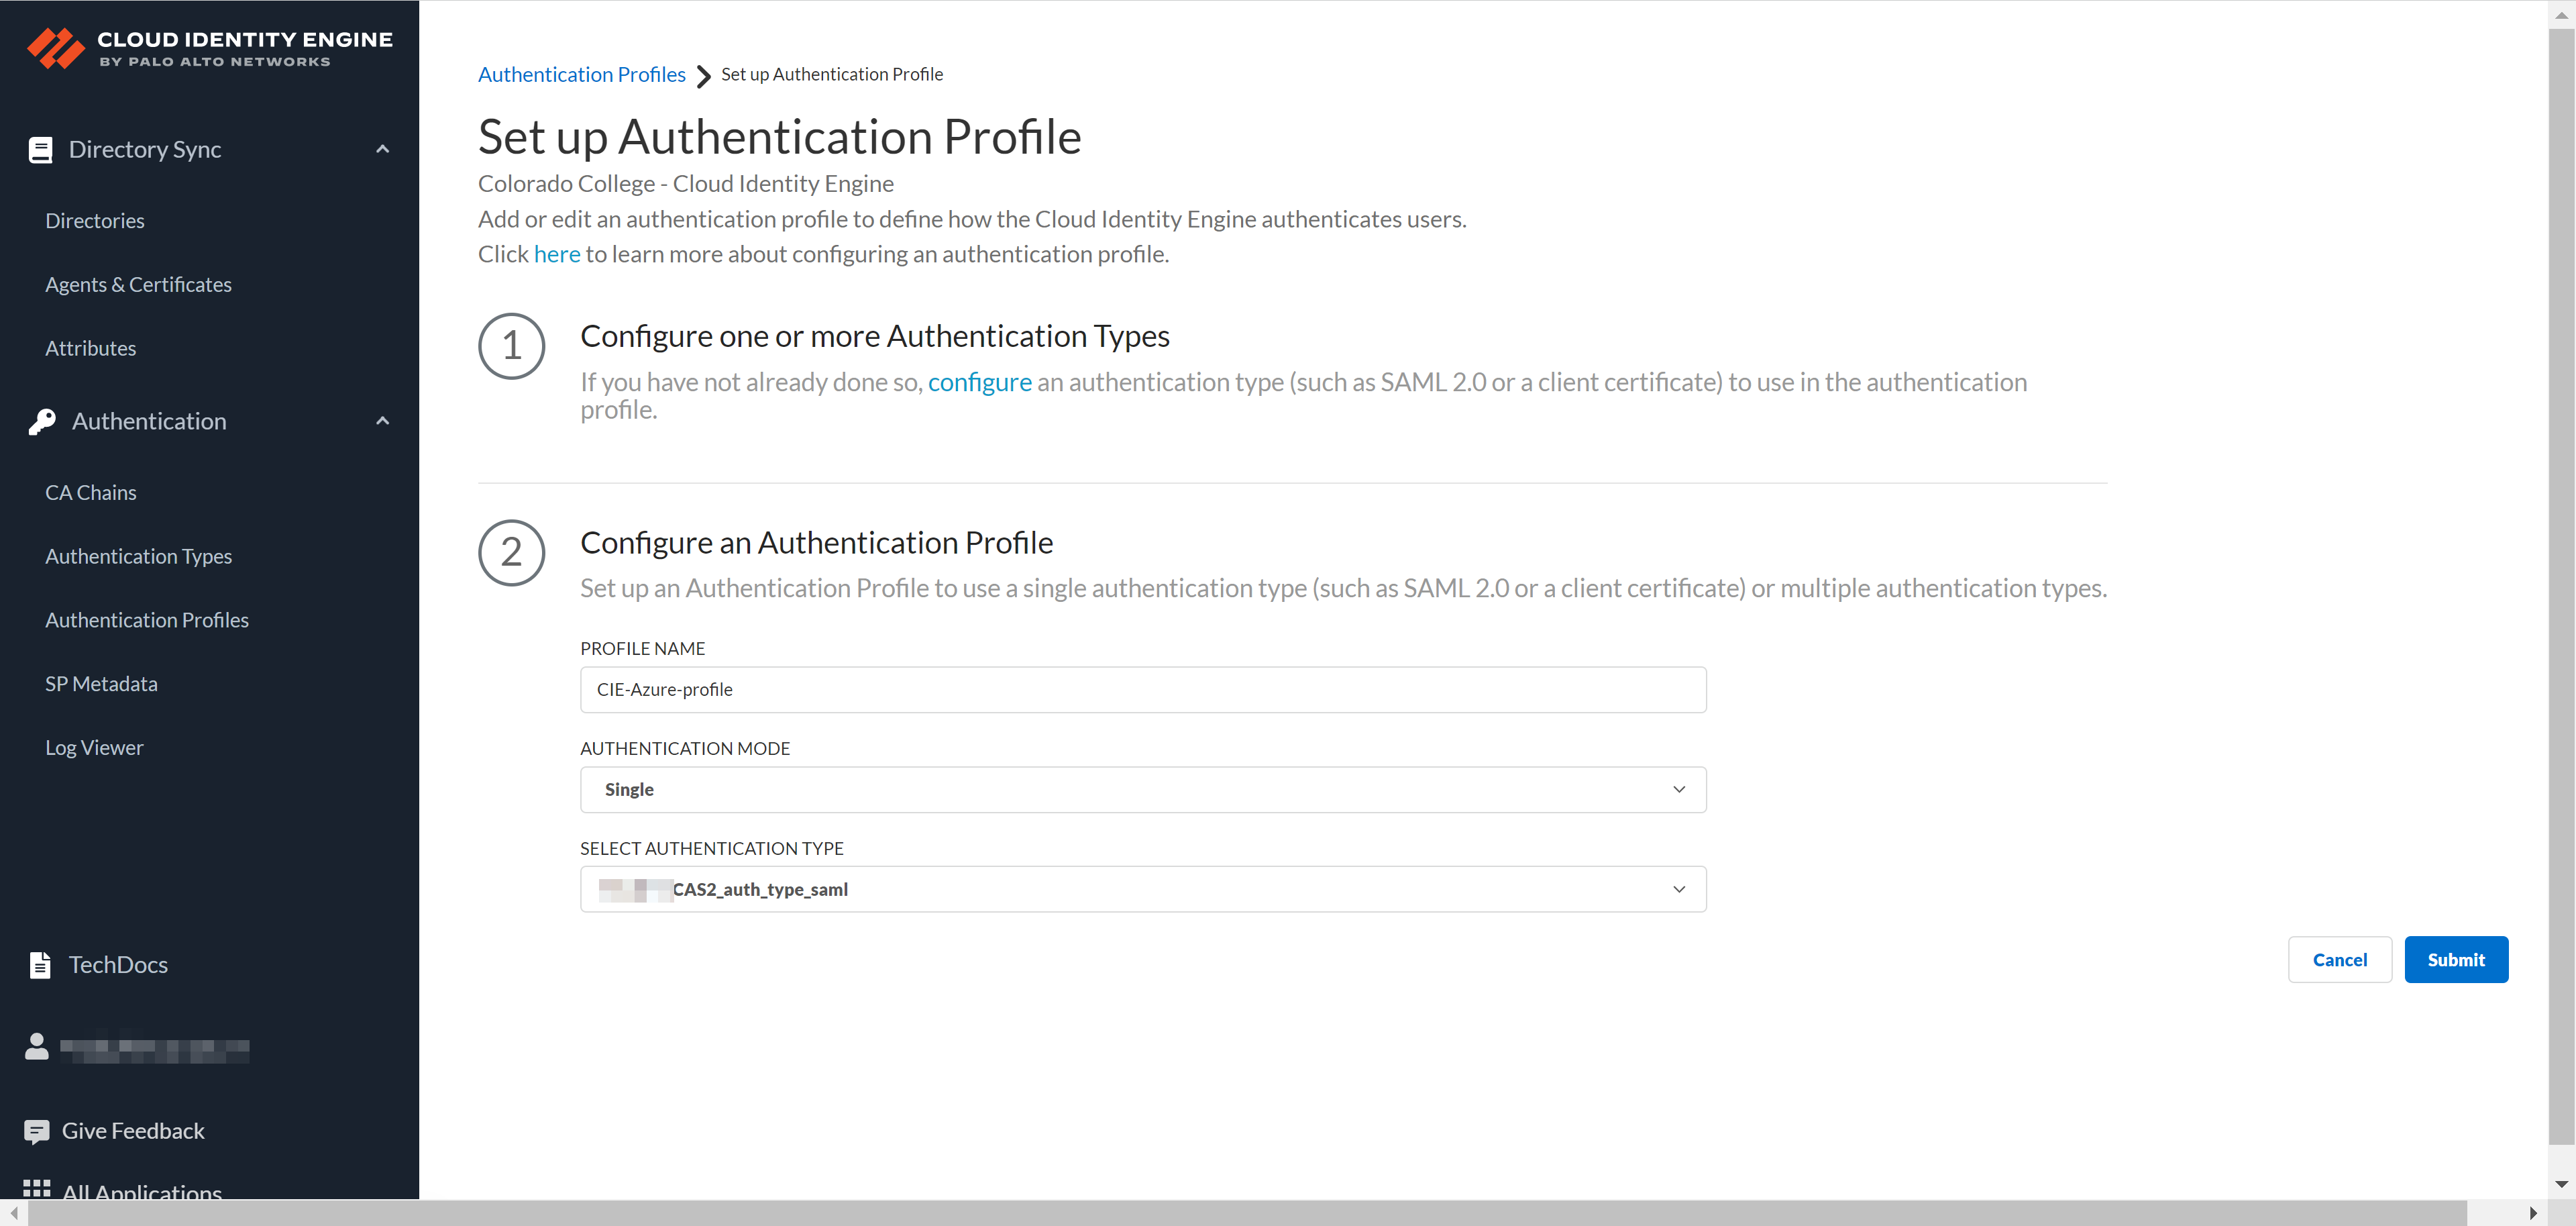
Click to Upload.Test SAML Setup to verify the profile configuration.Select the SAML attributes you want Prisma Access to use for authentication and Submit the IdP profile.Add an authentication profile.- Select AuthenticationAuthentication ProfilesAdd Authentication Profile.Enter a PROFILE NAME.Select an Authentication Mode.Select the Authentication Type from step 3 and Submit.
![]() Add the authentication profile from Cloud Identity Engine to Prisma Access.
Add the authentication profile from Cloud Identity Engine to Prisma Access.- In Prisma Access, select ConfigurationNGFW and Prisma AccessConfiguration ScopePrisma AccessIdentity ServicesAuthenticationAuthentication Profiles.Ensure to set the scope to GlobalProtect or Explicit Proxy mobile users.Add Profile.Select Cloud Identity Engine as your Authentication Method.Enter a Profile Name.Select the Profile you added in the Cloud Identity Engine app from step 4.Save the changes.
![]() Attach the authentication to mobile users.
Attach the authentication to mobile users.- For GlobalProtect mobile users
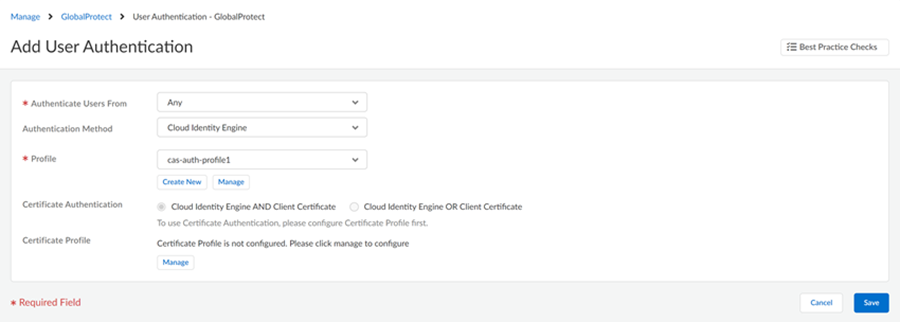
- Select ConfigurationNGFW and Prisma AccessConfiguration ScopePrisma AccessGlobalProtectInfrastructureAdd Authentication.Select all required fields and the Profile you added to Prisma Access in step 5.Save the changes.
![]() Move the authentication to the top of the list to prioritize it.
Move the authentication to the top of the list to prioritize it.-
For explicit proxy mobile users
- Select ConfigurationNGFW and Prisma AccessConfiguration ScopePrisma AccessExplicit Proxy.Edit the User Authentication settings.Create New profile.Select the Cloud Identity Engine authentication method.Enter a profile name.Select the Profile you added to Prisma Access in step 5.Save the changes.Move the authentication to the top of the list to prioritize it.(For GlobalProtect mobile users only) Edit the default browser settings for the GlobalProtect app.
- Select the Default app settings.Go to App ConfigurationShow Advanced OptionsAuthentication.Select the Use Default Browser for SAML Authentication.Save the changes.Push the changes.(Optional) Verify the user authentication.
-
For GlobalProtect mobile users
- Log in to a Windows machine and connect to the GlobalProtect app.The default browser takes you to SAML authentication.Enter the credentials and sign in.View Settings in the GlobalProtect app to see the connection details.Log in to Prisma Access and select ActivityLogsLog Viewer.You can see that the authentication is successful.
-
For explicit proxy mobile users
- Copy the PAC file URL to the endpoint.Go to ConfigurationNGFW and Prisma AccessConfiguration ScopePrisma AccessExplicit ProxyInfrastructure Settings to view the PAC file URL.Log in to a Windows machine.Edit the Proxy Settings and paste the PAC file URL to the Script Address.Access a URL that requires authentication.Enter the credentials.In Prisma Access, view the user mapping information by running the show user ip-user-mapping all command.(Optional) In Strata Cloud Manager, select InsightsActivity InsightsUsers.View details about mobile users connected for a time range you select.


