Prisma Access
Integrate Prisma Access with Microsoft Purview
Table of Contents
Integrate Prisma Access with Microsoft Purview
Integrate Prisma Access with Microsoft Purview for data loss prevention. Secure
network traffic, detect sensitive data, and enforce policies to prevent data
leaks.
| Where Can I Use This? | What Do I Need? |
|---|---|
|
|
Prisma Access integrates with Microsoft Purview Information Protection to
enable sensitive data detection and policy enforcement on network traffic. This
integration leverages Microsoft Purview's data loss prevention (DLP) capabilities to
secure data transmitted through your network, providing context for granular data
protection policies.
Prisma Access inspects and forwards network traffic. Microsoft Purview
Information Protection defines and applies data protection policies, identifies
sensitive data, and provides policy scopes. This integration combines Prisma Access's
network visibility with Purview's data classification engine to prevent data leaks and
enhance your data security.
Core architectural components and interactions include:
- Prisma Access captures and inspects network egress traffic from GlobalProtect.
- Microsoft Purview Information Protection serves as the central DLP engine. It defines data protection policies, identifies sensitive information based on configured rules, and provides policy scopes. Purview policies apply exclusively based on Microsoft Entra IDs.
- Strata Cloud Manager is used by global administrator to grant admin consent so that Palo Alto Networks applications can access the tenant's protection scope policies.
- Microsoft Entra ID is the authoritative source for user identities. Purview policies apply exclusively based on Microsoft Entra IDs, requiring synchronization for accurate policy enforcement.
- The Microsoft Graph API retrieves the Microsoft Entra ID Object ID for each user based on their user principal name (UPN), a prerequisite for Purview's policy application.
You can initiate integration setup directly from Strata Cloud Manager. An API
handshake establishes communication with your Microsoft Purview tenant, authorizing the
Prisma Access application registration within your M365 environment and granting Prisma
Access the necessary permissions for accessing Microsoft Purview DLP policies.
Prisma Access establishes an API connection with Microsoft Purview DLP to learn
relevant traffic scopes, including:
- FQDNs for applications
- User activity types
- User identifiers
Prisma Access captures data payloads and metadata for all file and non-file
traffic. This content is forwarded to Microsoft Purview for process content inspection.
Prisma Access synchronizes with Microsoft Entra ID to map user identities. The Microsoft
Graph API obtains the unique Object ID from Microsoft Entra ID for each user based on
their UPN. This ensures accurate application of Purview's policies, which rely on Entra
ID Object IDs.
Prerequisites
Before you enable Microsoft Purview Integration, make sure you have completed the
following prerequisites:
Palo Alto Networks
- Configure Cloud Identity Engine (CIE) to allow the CIE to collect data from your Microsoft Entra ID for policy enforcement and user visibility.
- Add a Microsoft Entra ID to the CIE.
Microsoft Purview
- Enable Microsoft 365 E5 or Office 365 E5 licensing
- Set up Microsoft pay-as-you-go billing.
Enable Microsoft Purview Integration
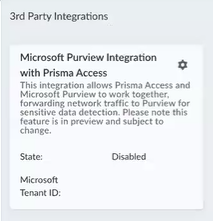
- Navigate to and locate the Microsoft Purview Integration with Prisma Access widget.
![]()
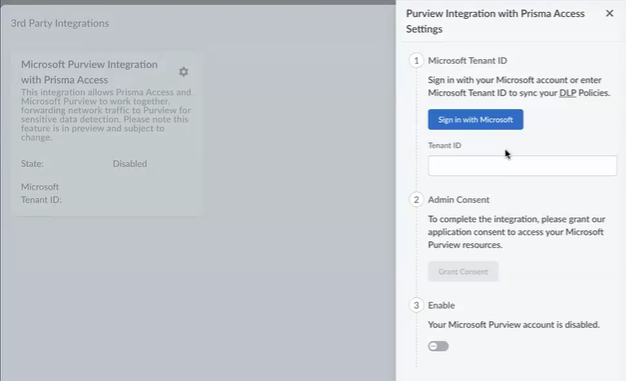
- Click the Settings gear to open the Preview Integration with Prisma Access Settings tab.
![]()
- Under Microsoft Tenant ID, click Sign in with Microsoft. Log in as a global administrator for your enterprise to auto-populate the tenantID field.
- Under Admin Consent, click Grant Consent, and Pick an account. Review the permissions this application requests, and click Accept.
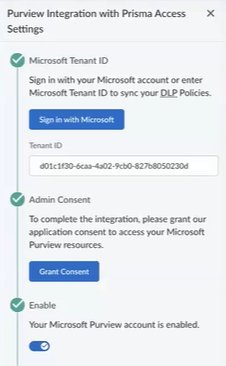
- Under Enable, move the slider to the right to enable the Microsoft Purview integration.
![]()
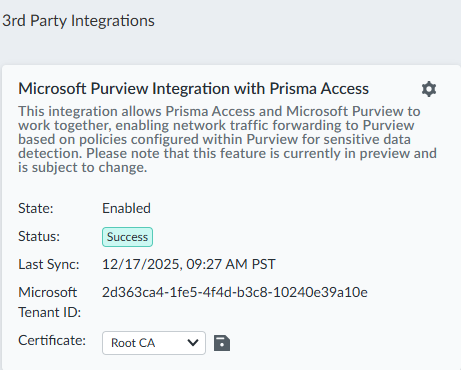
- The Microsoft Purview Integration with Prisma Access widget now shows
that Microsoft Purview is enabled.
![]()
- Select a certificate. If no certifications are available, they need to be uploaded to the certificate management page.
Create a Microsoft Purview Policy
- Log in to the Microsoft Purview portal at
https://purview.microsoft.com, and select the Data Loss
Prevention solution.Depending on the outcome you would like to achieve, you can configure one or both types of these policies. The policies work in parallel with one another.
- DLP Policies—DLP policies trigger alerts and audit events when content is shared with unsanctioned cloud apps.
- Collection Policies—Use Collection policies to discover signals and monitor data shared with unsanctioned apps. Although they do not include enforcement actions, they are essential for powering downstream features such as Data Security Posture Management (DSPM) and insider risk management.
- Select .
- On the Start with a template or create a custom policy page, select Next .
- Name your DLP policy, and select Next.
- On the Choose cloud apps to apply the policy page, select + Add cloud apps.
- In the Choose data sources selector, select the Unmanaged cloud apps tab, and choose the cloud apps you want to protect with this policy.You can choose a preexisting scope within the Adaptive app scopes tab to apply this policy across generative AI and other categories.
After you select the apps and categories you want to protect, click
Add and select Next.
Optionally, you can select Edit scope to include or exclude specific
users and groups.
- On the Choose where to enforce the policy page, ensure Network is selected.
- On the Define policy settings page, click Next. Then choose + Create rule to create one or more customized advanced DLP rules.
- Give the rule a name and an optional description.
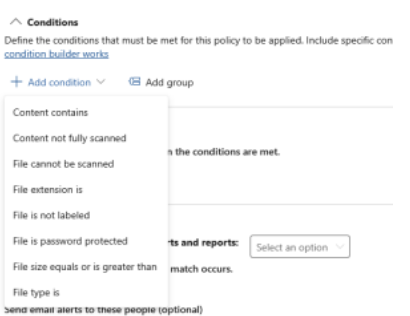
- From the Condition drop-down, choose one or more
conditions for this rule. For example, select Content
contains to specify advanced conditions for content, such as
sensitive information types, sensitivity labels, or trainable classifiers.
![]()
- From the Actions drop-down, choose Restrict browser and network activities. Choose the activities and actions you want to take.
- Choose whether you want to generate an incident report and an email notification on rule match events. Save the rule. You can create more than one rule, or select Next if you are satisfied with the single rule.
- On the Policy mode page, you can choose to:
- Run the policy in simulation mode: Generates audit events, but does not block.
- Turn the policy on immediately
- Leave the policy turned off: Save the policy state, but do not enable it.
- From the Review and finish page, review policy settings, and Submit when you are ready to create the policy.
Within an hour, your Microsoft Purview policy it is ready to test from
the client device, and rule matches should begin appearing on the Purview
Activity Explorer and Purview DLP Alerts pages.