Remote Browser Isolation
Configure Remote Browser Isolation (Panorama)
Table of Contents
Configure Remote Browser Isolation (Panorama)
Learn how to configure Remote Browser Isolation using Panorama Managed
Prisma Access.
You can secure your end users' browsing experience by configuring Remote Browser Isolation (RBI) to isolate their browser traffic.
Configure RBI by completing the following steps:
- Before you can begin to configure RBI, ensure that you:
- Purchase a valid Prisma Access license with a Mobile Users or Remote Networks license subscription.
- Purchase and activate the Remote Browser Isolation license.
- Configure at least one Prisma Access connection method, such as GlobalProtect, Explicit Proxy, or Remote Networks, otherwise you won't be able to enable RBI.
- Enable decryption so that Prisma Access can decrypt and inspect traffic to determine what needs to be isolated according to the policies that you configured.
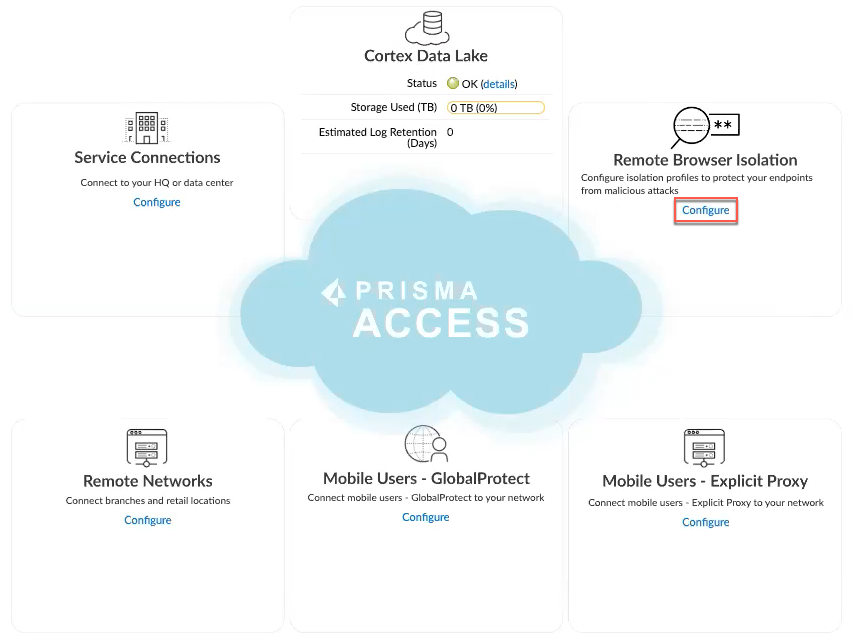
Follow the instructions to configure a URL Filtering profile and apply it to a security rule.When configuring the URL Filtering profile, you can select alert or allow under Site Access for a URL category, and then attach an isolation profile to the URL category and associate it to a security policy.![]() If you are setting up RBI for the first time in Panorama Managed Prisma Access, select PanoramaCloud ServicesStatusRemote Browser IsolationConfigure.The Configure button is available only if you purchased the Remote Browser Isolation license.
If you are setting up RBI for the first time in Panorama Managed Prisma Access, select PanoramaCloud ServicesStatusRemote Browser IsolationConfigure.The Configure button is available only if you purchased the Remote Browser Isolation license.![]() If you set up RBI previously and want to edit the configuration, select PanoramaCloud ServicesConfigurationRemote Browser Isolation.Set up the infrastructure settings for RBI that will define the browser behavior and appearance during isolated browsing sessions.
If you set up RBI previously and want to edit the configuration, select PanoramaCloud ServicesConfigurationRemote Browser Isolation.Set up the infrastructure settings for RBI that will define the browser behavior and appearance during isolated browsing sessions.- Edit the Settings.
![]() Selecting the General tab to start defining the browser behavior during an isolated browsing session by
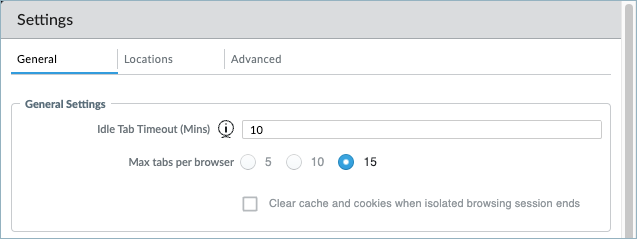
Selecting the General tab to start defining the browser behavior during an isolated browsing session by- Configure general browser settings:
![]()
- Idle Tab Timeout (Mins)—Specify the duration that elapses before a browser tab will time out due to user inactivity. The default timeout value is 10 minutes. The range is 5-20 minutes.The inactivity timer starts from the user's last action, such as mouse click, scrolling, navigation, file upload or download, and stopping video or audio. Just moving the cursor isn't considered an activity.
- Max Tabs Per Browser—Select the maximum number of tabs that the user can open per browser. You can choose either 5, 10, or 15 maximum tabs. The default is 10.When the number of tabs exceeds the maximum, the users will be prompted to close existing tabs if they want to open more tabs for browsing.
- Clear cache and cookies when isolated browsing session ends—Enable this setting to clear the browser's cache and cookies when the user ends the isolated browsing session (by closing the browser). Clearing the cache and cookies can potentially help resolve some browser issues by speeding page loads or removing website tracking data.
- Set up theme settings for the isolated browsing session. When a
user enters an isolated browsing session, a notification banner
appears for about five seconds in the browser to let them know
that they are entering isolation. You can customize this
notification to align with your organization's look and
feel.The following is an example of a notification banner:
![]() Here’s where you specify what goes on the banner:
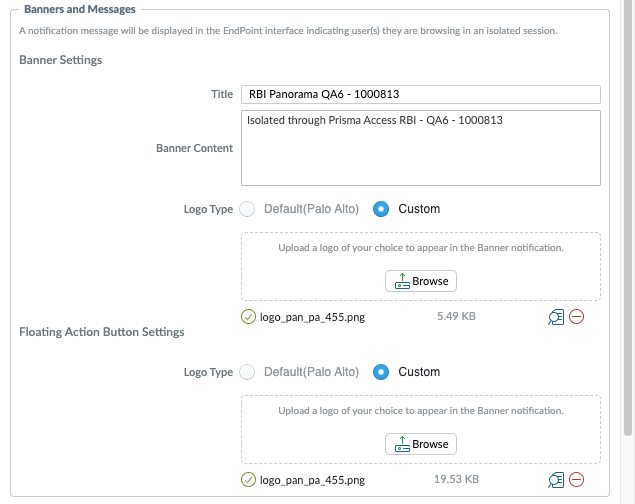
Here’s where you specify what goes on the banner:![]()
- Title—Enter the name that will appear on the notification banner when the user enters an isolated session on their browser.
- Banner Content—Enter the text that goes on the notification banner.
- Logo Type (Banner)—Select the type of logo that will appear on the banner. The default logo is the Palo Alto Networks icon. To customize the logo, click Custom and Browse to upload a graphics file of your choice. You can upload only one file. The valid file formats are JPG and PNG.
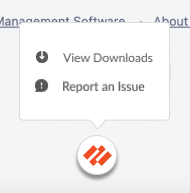
- Logo Type (Floating Action Button)—Select the type of logo that will appear on the floating action button on the isolation browser. The floating action button provides a list of actions that the user can perform, such as reporting an issue. The user can drag the button to different locations on the browser.The Default logo for the floating action button is the Palo Alto Networks icon. To customize the logo, click Custom and Browse to upload a graphics file of your choice. You can upload only one file. The valid file formats are JPG and PNG. The image should be 42x42 pixels in size to render well in RBI.The following image shows an example of the floating action button:
![]()
- Enable Allow users to report issues encountered in isolated sessions? if you want your end users to report issues they encountered during isolated browsing. The users can click the floating action button and select Report an issue.
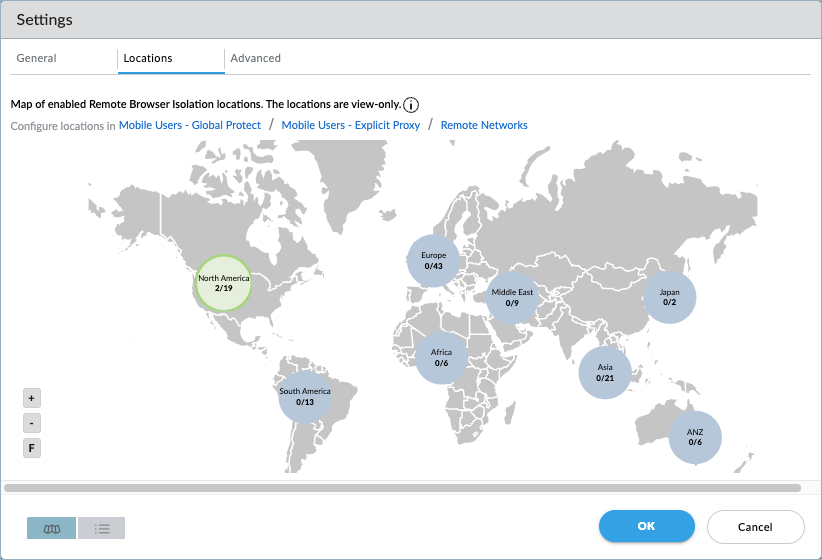
Review a map of the RBI locations by selecting the Locations tab. The locations shown are the same as the GlobalProtect, Explicit Proxy, and Remote Network locations that you have already set up.If you did not set up any locations, you can click the links on the map to navigate to the relevant configuration pages.![]() Set up advanced settings for isolated browsing, such as split tunnel settings, by selecting the Advanced tab.
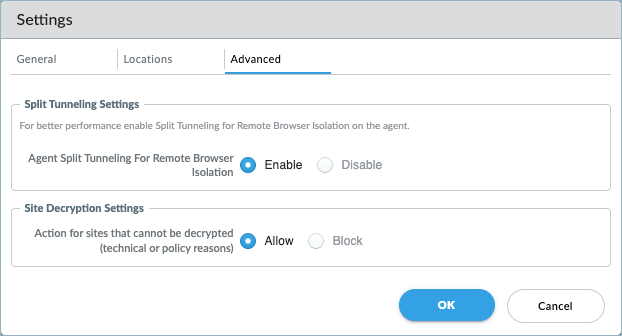
Set up advanced settings for isolated browsing, such as split tunnel settings, by selecting the Advanced tab.![]()
- Agent Split Tunneling for RBI—To further improve the user experience while in isolation, enable split tunneling, which allows the remote browser to connect directly to endpoints for quicker access.This setting is enabled by default and applies only to mobile user connections such as GlobalProtect and Explicit Proxy. For Remote Networks, all traffic goes through the tunnel to Prisma Access. For Explicit Proxy, you need to exclude the RBI domain in the PAC file by adding the following statements:
if (shExpMatch(host, "*.rbi.io"))
return "DIRECT";
The RBI split tunnel configuration is not viewable in the split tunnel configuration area of GlobalProtect. RBI uses split tunneling based on the domain and application, and the configuration is FQDN-based. For split tunneling to work, you must enable Split DNS to enable mobile users to direct their DNS queries for applications and resources over the tunnel or outside the tunnel in addition to network traffic. - Action for sites that cannot be decrypted (technical or policy reason)—Prisma Access needs to decrypt encrypted websites so that it can inspect traffic to determine which websites to isolate according to the policies that you configured.Choose whether to Allow or Block access to websites that can't be decrypted due to technical or policy reasons. You can also select Force Isolate to isolate the traffic from these websites if Prisma Access is unable to decrypt the traffic.
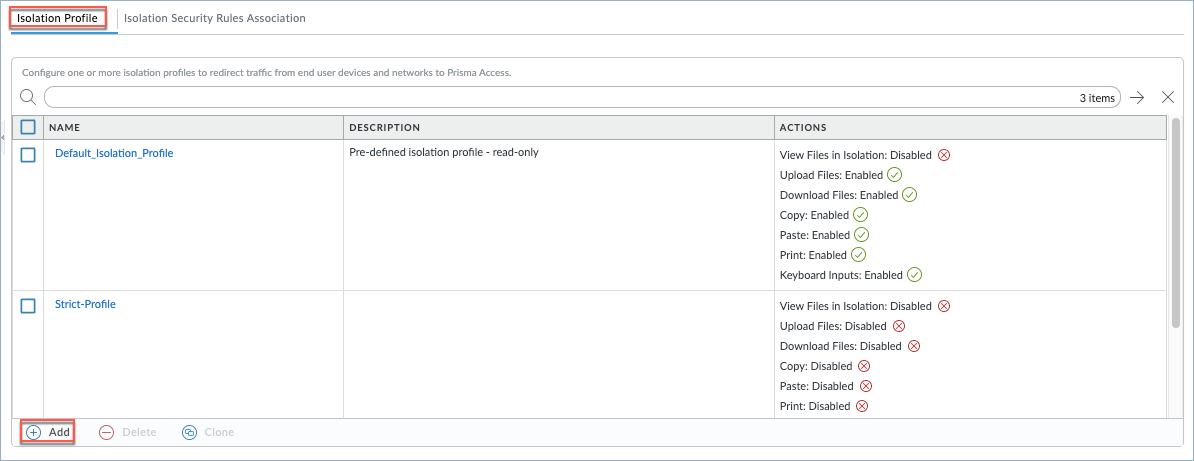
Set up one or more isolation profiles that define what browser actions users can perform during an isolated session.- From the Remote Browser Isolation configuration page, select Isolation Profile.A default isolation profile is provided for you. You can Add a custom isolation profile.
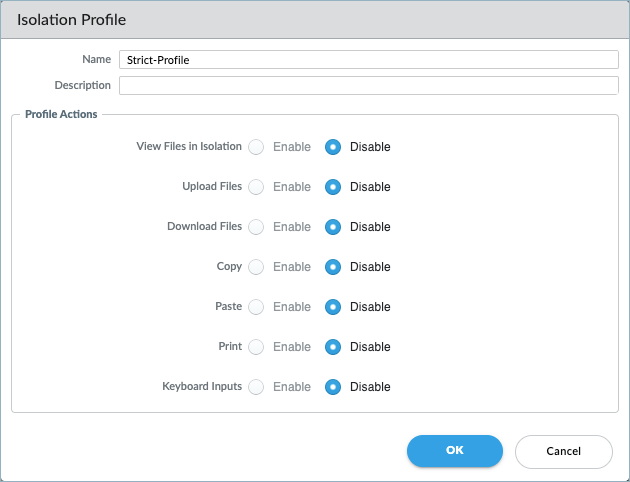
![]() Enter a Name and Description for the isolation profile.Select the security controls for the browser. You can allow or prohibit a user from doing the following actions:
Enter a Name and Description for the isolation profile.Select the security controls for the browser. You can allow or prohibit a user from doing the following actions:- View files in isolation
- Upload files
- Download files
- Copy content
- Paste content
- Use the keyboard for input
- Print content
By selecting a security control, the browser action will be allowed for the user in isolation.![]() Click OK to save your isolation profile.Attach an isolation profile to a security rule to which you applied a URL Filtering profile containing categories for isolated browsing.
Click OK to save your isolation profile.Attach an isolation profile to a security rule to which you applied a URL Filtering profile containing categories for isolated browsing.- From the Remote Browser Isolation configuration page, select Isolation Security Rules Association.Add a device group and associate an isolation profile and URL categories with the security rules for the device group.
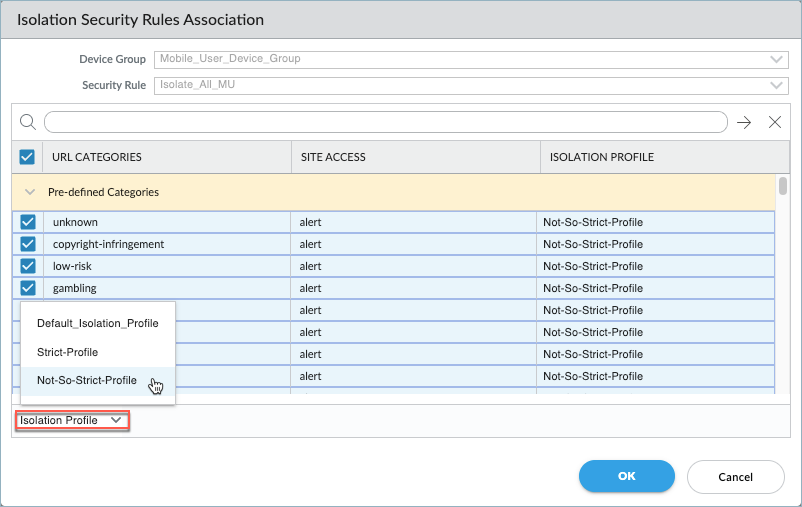
![]() If you want to update an existing device group, select the check box next to the device group name and select Modify in the Actions column.Select a predefined Device Group and a predefined Security Rule for the selected device group.Search for or scroll to the URL categories that you want to associate with the device group and select the check boxes next to the URL categories.To quickly configure the access control for all URL categories, select the check box next to the URL Categories table heading. All the URL categories will be selected.To attach an isolation profile to the security rule, click Isolation Profile and select an available isolation profile. Ensure that the Site Access for a URL category is set to alert or allow.
If you want to update an existing device group, select the check box next to the device group name and select Modify in the Actions column.Select a predefined Device Group and a predefined Security Rule for the selected device group.Search for or scroll to the URL categories that you want to associate with the device group and select the check boxes next to the URL categories.To quickly configure the access control for all URL categories, select the check box next to the URL Categories table heading. All the URL categories will be selected.To attach an isolation profile to the security rule, click Isolation Profile and select an available isolation profile. Ensure that the Site Access for a URL category is set to alert or allow.![]() All the selected URL categories will be associated with the selected isolation profile.Click OK to save your settings.Commit and push your configuration changes to the cloud firewall.After the configuration has been pushed successfully, you can view the status of the RBI configuration in the PanoramaCloud ServicesStatus page.
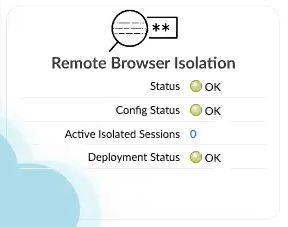
All the selected URL categories will be associated with the selected isolation profile.Click OK to save your settings.Commit and push your configuration changes to the cloud firewall.After the configuration has been pushed successfully, you can view the status of the RBI configuration in the PanoramaCloud ServicesStatus page.![]()


