Replace a PA-3200 Series Drive
Table of Contents
Replace a PA-3200 Series Drive
Learn how to replace the SSD drive on a PA-3200 Series
firewall. The SSD drive contains the system files and logs.
The PA-3200 Series firewalls use a single
solid-state drive (SSD) to store the PAN-OS system files, system
logs, and network traffic logs. If this drive fails, you must replace
it to restore functionality to the firewall.
The replacement
drive ships with a factory default PAN-OS image with the default
configuration. After you install the new drive, you will need to
obtain a backup configuration that you saved from the failed firewall
to restore your configuration.
To avoid injury to yourself or damage to
your Palo Alto Networks® hardware or the data that resides on the
hardware, read the Product Safety Warnings.
- Disconnect power from the firewall. For AC power supplies, remove the AC power cords. For DC power supplies, shut down the DC power source.
- Press the ejector button on the drive carrier to release
the carrier handle and gently pull the handle toward you to remove
the carrier and drive.
![]()
- Remove the replacement drive from the packaging and place it on an antistatic surface.
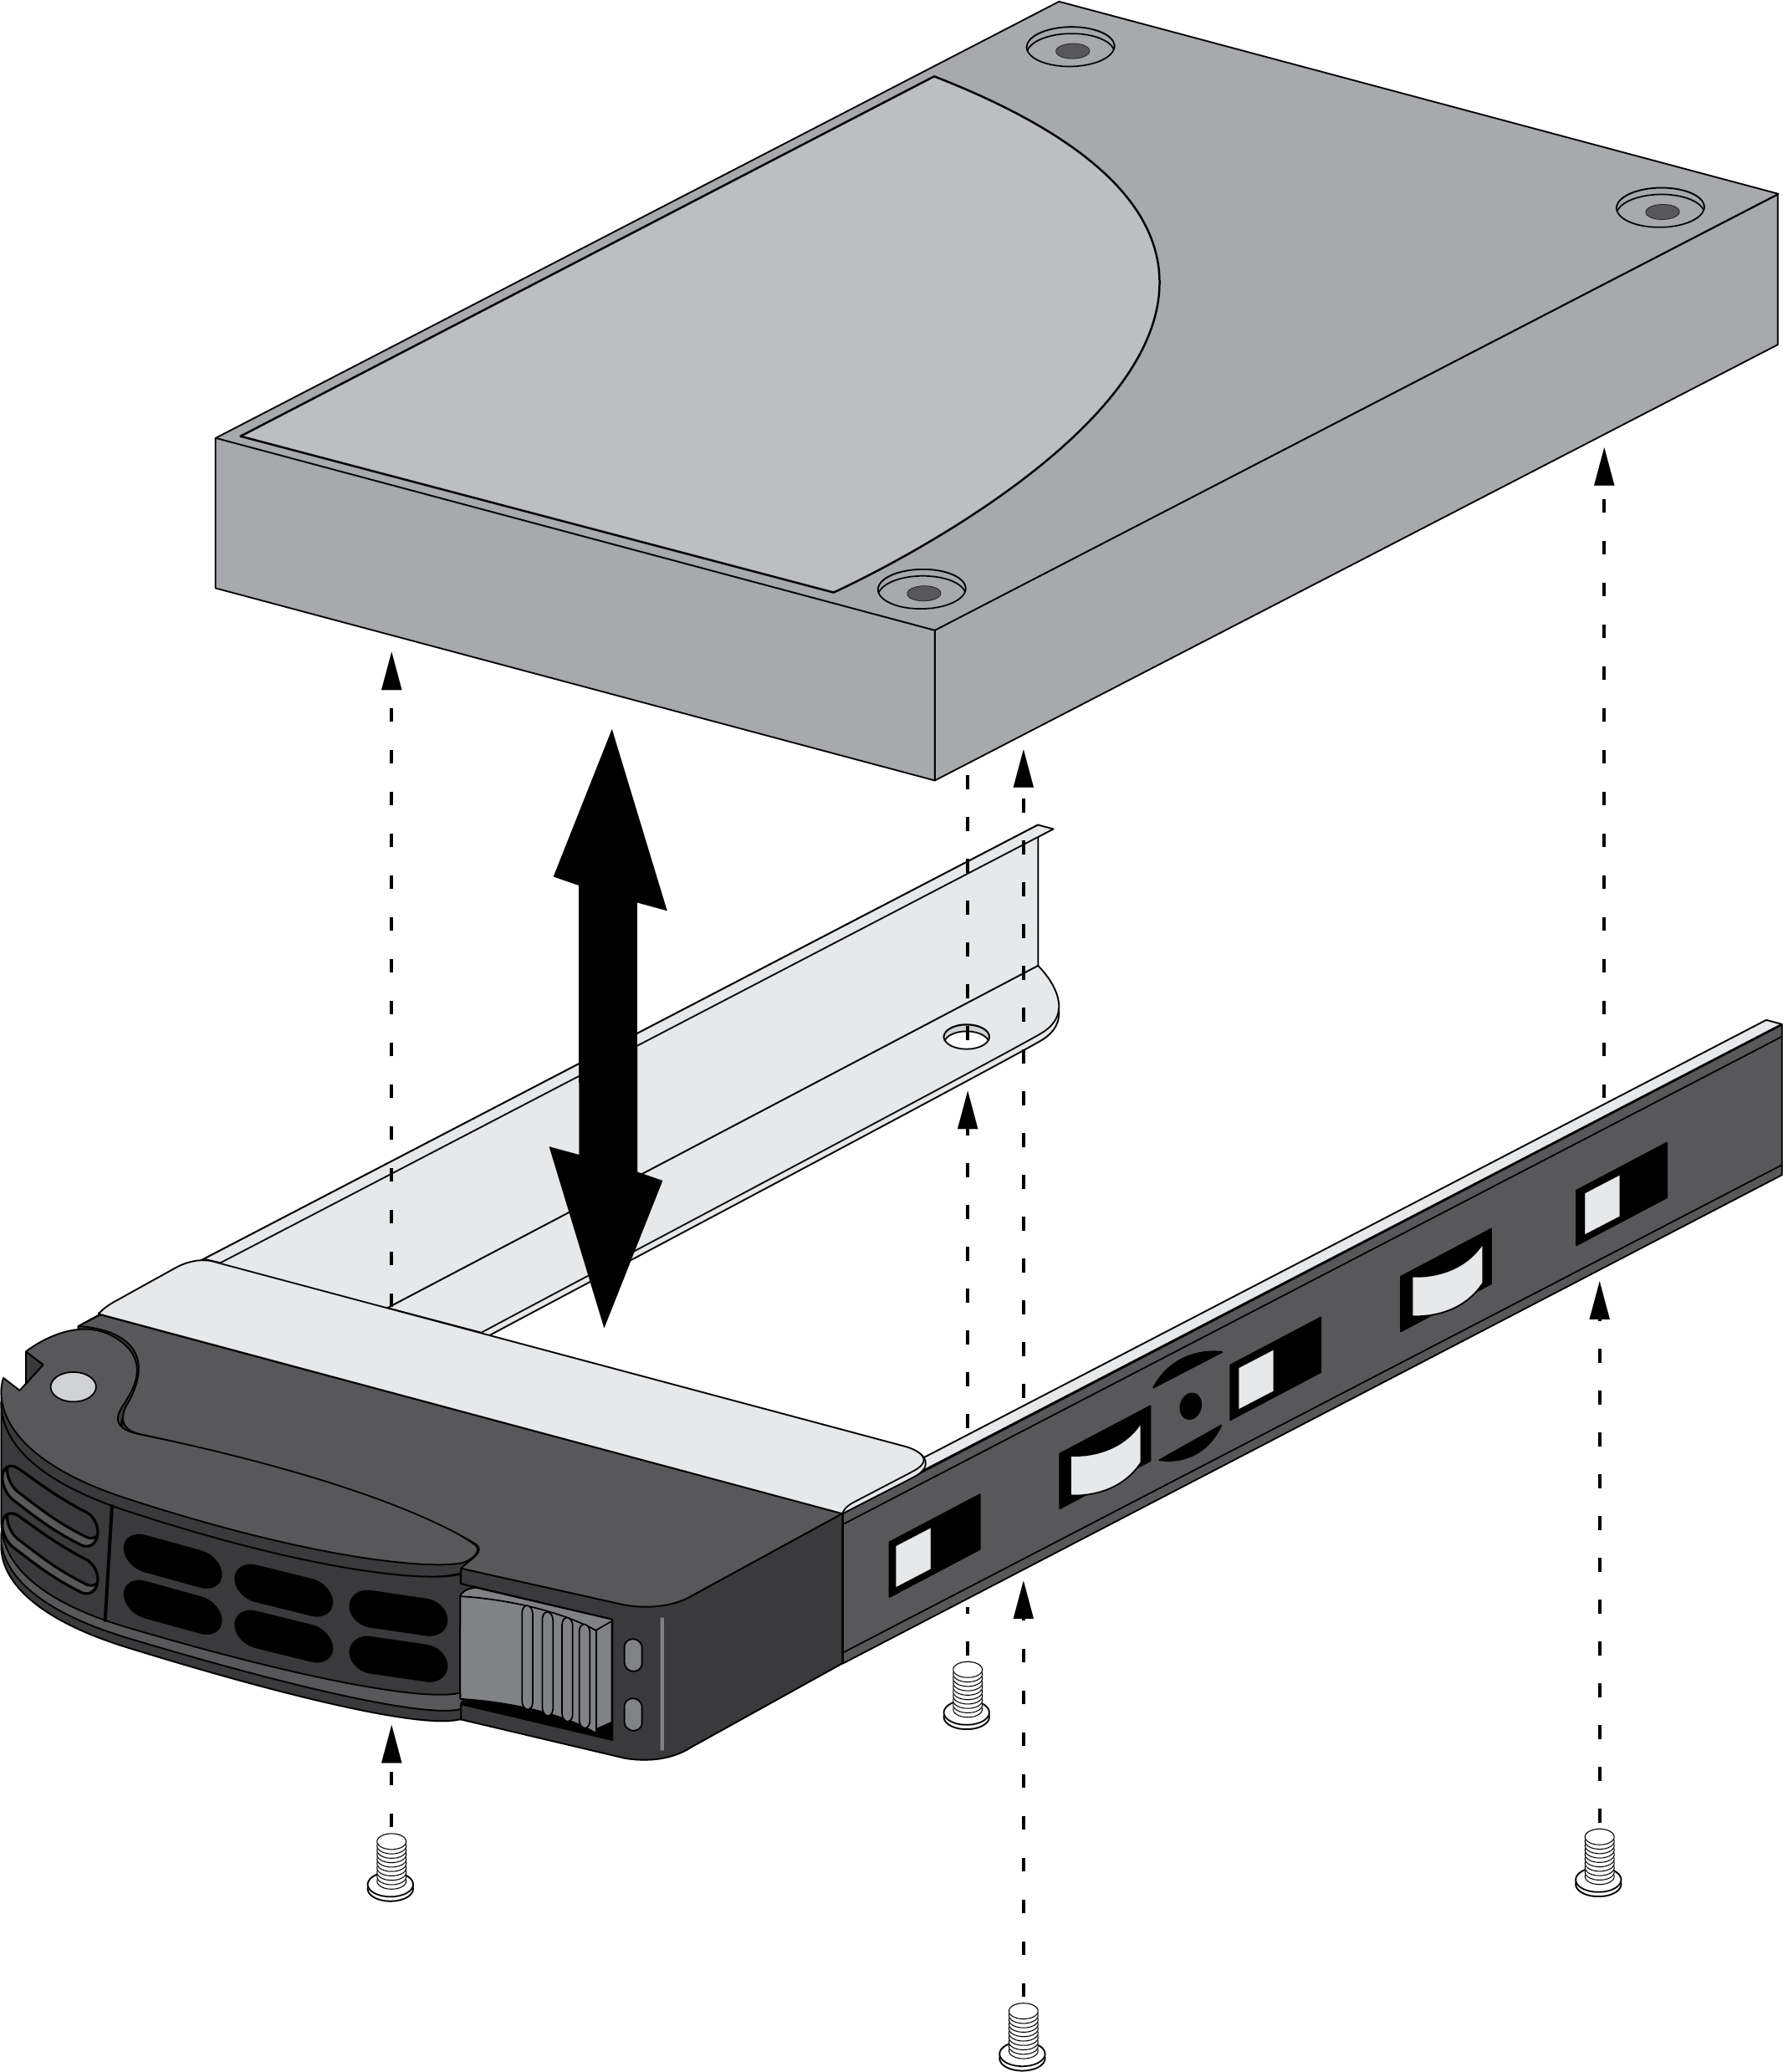
- Install the replacement drive in the drive carrier.
- Place the failed drive next to the replacement drive with the connectors facing the same direction.
- Remove the four screws that hold the failed drive in the carrier and remove the drive from the carrier.
- Install the replacement drive in the carrier and secure it using the four screws you removed from the failed drive.
![]()
- Install the replacement drive in the firewall.
- Ensure that the drive carrier lever is in the open position; if it is not, press the ejector button on the drive carrier to release the lever and pull it out until it is fully open.
- Slide the replacement drive and carrier assembly into the empty drive bay until it is about 1/4” (.6cm) from being fully inserted.
- Before fully inserting the drive carrier, ensure that the lever attaches to the locking mechanism on the firewall and then close the lever to seat the carrier.
- Power on the firewall and connect a standard RJ-45 Ethernet cable from the RJ-45 port on your computer to the MGT port on the firewall.
- Change the IP address on your computer to an address in the 192.168.1.0/24 network, such as 192.168.1.2.
- From a web browser, go to https://192.168.1.1 and, when prompted, log in to the web interface using the default username and password (admin/admin).
- Configure management access and restore the firewall configuration.For information on how to upgrade or downgrade PAN-OS, see the New Features Guide for the PAN-OS version that your firewall is running. The New Features Guides are located on the Technical Documentation portal.