Perform Initial Configuration of the M-Series Appliance
Table of Contents
Perform Initial Configuration of the M-Series Appliance
By default, Panorama has an IP address of
192.168.1.1 and a username/password of admin/admin. For security
reasons, you must change these settings before continuing with other
configuration tasks. You must perform these initial configuration
tasks either from the Management (MGT) interface or using a direct
serial port connection to the console port on the M-700, M-600,
M-500, M-300, or M-200 appliance.
If you are configuring
an M-Series appliance in Log Collector mode with 10GB interfaces,
you must complete this entire configuration procedure for the 10GB
interfaces to display as Up.
- Gather the required interface and server information from your network administrator.
- Gather the IP address, netmask (for IPv4) or prefix length (for IPv6), and default gateway for each interface that you plan to configure (MGT, Eth1, Eth2, Eth3, Eth4, Eth5). Only the MGT interface is mandatory.Palo Alto Networks recommends that you specify all these settings for the MGT interface. If you omit values for some of these settings (such as the default gateway), you can access Panorama only through the console port for future configuration changes. You cannot commit the configurations for other interfaces unless you specify all these settings.If you plan to use the appliance as a Panorama management server, Palo Alto Networks recommends using the MGT interface only for managing Panorama and using other interfaces for managing devices, collecting logs, communicating with Collector Groups, and deploying updates to devices (see M-Series Appliance Interfaces).
- Gather the IP addresses of the DNS servers.
Access the M-Series appliance from your computer.- Connect to the M-Series appliance in one of the following ways:
- Attach a serial cable from a computer to the Console port on the M-Series appliance and connect using terminal emulation software (9600-8-N-1).
- Attach an RJ-45 Ethernet cable from a computer to the MGT port on the M-Series appliance. From a browser, go to https://192.168.1.1. Enabling access to this URL might require changing the IP address on the computer to an address in the 192.168.1.0 network (for example, 192.168.1.2).
When prompted, log in to the appliance using the default username and password (admin/admin). The appliance starts initializing.Change the default admin password.Starting with PAN-OS 9.0.4, the predefined, default administrator password (admin/admin) must be changed on the first login on a device. The new password must be a minimum of eight characters and include a minimum of one lowercase and one uppercase character, as well as one number or special character.Be sure to use the best practices for password strength to ensure a strict password and review the password complexity settings.- Click the admin link in the lower left of the web interface.Enter the Old Password, New Password, and Confirm New Password, and then click OK. Store the new password in a safe location.To ensure that the MGT interface remains secure, configure Minimum Password Complexity settings (select ) and specify the interval at which administrators must change their passwords.Configure the network access settings for each interface that you will use to manage Panorama, manage devices, collect logs, communicate with Collector Groups, and deploy updates to devices.To configure connectivity to Panorama using an IPv6 IP address, you must configure both an IPv4 and IPv6 to successfully configure Panorama using an IPv6 IP address. Panorama does not support configuring the management interface with only an IPv6 IP address.
- Select and click the Interface Name.(Non-MGT interfaces only) Enable the interface.Edit the network access settings of each interface that Panorama will use. Only the MGT interface is required. The Eth1, Eth2, Eth3, Eth4, and Eth5 interfaces are optional and apply only if you plan to use the M-Series appliance as a Panorama management server.
- Complete one or both of the following field sets based on the IP protocols of your network:IPv4—Public IP Address, IP Address, Netmask, and Default GatewayIf your firewalls connect to the Panorama management server using a public IP address that is translated to a private IP address (NAT), enter the public IP in the Public IP Address field, and the private IP in the IP Address field to push both addresses to your firewalls.IPv6—IPv6 Address/Prefix Length and Default IPv6 Gateway
- Select the Device Management Services that the interface supports:Device Management and Device Log Collection—You can assign one or more interfaces.Collector Group Communication—You can assign only one interface.Device Deployment (software and content updates)—You can assign only one interface.
- (Optional) Select the Network Connectivity Services that the interface supports.(MGT interface only) Disable Telnet and HTTP; these services use plaintext and so are less secure than other services.
- Click OK to save your changes.
Configure the hostname, time zone, and general settings.- Select and edit the General Settings.Align the clock on Panorama and the managed firewalls to use the same Time Zone, for example GMT or UTC. If you plan to use the Strata Logging Service, you must configure NTP so that Panorama can stay in sync with the Strata Logging Service.The firewall records timestamps when it generate logs and Panorama records timestamps upon receiving the logs. Aligning the time zones ensures that the timestamps are synchronized and that the process of querying logs and generating reports on Panorama is harmonious.Enter a Hostname for the server. Panorama uses this as the display name/label for the appliance. For example, this is the name that appears at the CLI prompt. It also appears in the Collector Name field if you add the appliance as a managed collector on the page.(Optional) Enter the Latitude and Longitude to enable accurate placement of the M-Series appliance on the world map. The and use these values.Click OK to save your entries.Configure the DNS servers and Palo Alto Networks Update Server.
- Select and edit the settings.Enter the IP address of the Primary DNS Server and (optionally) of the Secondary DNS Server.Enter the URL or static address of the Update Server (default updates.paloaltonetworks.com).Select Verify Update Server Identity if you want Panorama to verify that the Update Server from which it downloads software or content packages has an SSL certificate that a trusted authority signed. This option adds an additional level of security for communication between the Panorama management server and Update Server.Click OK to save your entries.Commit your configuration changes.Select and Commit your changes.If you plan to use the M-Series appliance as a Panorama management server and you configured interfaces other than MGT, you must assign those interfaces to the Device Log Collection or Collector Group Communication functions when you Configure a Managed Collector. To make the interfaces operational, you must then Configure a Collector Group for the managed collector and perform a Collector Group commit.Verify network access to external services required for Panorama management, such as the Palo Alto Networks Update Server.
- Connect to the M-Series appliance in one of the following ways:
- Attach a serial cable from your computer to the Console port on the M-Series appliance. Then use a terminal emulation software (9600-8-N-1) to connect.
- Use terminal emulation software such as PuTTY to open an SSH session to the IP address that you specified for the MGT interface of the M-Series appliance during initial configuration.
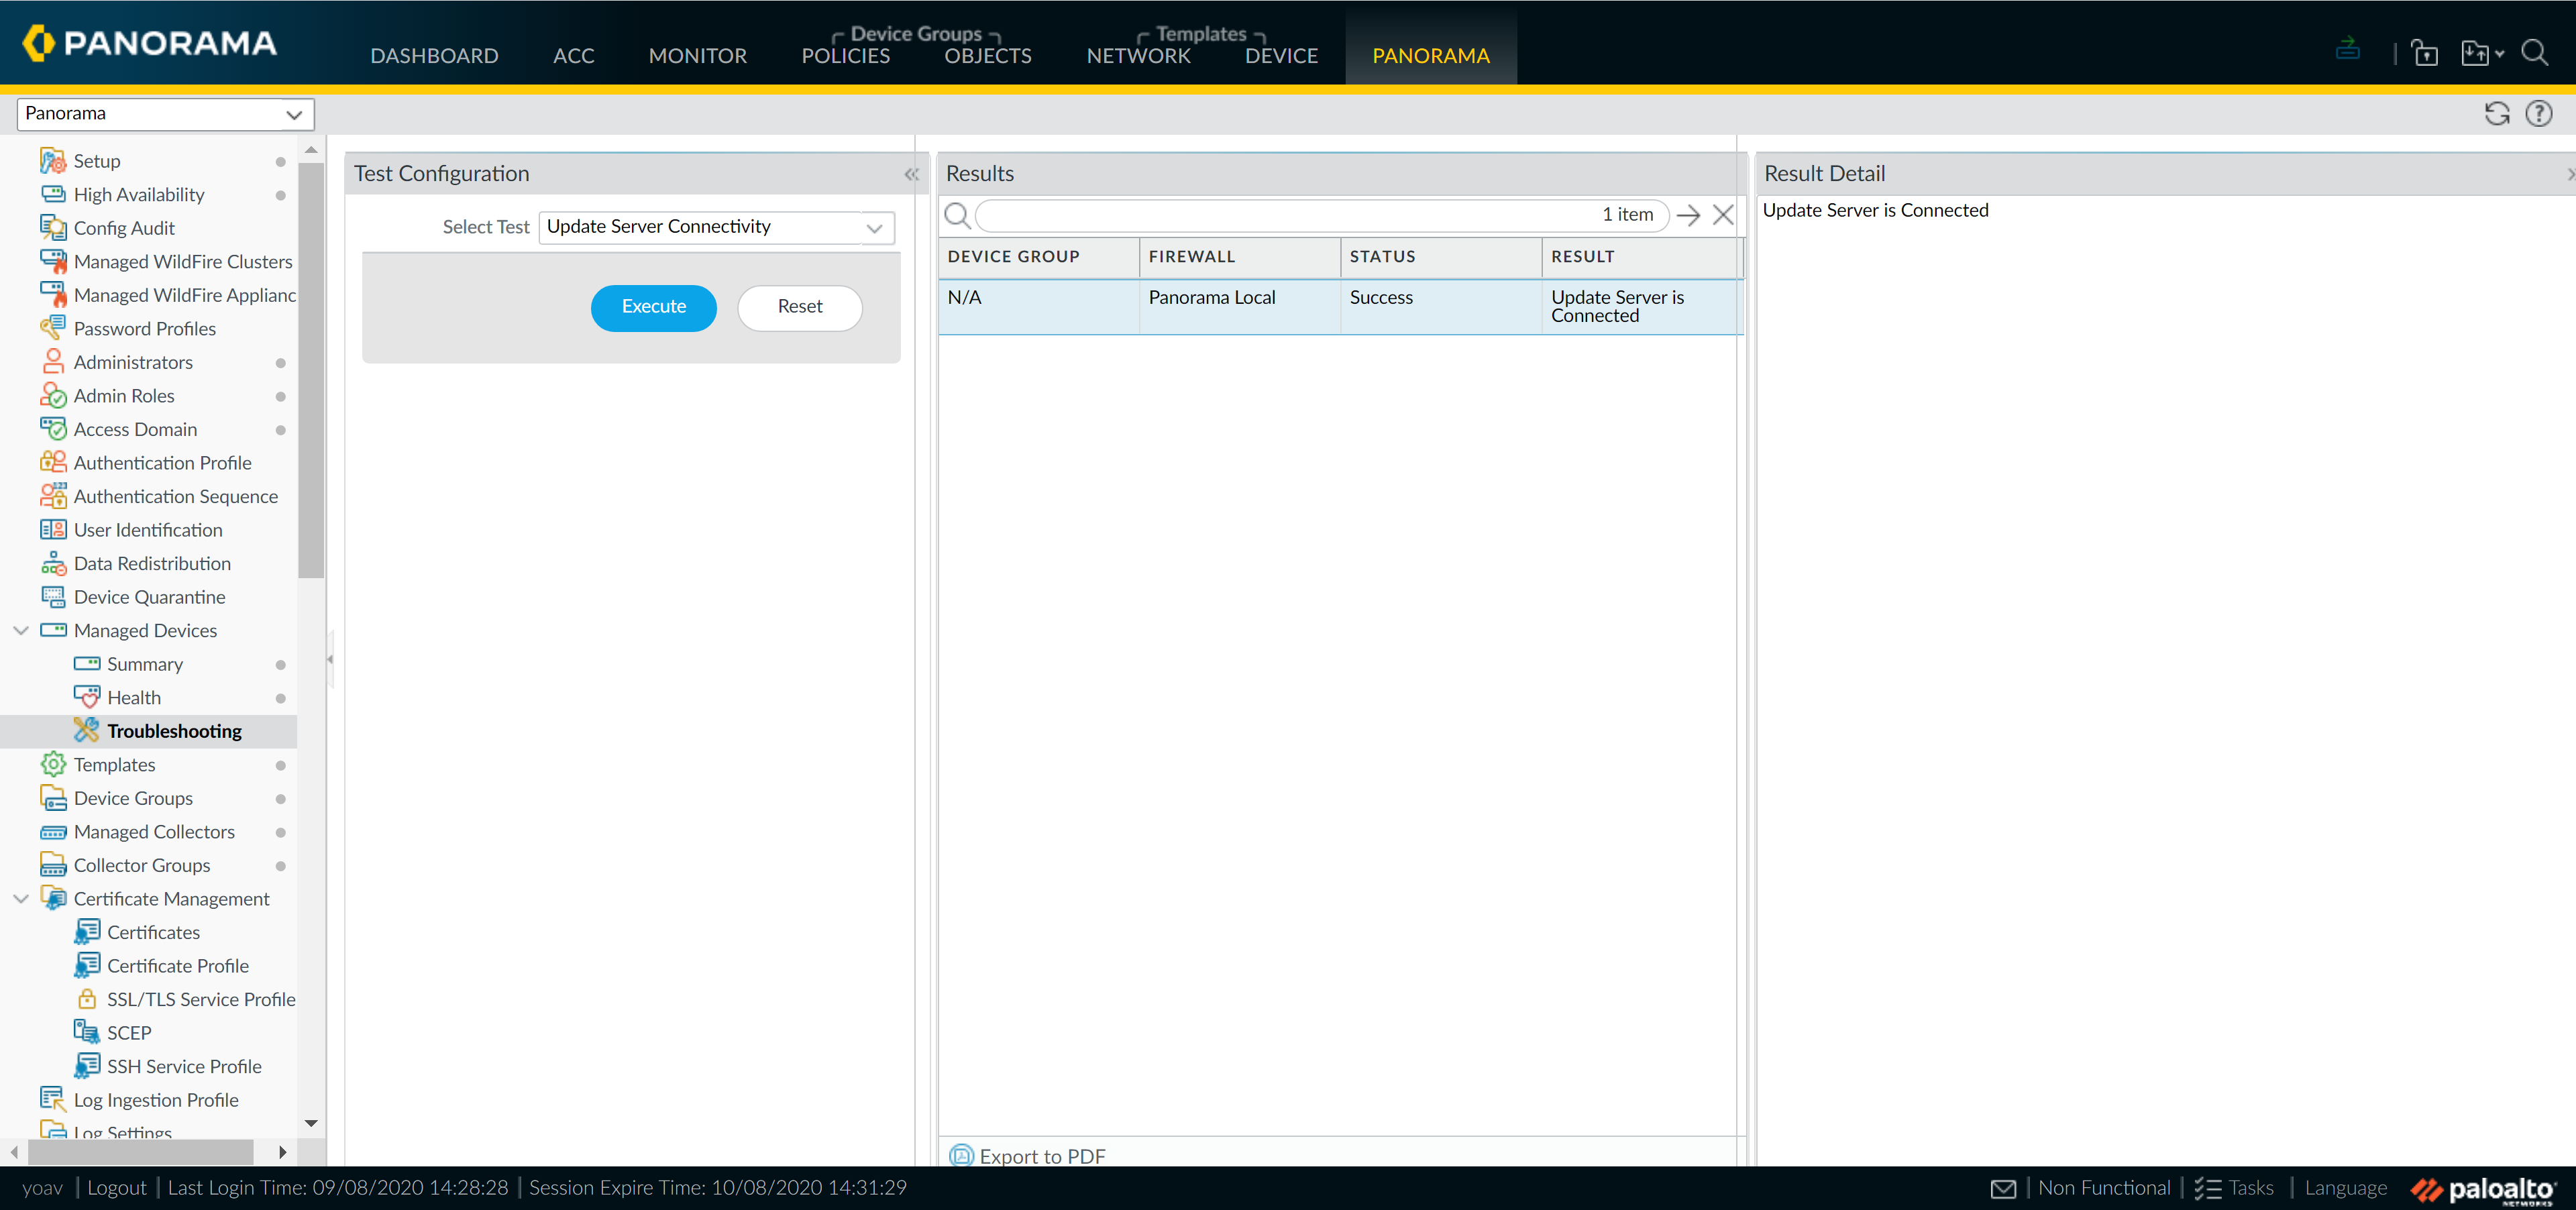
Log in to the CLI when prompted. Use the default admin account and the password that you specified during initial configuration.Use the Update Server Connectivity test to verify network connectivity to the Palo Alto Networks Update Server as shown in the following example.- Select , and select Updates Server Connectivity from the Select Test drop-down.
- Execute the update server connectivity test.
![]() Use the following CLI command to retrieve information on the support entitlement for Panorama from the Update Server:
Use the following CLI command to retrieve information on the support entitlement for Panorama from the Update Server:admin> request support checkIf you have connectivity, the Update Server responds with the support status for Panorama. Because Panorama is not registered, the Update Server returns the following message:Contact Us https://www.paloaltonetworks.com/company/contact-us.html Support Home https://www.paloaltonetworks.com/support/tabs/overview.html Device not found on this update server
Next steps...- Register Panorama and Install Licenses.Install Content and Software Updates for Panorama.As a best practice, replace the default certificate that Panorama uses to secure HTTPS traffic over the MGT interface.