GlobalProtect
Enable System Extensions in the GlobalProtect App for macOS Endpoints
Table of Contents
Enable System Extensions in the GlobalProtect App for macOS Endpoints
Starting with macOS 10.15.4, Apple has limited
the support of kernel extensions. The GlobalProtect app will use
system extensions instead of kernel extensions. Users must approve
system extensions before they can use them.
In addition
to enabling system extensions, you can enable network extensions
in the GlobalProtect app to suppress the Network Extensions
Configuration pop-up prompts that are used for the Split Tunnel
and Enforce GlobalProtect Connections for Network Access features.
You can use the mobile device management system (MDM) such as Jamf
Pro to automatically load the network extensions without receiving
the pop-up prompts. Refer to the knowledge base article at https://knowledgebase.paloaltonetworks.com/KCSArticleDetail?id=kA14u000000HAW8 for
information on how to enable system and network extensions
using Jamf Pro.
Use the following steps to configure a profile to automatically approve the system extension
using Workspace ONE. While this configuration has been tested with Workspace ONE,
you can use any Qualified MDM vendor to create
and implement this profile.
- Create a system extension profile.
- Log in to Workspace ONE as an administrator.
- Select , and then select from the drop-down.
- In the Add Profile area, click Apple macOS, and then click the Device Profile icon.
- In the General area, specify
the name for the profile.You can also select an existing system extension profile () in the list.
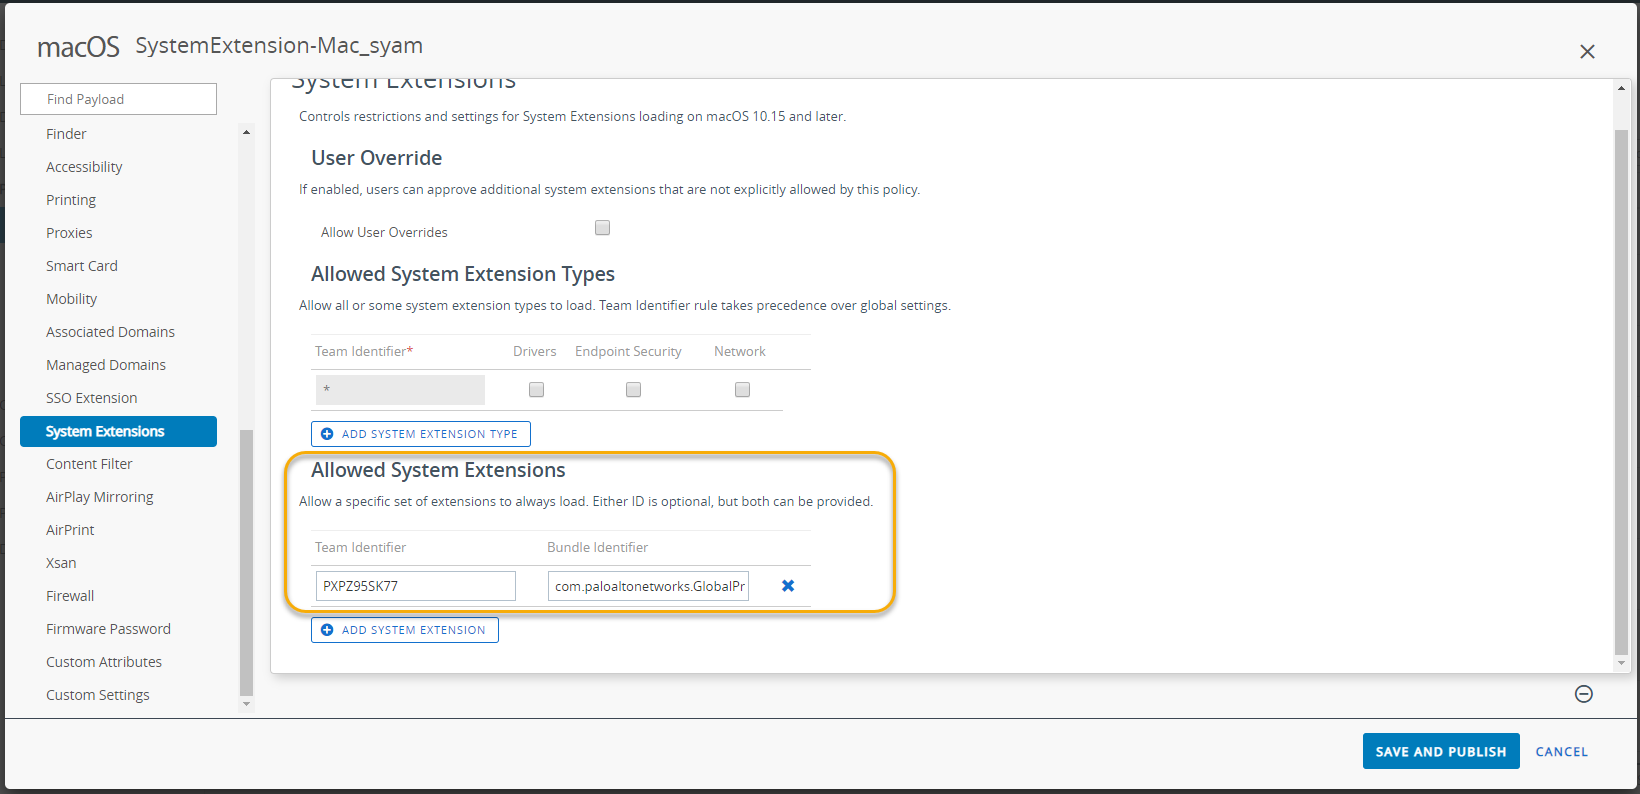
- Add a system extension.
- Select System Extensions.
- Enter the Team Identifier used by the GlobalProtect app (PXPZ95SK77).
- Enter the Bundle Identifier (com.paloaltonetworks.GlobalProtect.client.extension)
![]()
- Click Save and Publish to save your changes.