Install the M-700 Appliance in a 19” Equipment Rack
Table of Contents
Install the M-700 Appliance in a 19” Equipment Rack
Learn how to install an M-700 appliance in an equipment
rack using the provided four-post rack kit.
The following procedure describes how to install
the M-700 appliance in a four-post equipment rack (shipped with
the appliance). The rack kit includes the hardware required to install
the appliance in most equipment racks. Extra screws and washers
are included.
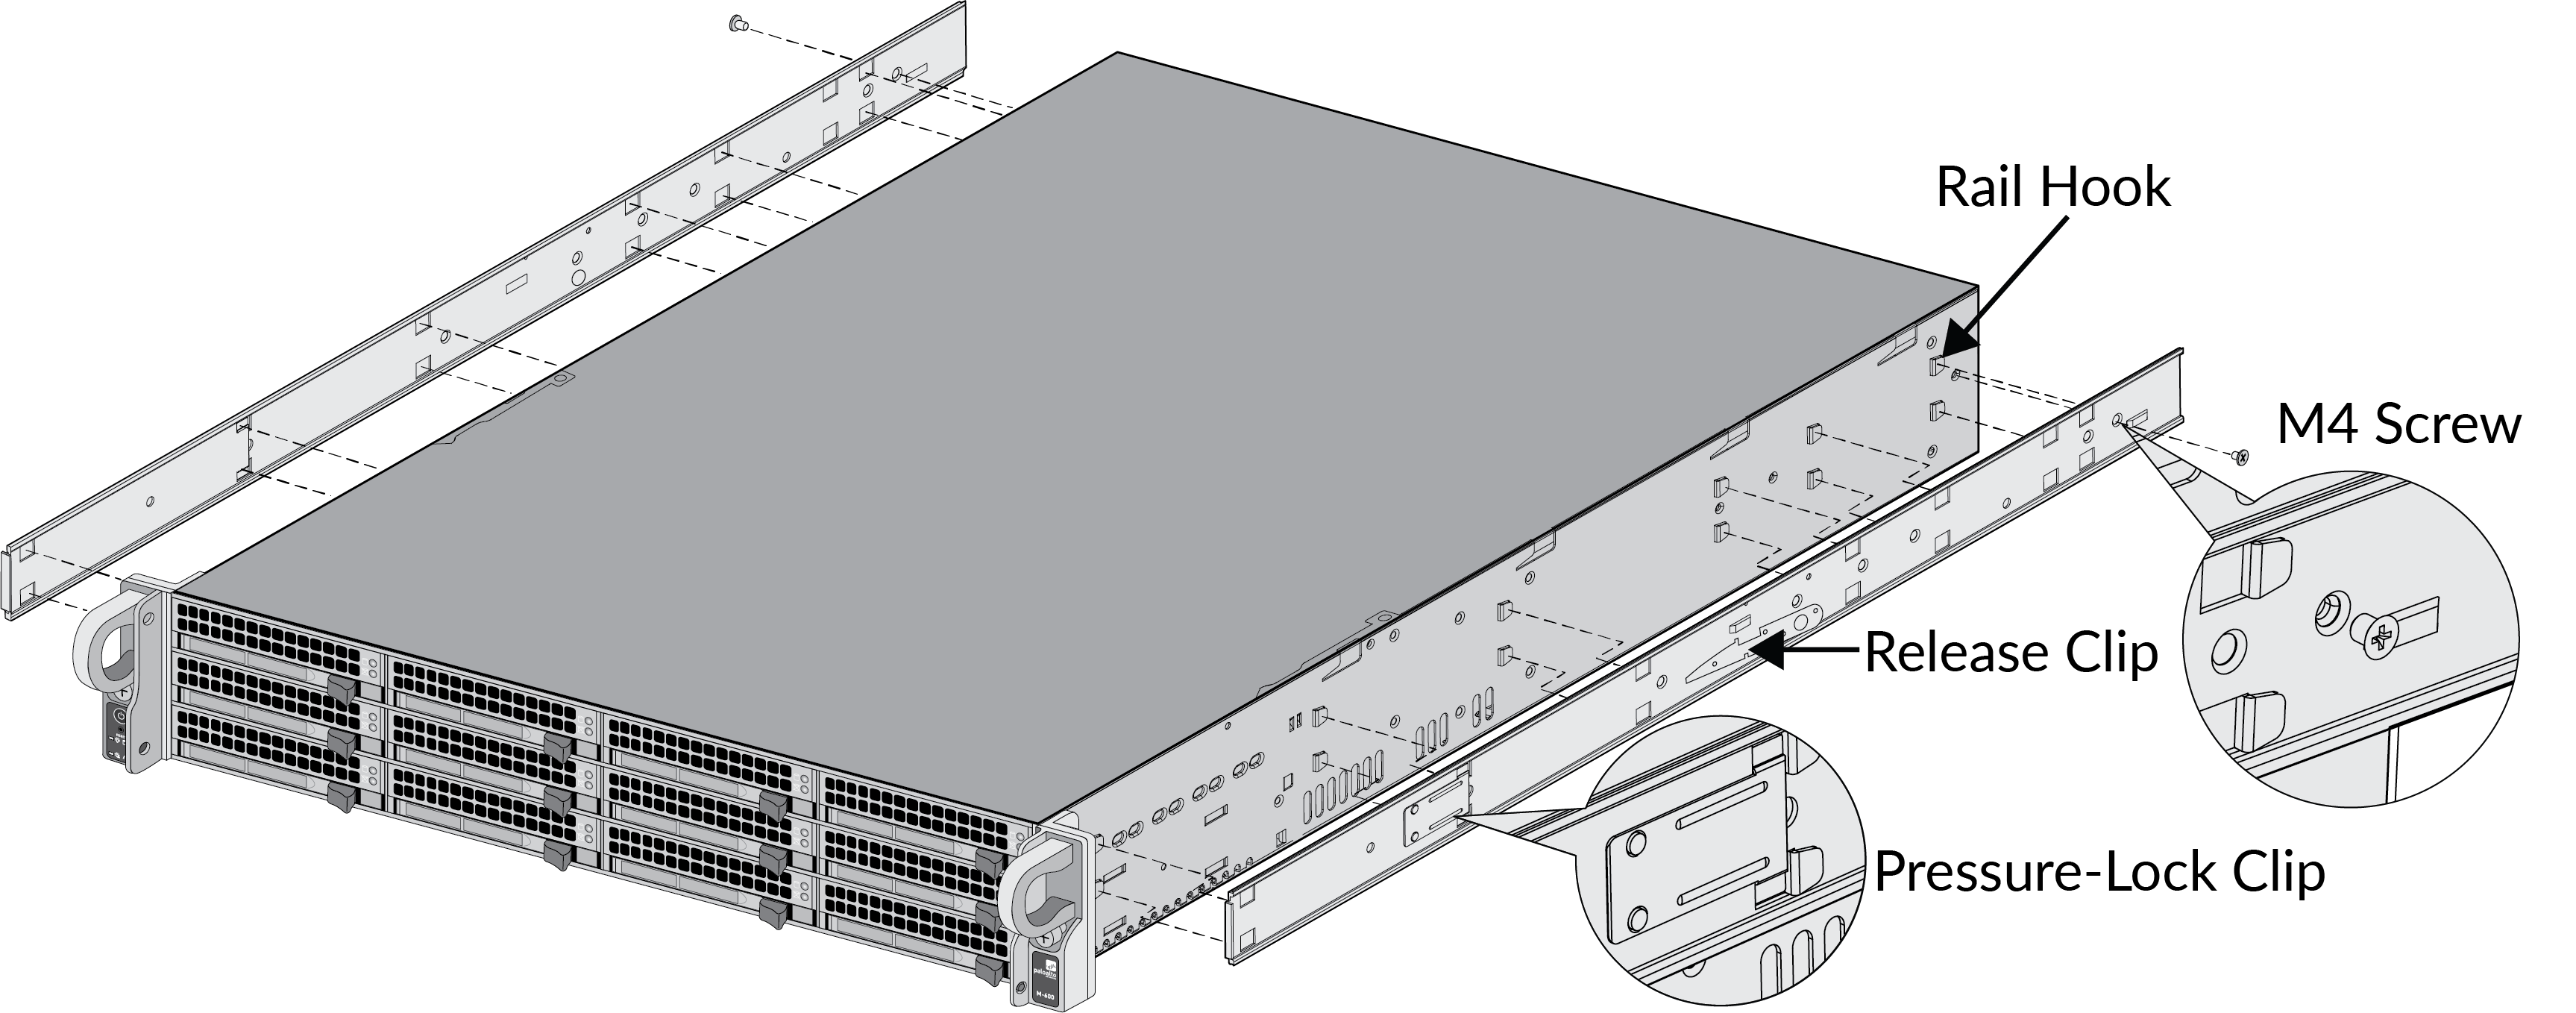
- Attach the inner-rails to each side of the appliance
by aligning the square holes on each rail with the rail hooks on
the appliance and then sliding the rails toward the front of the
appliance to engage the hooks. Secure the back part of each rail
to the appliance using one M4 screw for each rail.The inner-rails also use a pressure-lock clip (one on each rail) that locks the rails to the appliance. Remove the M4 screw and pull the metal tab on the clip to remove the rail from the appliance.
![]()
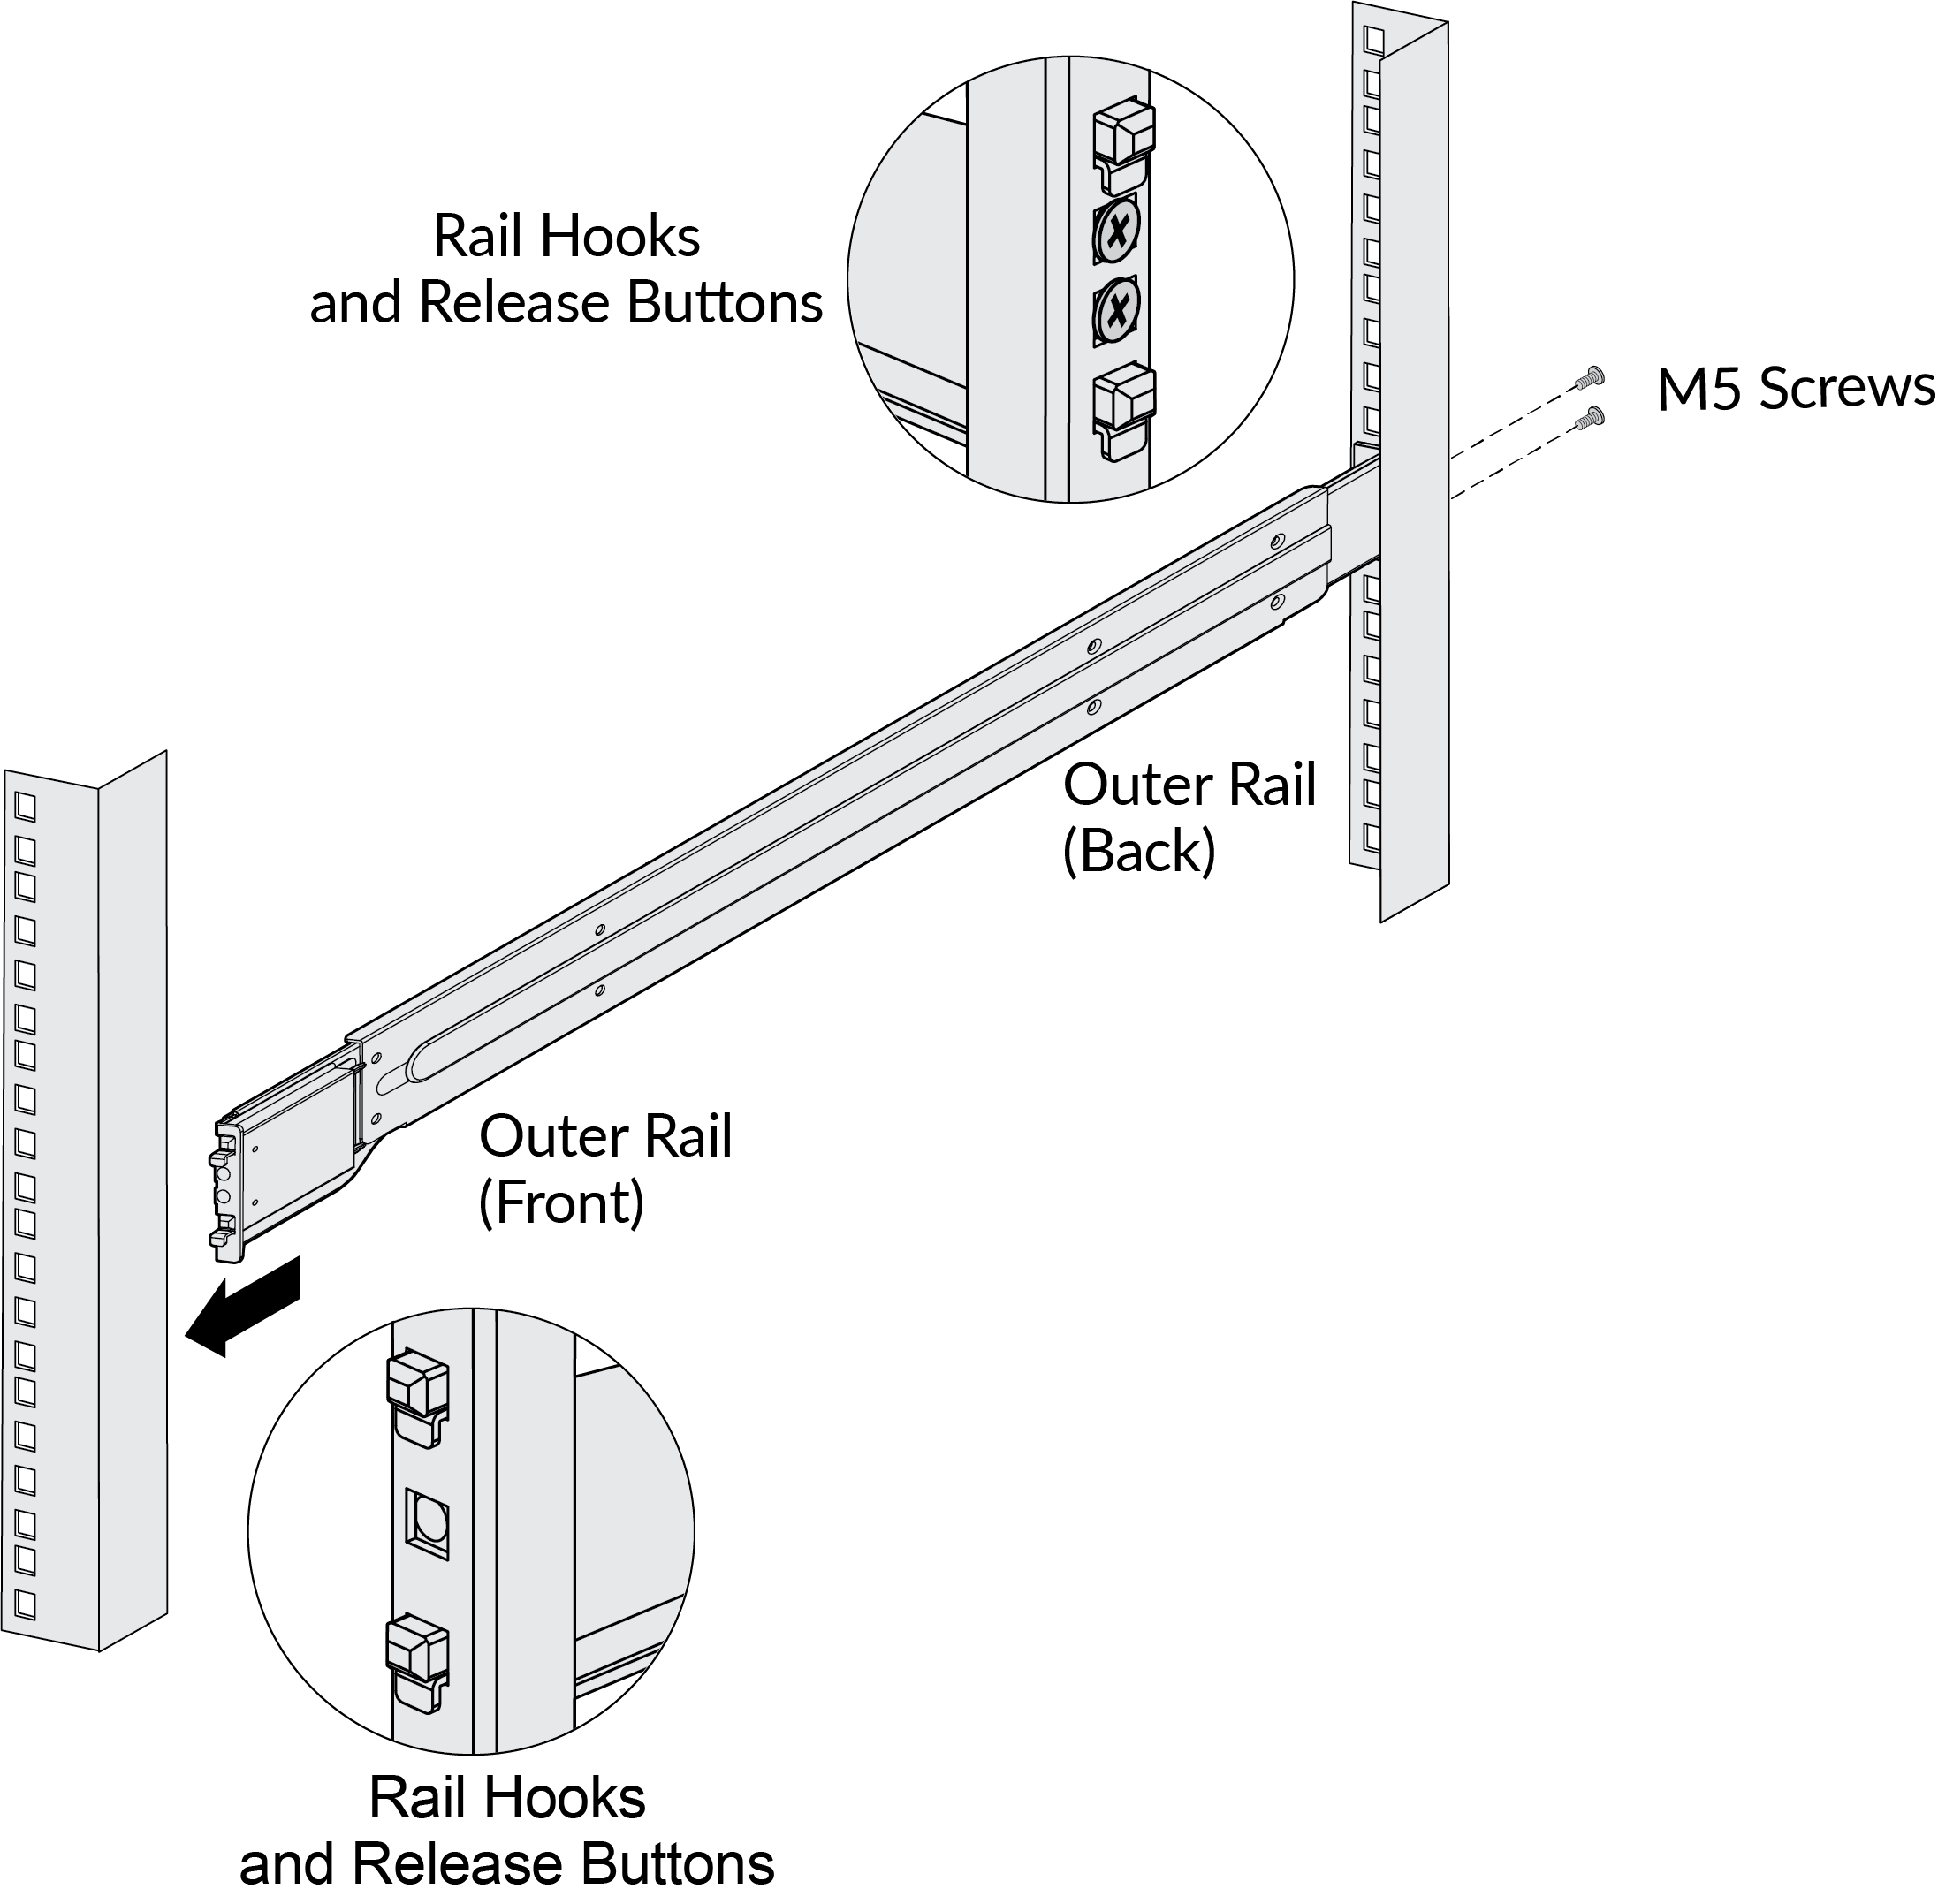
- Install one outer rack-mount rail to each side of the
equipment rack. Push the two rail hooks (on the front and back of
each rail) in to the square rack holes and push down to engage the
hooks. The release buttons located above each rail hook will depress
as you push the rail hooks in to the square holes. Secure the back
of each rail to the rack using two M5 screws (with washers) for
each rail. The following image shows the right side of the rack
if you are facing the front of the rack.
![]()
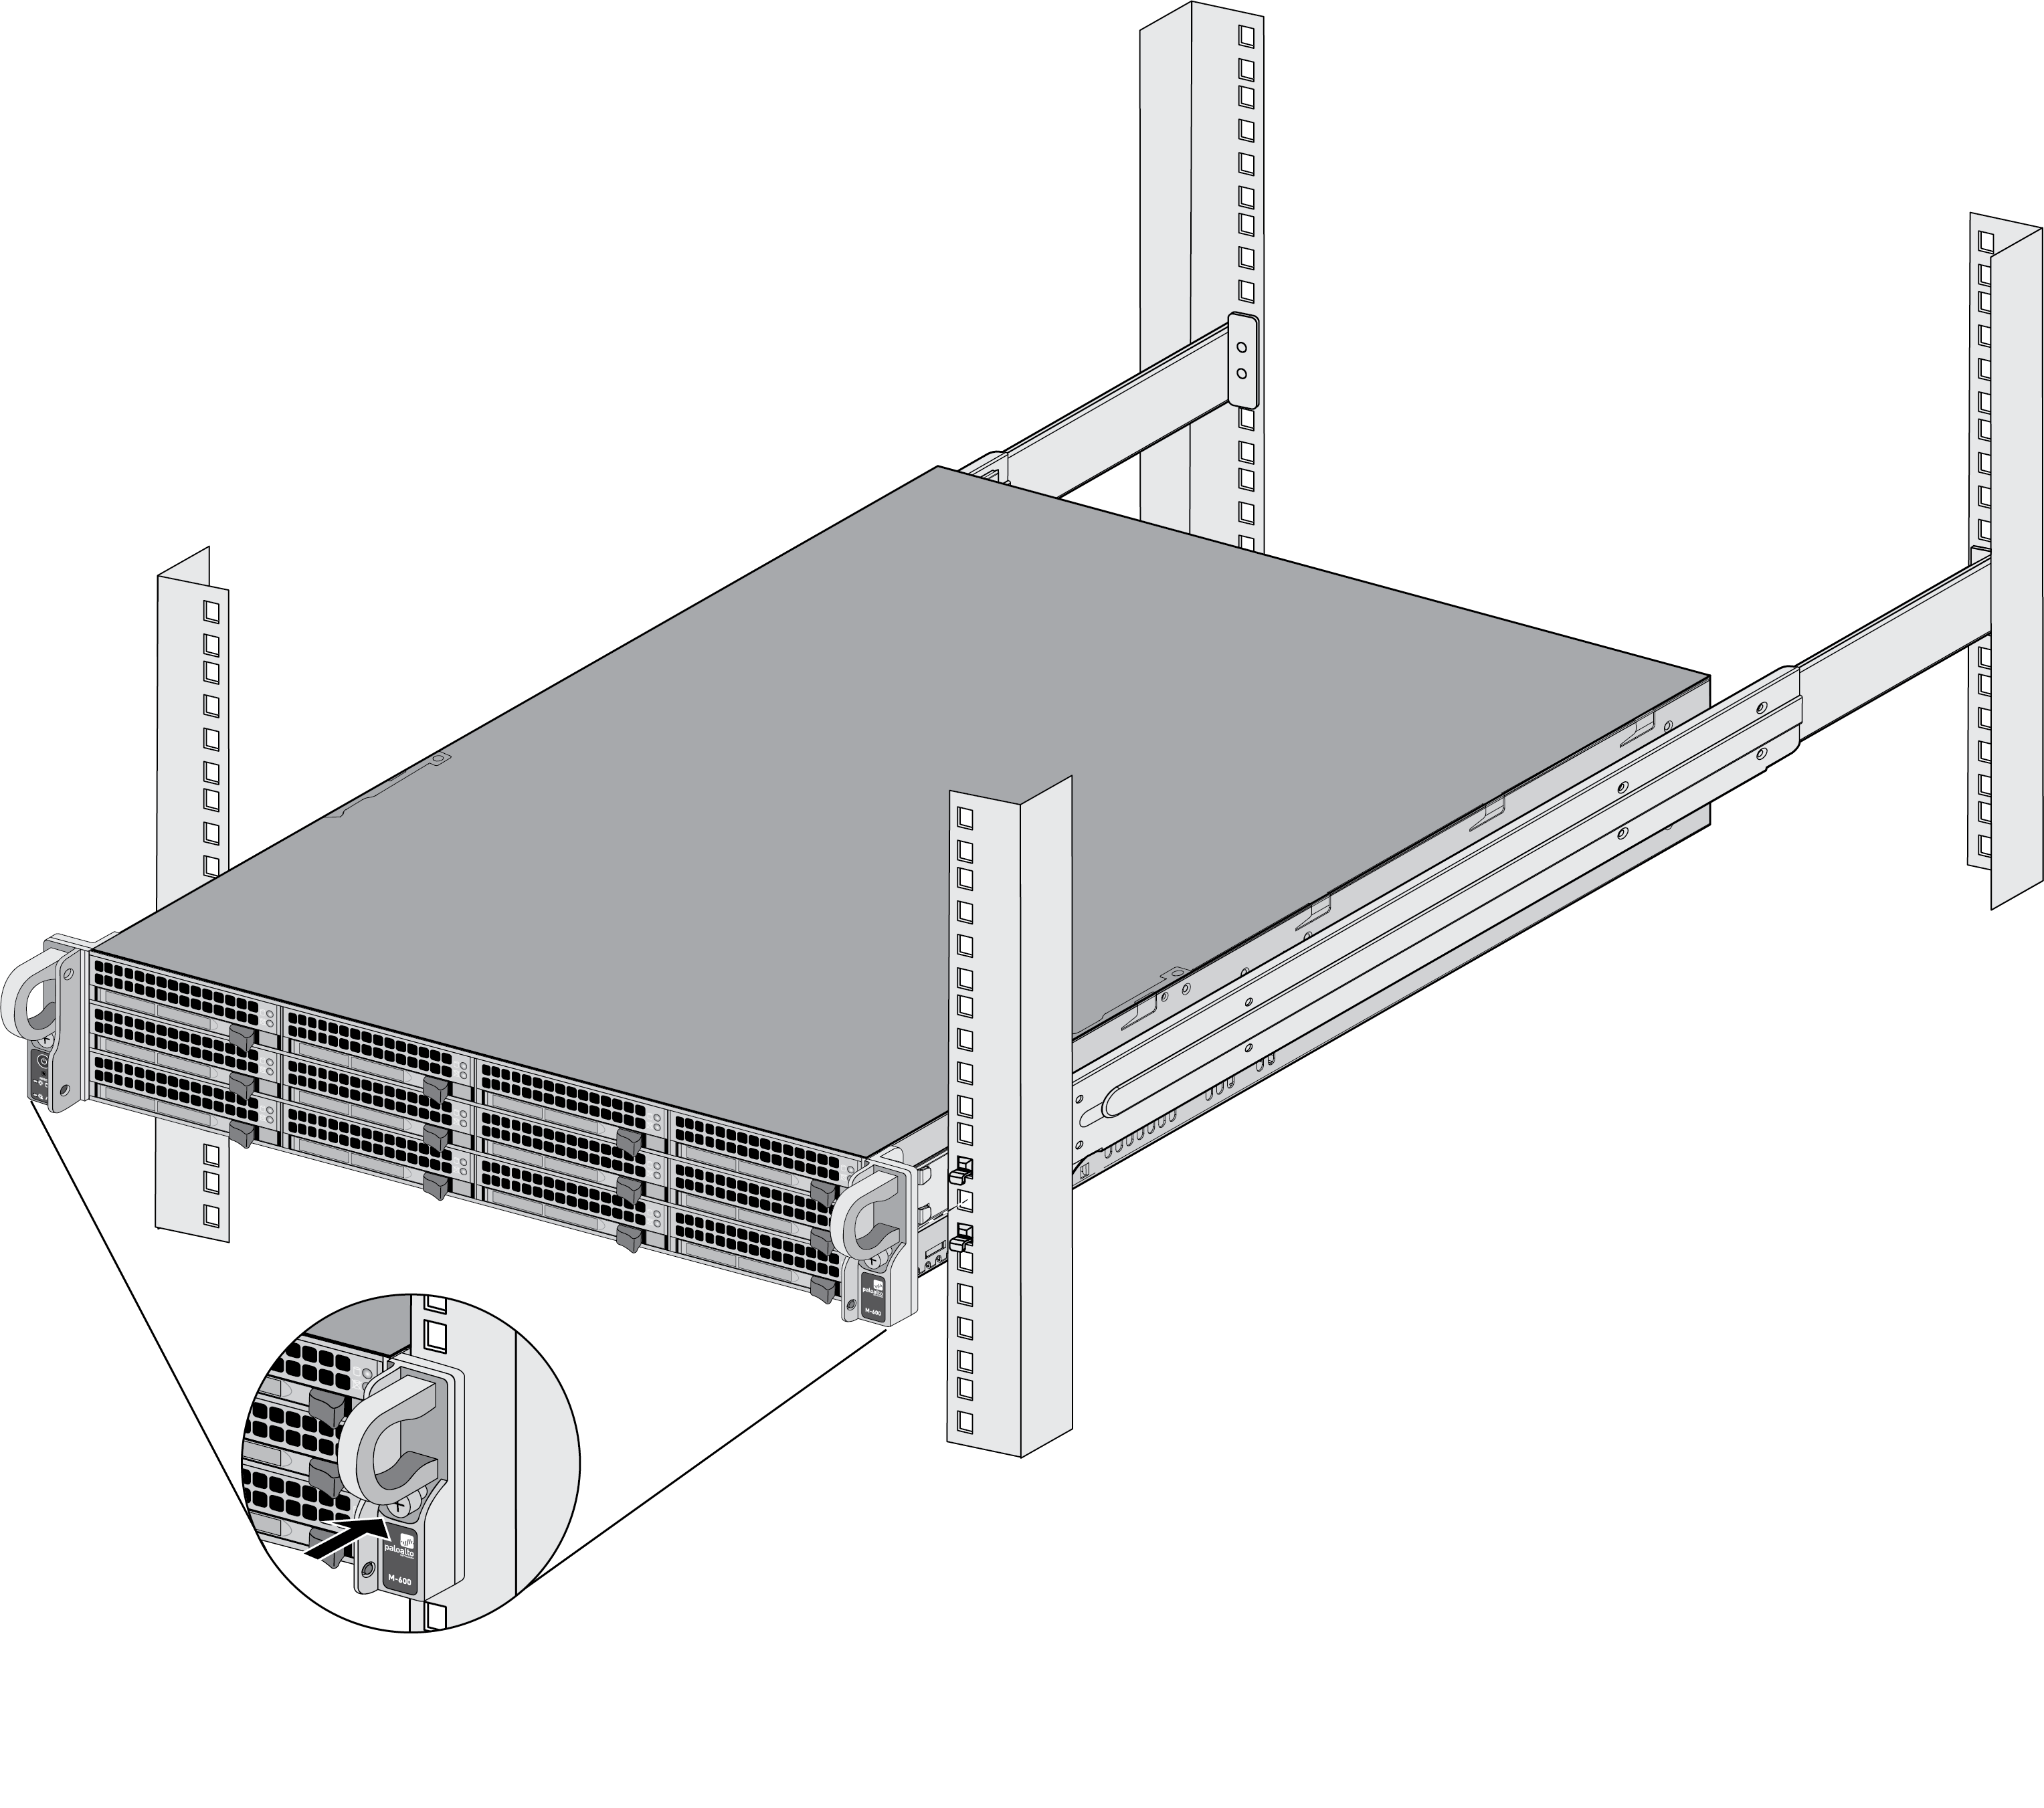
- Install the appliance in to the equipment rack by sliding
the inner-rails in to the outer rack-mount rails until the appliance
stops (about halfway in to the rack). Push the inner-rail release
clips on each side of the two rails to release the appliance and
then continue to slide the appliance in to the rack until the front
of the appliance is flush with the front of the rack. The inner-rail
release clips are shown in step 1.
![]()
- Secure the front of the appliance to the rack by turning the front thumb screws on each rail clockwise until tight.