Replace a Fan Tray on a PA-5200 Series Firewall
Table of Contents
Replace a Fan Tray on a PA-5200 Series Firewall
Learn how to replace the fan tray on a PA-5200 Series
firewall.
PA-5200 Series firewalls have two fan trays
and each fan tray contains four fans. If one fan on a fan tray fails,
the LED on the fan tray turns red. When this occurs, immediately
replace the fan tray to avoid service interruption. If two or more
fans fail on one or both fan trays, the firewall will shut down
and you must replace the failed fan tray(s) to restore functionality.You
can replace a fan tray while the firewall is powered on but you
must replace it within 45 seconds or the thermal protection circuit
automatically shuts down the firewall.
- Remove the replacement fan tray from the packaging.
- Identify the failed fan tray by viewing the LEDs. During a failure condition, the fan tray LED on the failed fan tray and the FANS LED on the front of the firewall show red.
- Remove the failed fan tray.
- Turn the two fan tray thumb screws counter-clockwise
until the screws stop. Earlier models will have four fan-tray thumb screws rather than two. The procedure for both setups is the same.
- Grasp the fan tray handle and pull the tray out of
the firewall.
![]()
- Turn the two fan tray thumb screws counter-clockwise
until the screws stop.
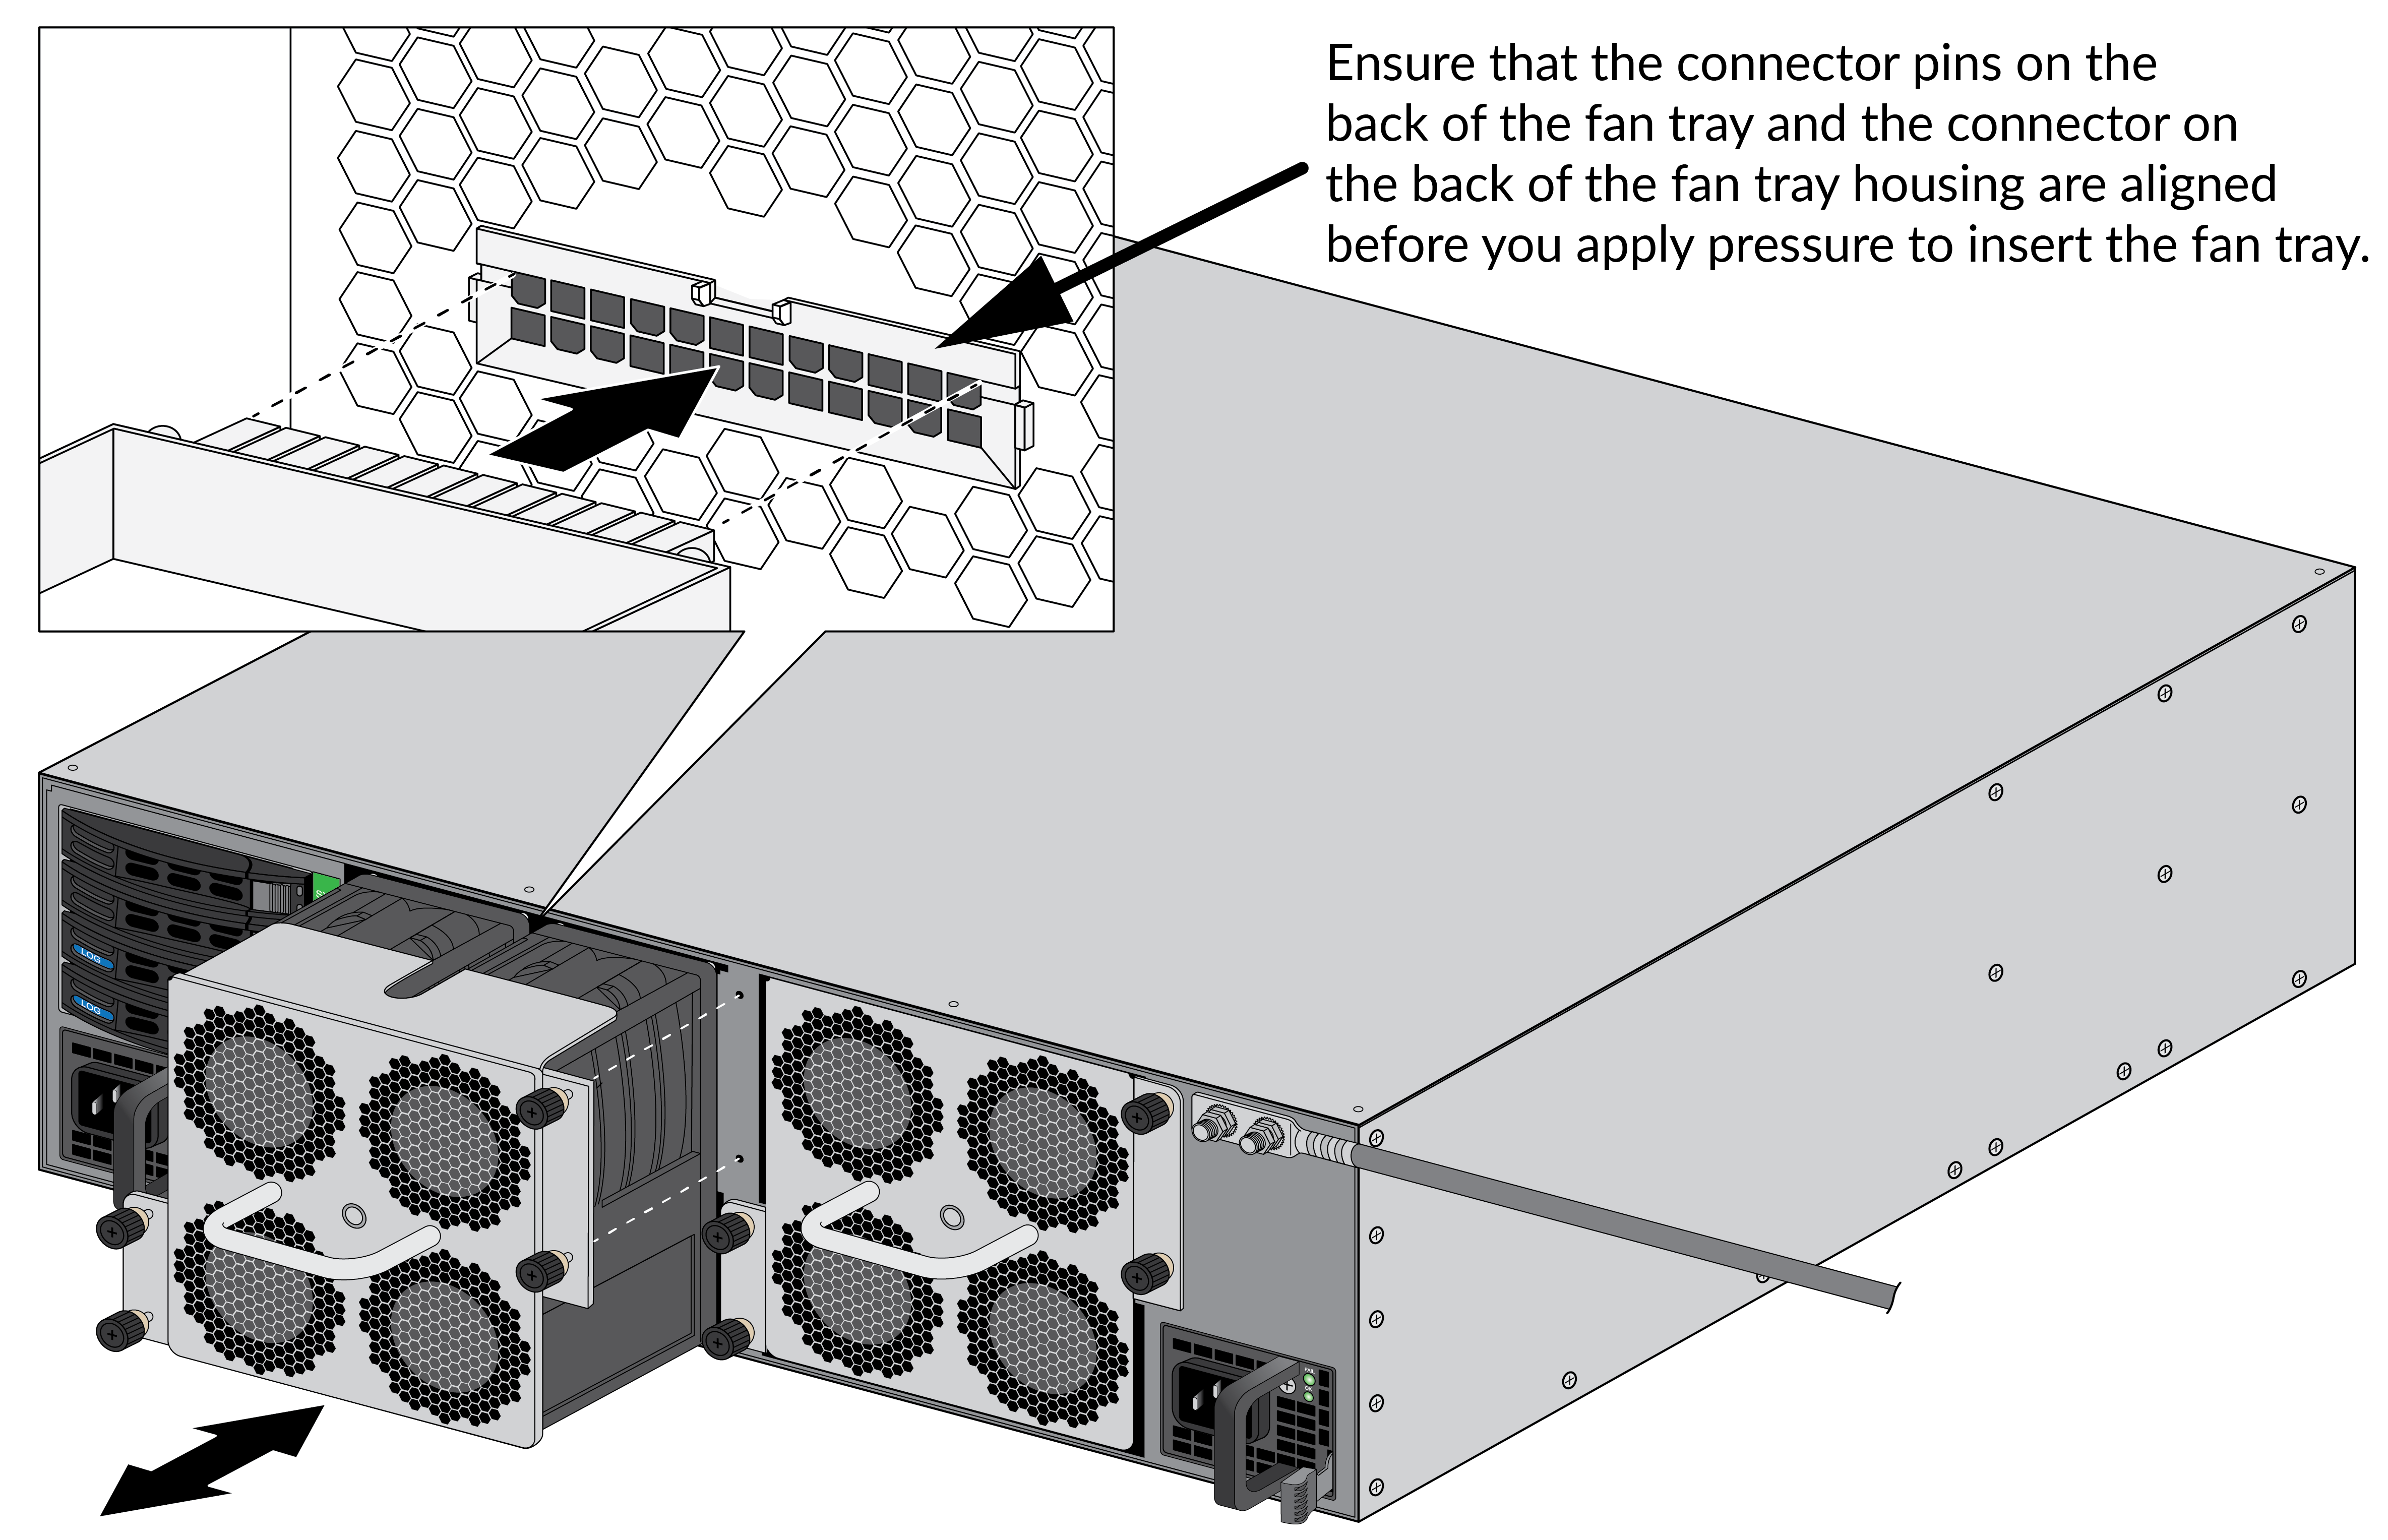
- Slide the replacement fan tray into the empty fan-tray
slot ensuring that the alignment grooves on the fan tray and the
fan-tray slot are aligned. Push the tray in until it seats and then
turn the four fan-tray thumb screws clockwise to secure the tray
to the firewall. The fan tray LED turns green and if there are no other failed fans, the FAN LED on the front of the firewall turns green.If the thermal protection circuit powered off the firewall due to overheating or fan failures, you need to disconnect and reconnect power. On an AC model, disconnect both power cords, wait five seconds, and then plug the cords back in. On a DC model, shut down the DC circuit that is providing power to the firewall, wait five seconds, and then restore the power.