Provision the VM-Series Firewall on a KVM Host
Table of Contents
Provision the VM-Series Firewall on a KVM Host
Use the following instructions to provision
the KVM host for the VM-Series firewall.
- Create a new virtual machine and add the VM-Series Firewall for KVM image to virt-mgr.
- On the Virt-manager, select Create a new virtual machine.Add a descriptive Name for the VM-Series firewall.
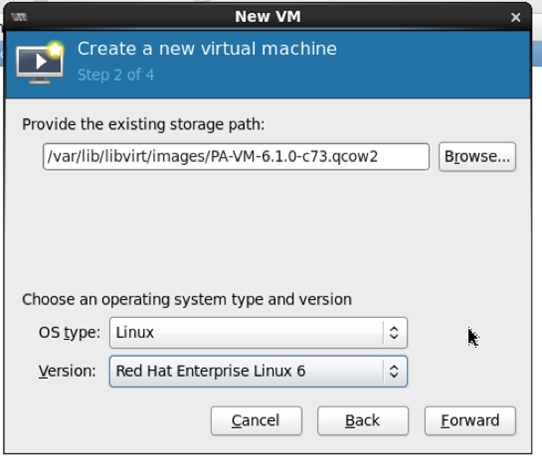
![]() Select Import existing disk image, browse to the image, and set the OS Type: Linux and Version: Red Hat Enterprise Linux 6.If you prefer, you can leave the OS Type and Version as Generic.
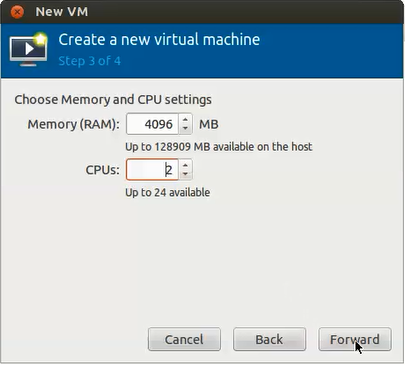
Select Import existing disk image, browse to the image, and set the OS Type: Linux and Version: Red Hat Enterprise Linux 6.If you prefer, you can leave the OS Type and Version as Generic.![]() To add network adapters for the data interfaces:Configure the memory and CPU settings.
To add network adapters for the data interfaces:Configure the memory and CPU settings.- Set the Memory to the minimum memory based on the VM-Series system requirements of your VM-Series model.Set CPU to the minimum CPUs based on the VM-Series System Requirements of your VM-Series model.
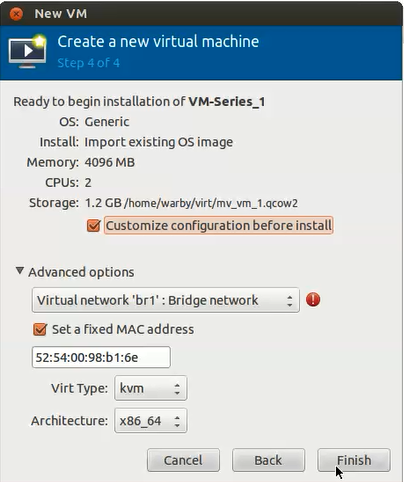
![]() Enable configuration customization and select the management interface bridge.
Enable configuration customization and select the management interface bridge.- Select Customize configuration before install.Under Advanced options, select the bridge for the management interface, and accept the default settings.
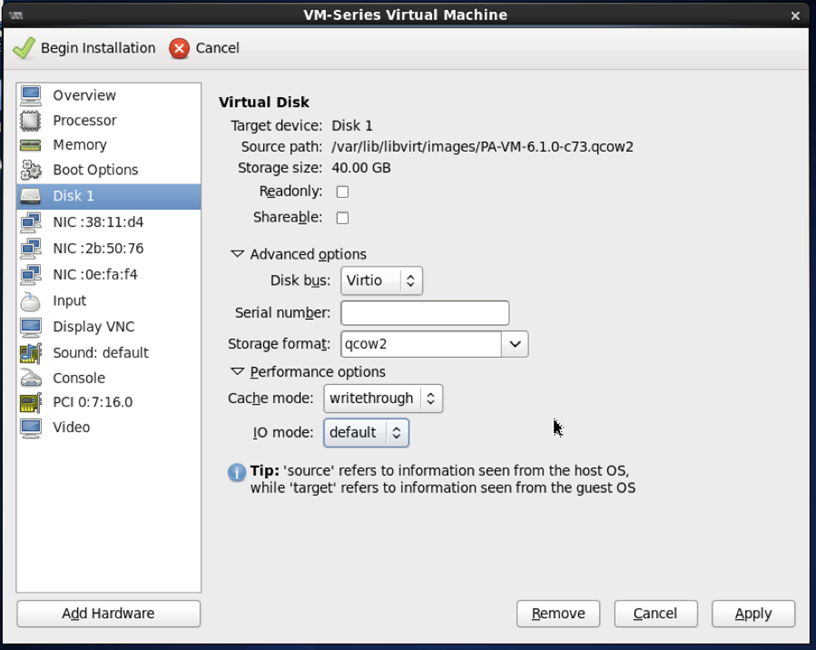
![]() Configure virtual disk settings.
Configure virtual disk settings.- Select Disk, expand Advanced options and select Storage format — qcow2; Disk Bus—Virtio or IDE, based on your set up.If you want to use a SCSI disk bus, see Enable the Use of a SCSI Controller.Expand Performance options, and set Cache mode to writethrough. This setting improves installation time and execution speed on the VM-Series firewall.
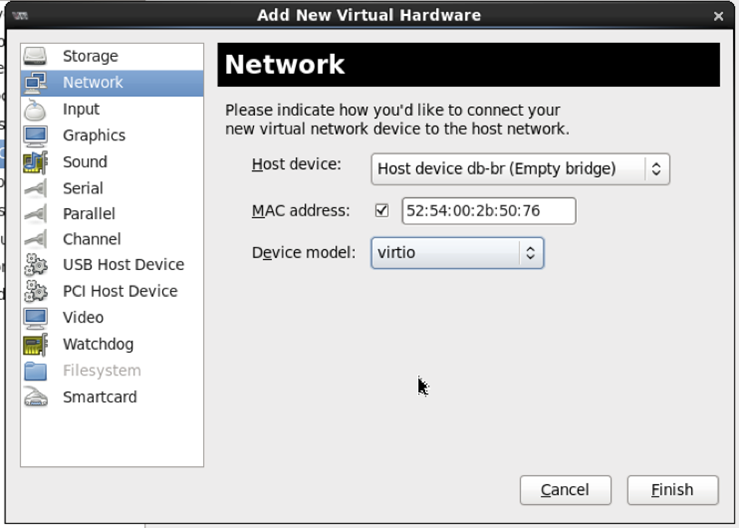
![]() Configure network adapters.
Configure network adapters.- Select Add Hardware > Network if you are using a software bridge such as the Linux bridge or the Open vSwitch.For Host Device, enter the name of the bridge or select it from the drop down list.To specify the driver, set Device Model to e-1000 or virtio. These are the only supported virtual interface types.
![]() Select Add Hardware > PCI Host Device for PCI-passthrough or an SR-IOV capable device.
Select Add Hardware > PCI Host Device for PCI-passthrough or an SR-IOV capable device.![]() In the Host Device list, select the interface on the card or the virtual function.Click Apply or Finish.Click Begin Installation. Wait 5-7 minutes for the installation to complete.
In the Host Device list, select the interface on the card or the virtual function.Click Apply or Finish.Click Begin Installation. Wait 5-7 minutes for the installation to complete.![]() By default, the XML template for the VM-Series firewall is created and stored at etc/libvirt/qemu.
By default, the XML template for the VM-Series firewall is created and stored at etc/libvirt/qemu.![]() (Optional) Bootstrap the VM-Series firewallIf you are using bootstrapping to perform the configuration of your VM-Series firewall on KVM, refer to Bootstrap the VM-Series Firewall on KVM. For more information about bootstrapping, see Bootstrap the VM-Series Firewall.Configure the network access settings for the management interface.
(Optional) Bootstrap the VM-Series firewallIf you are using bootstrapping to perform the configuration of your VM-Series firewall on KVM, refer to Bootstrap the VM-Series Firewall on KVM. For more information about bootstrapping, see Bootstrap the VM-Series Firewall.Configure the network access settings for the management interface.- Open a connection to the console.Log into the firewall with username/password: admin/admin.Enter configuration mode with the following command:
configureUse the following commands to configure the management interface:set deviceconfig system type staticset deviceconfig system ip-address <Firewall-IP> netmask <netmask> default-gateway <gateway-IP> dns-setting servers primary <DNS-IP>where <Firewall-IP> is the IP address you want to assign to the management interface, <netmask> is the subnet mask, <gateway-IP> is the IP address of the network gateway, and <DNS-IP> is the IP address of the DNS server.commit
Verify which ports on the host are mapped to the interfaces on the VM-Series firewall. In order to verify the order of interfaces on the Linux host, see Verify PCI-ID for Ordering of Network Interfaces on the VM-Series Firewall.To make sure that traffic is handled by the correct interface, use the following command to identify which ports on the host are mapped to the ports on the VM-Series firewall.admin@PAN-VM> debug show vm-series interfaces all Phoenix_interface Base-OS_port Base-OS_MAC PCI-ID mgt eth0 52:54:00:d7:91:52 0000:00:03.0 Ethernet1/1 eth1 52:54:00:fe:8c:80 0000:00:06.0 Ethernet1/2 eth2 0e:c6:6b:b4:72:06 0000:00:07.0 Ethernet1/3 eth3 06:1b:a5:7e:a5:78 0000:00:08.0 Ethernet1/4 eth4 26:a9:26:54:27:a1 0000:00:09.0 Ethernet1/5 eth5 52:54:00:f4:62:13 0000:00:10.2Access the web interface of the VM-Series firewall and configure the interfaces and define security rules and NAT rules to safely enable the applications that you want to secure.Refer to the PAN-OS Administrator’s Guide.