Create Cloud Identity Engine Tenants
Table of Contents
Expand all | Collapse all
-
- Cloud Identity Engine Attributes
- Collect Custom Attributes with the Cloud Identity Engine
- View Directory Data
- Cloud Identity Engine User Context
- Create a Cloud Dynamic User Group
- Configure Third-Party Device-ID
- Configure an IP Tag Cloud Connection
- View Mappings and Tags
- Configure Dynamic Privilege Access in the Cloud Identity Engine
- Send Cortex XDR Risk Signals to Okta
- Configure SSF Okta Receiver as a Risk Connection
- Configure the Secrets Vault
-
- Set Up Password Authentication
-
- Configure Azure as an IdP in the Cloud Identity Engine
- Configure Okta as an IdP in the Cloud Identity Engine
- Configure PingOne as an IdP in the Cloud Identity Engine
- Configure PingFederate as an IdP in the Cloud Identity Engine
- Configure Google as an IdP in the Cloud Identity Engine
- Configure a SAML 2.0-Compliant IdP in the Cloud Identity Engine
- Set Up a Client Certificate
- Configure an OIDC Authentication Type
- Set Up an Authentication Profile
- Configure Cloud Identity Engine Authentication on the Firewall or Panorama
- Configure the Cloud Identity Engine as a Mapping Source on the Firewall or Panorama
- Configure Dynamic Privilege Access in the Cloud Identity Engine
- Get Help
Create Cloud Identity Engine Tenants
Learn how to use tenants to isolate directory data or
to allow apps to access different directory data.
If you want to isolate your directory data,
or allow different Palo Alto Networks cloud applications and services
to access different sets of directory data, you can create multiple
Cloud Identity Engine tenants in the hub.
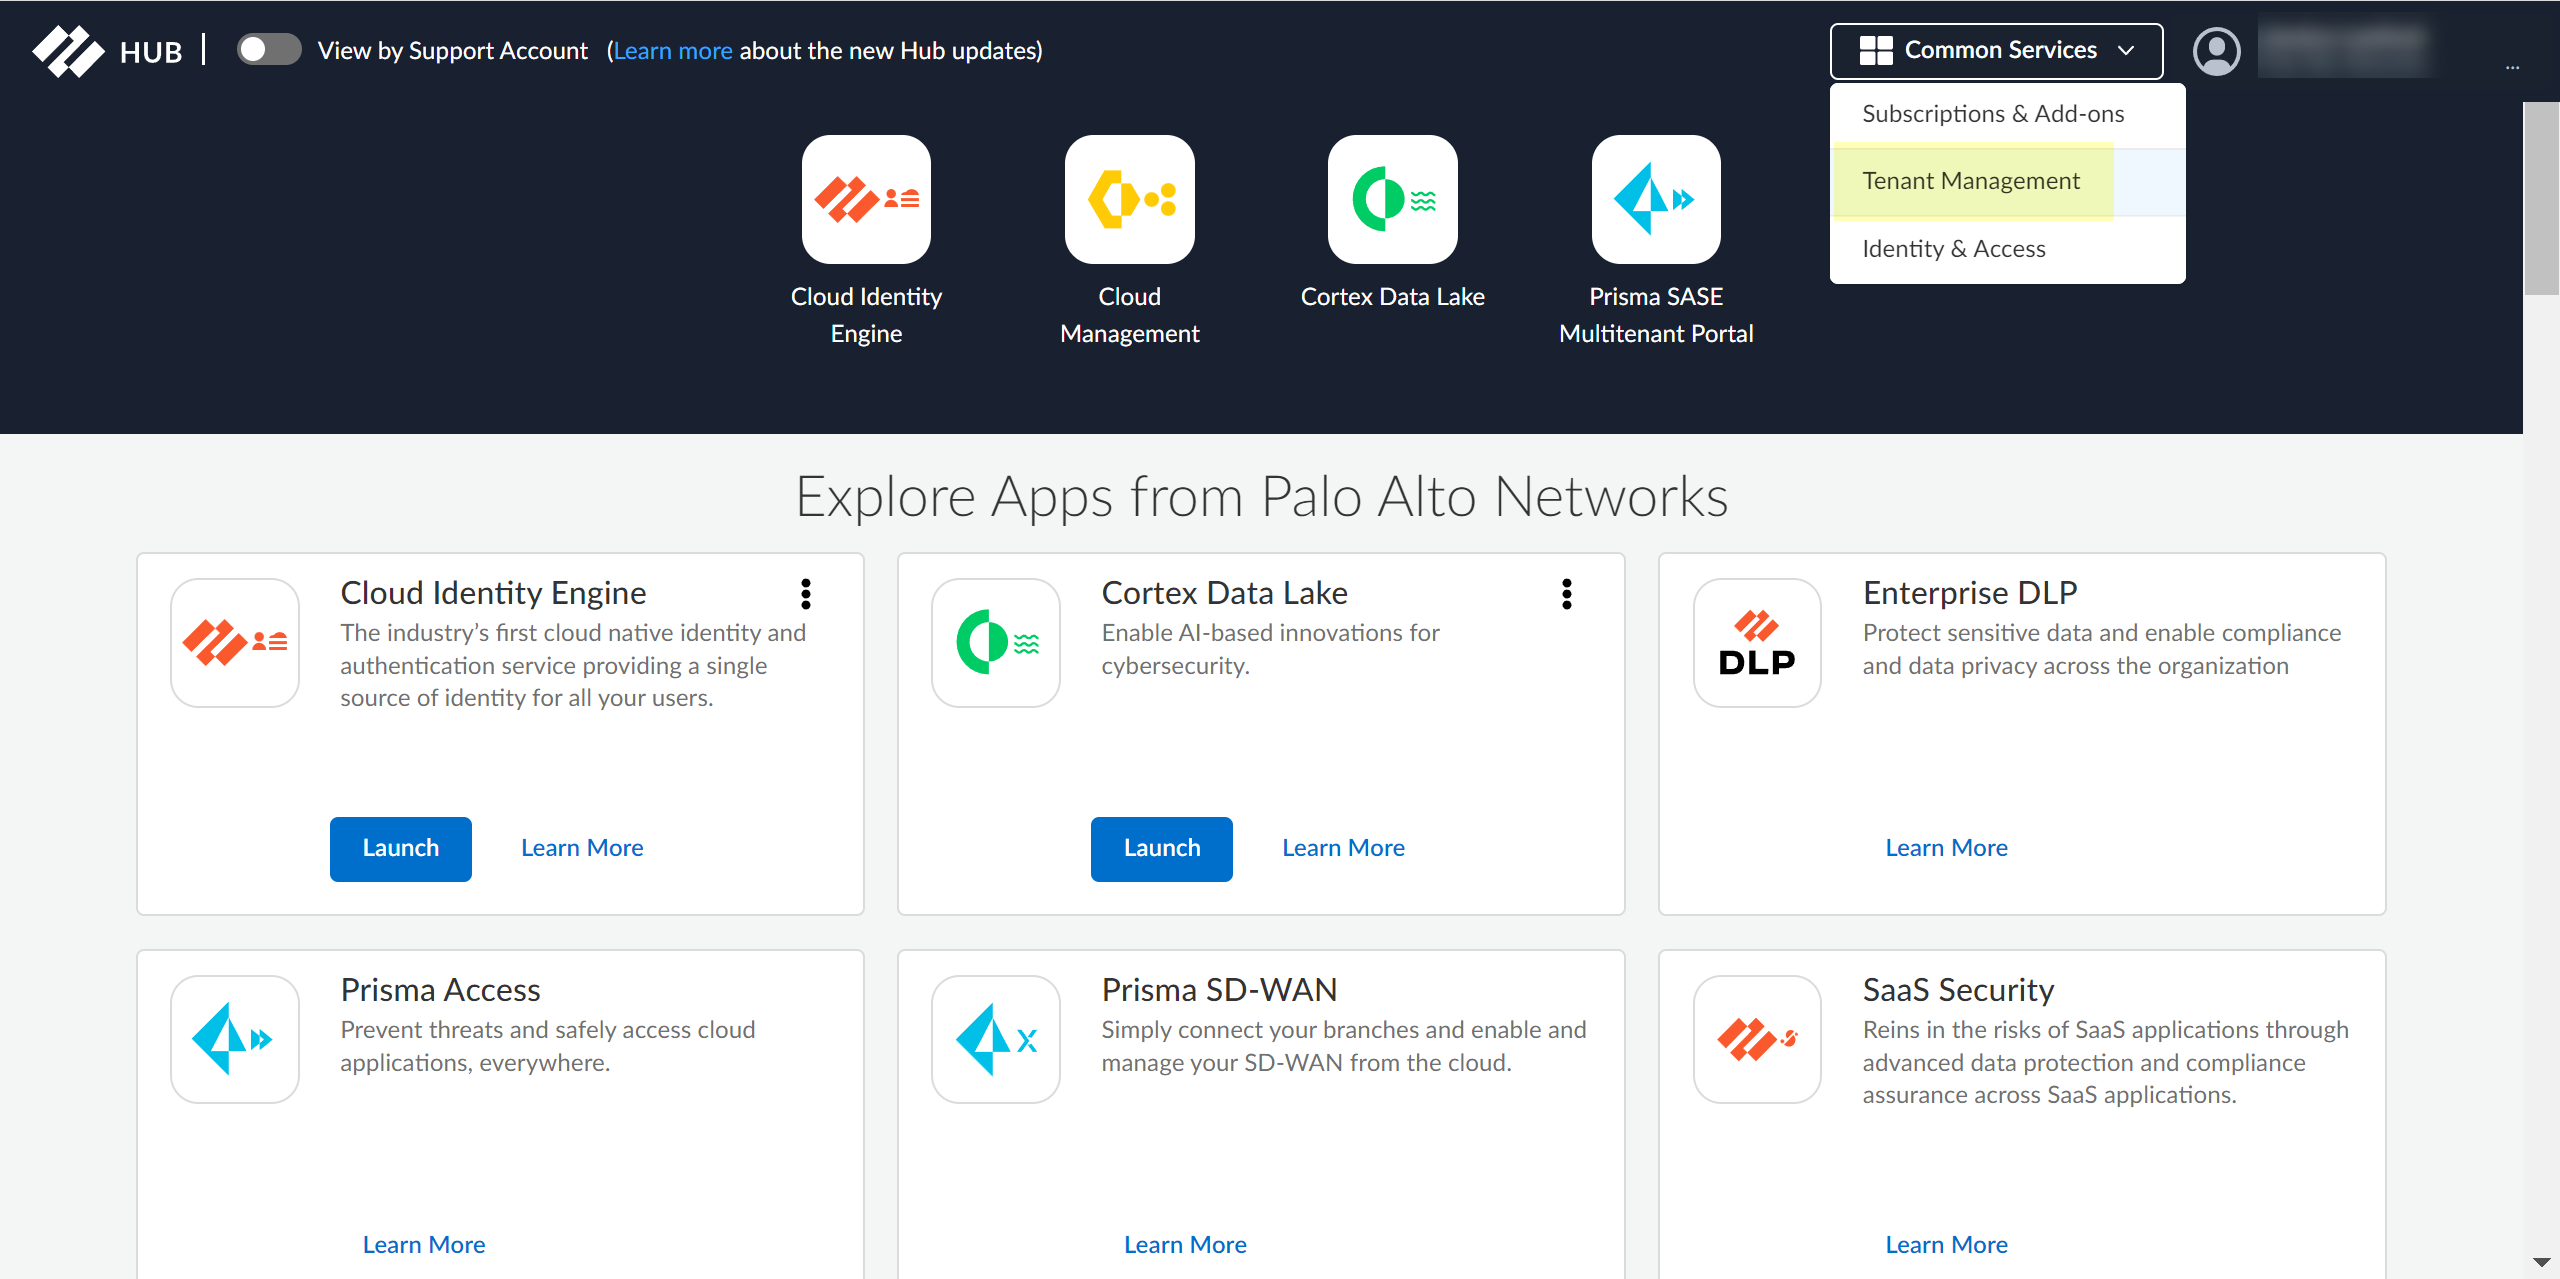
- Log in to the hub.Select Tenant Management.
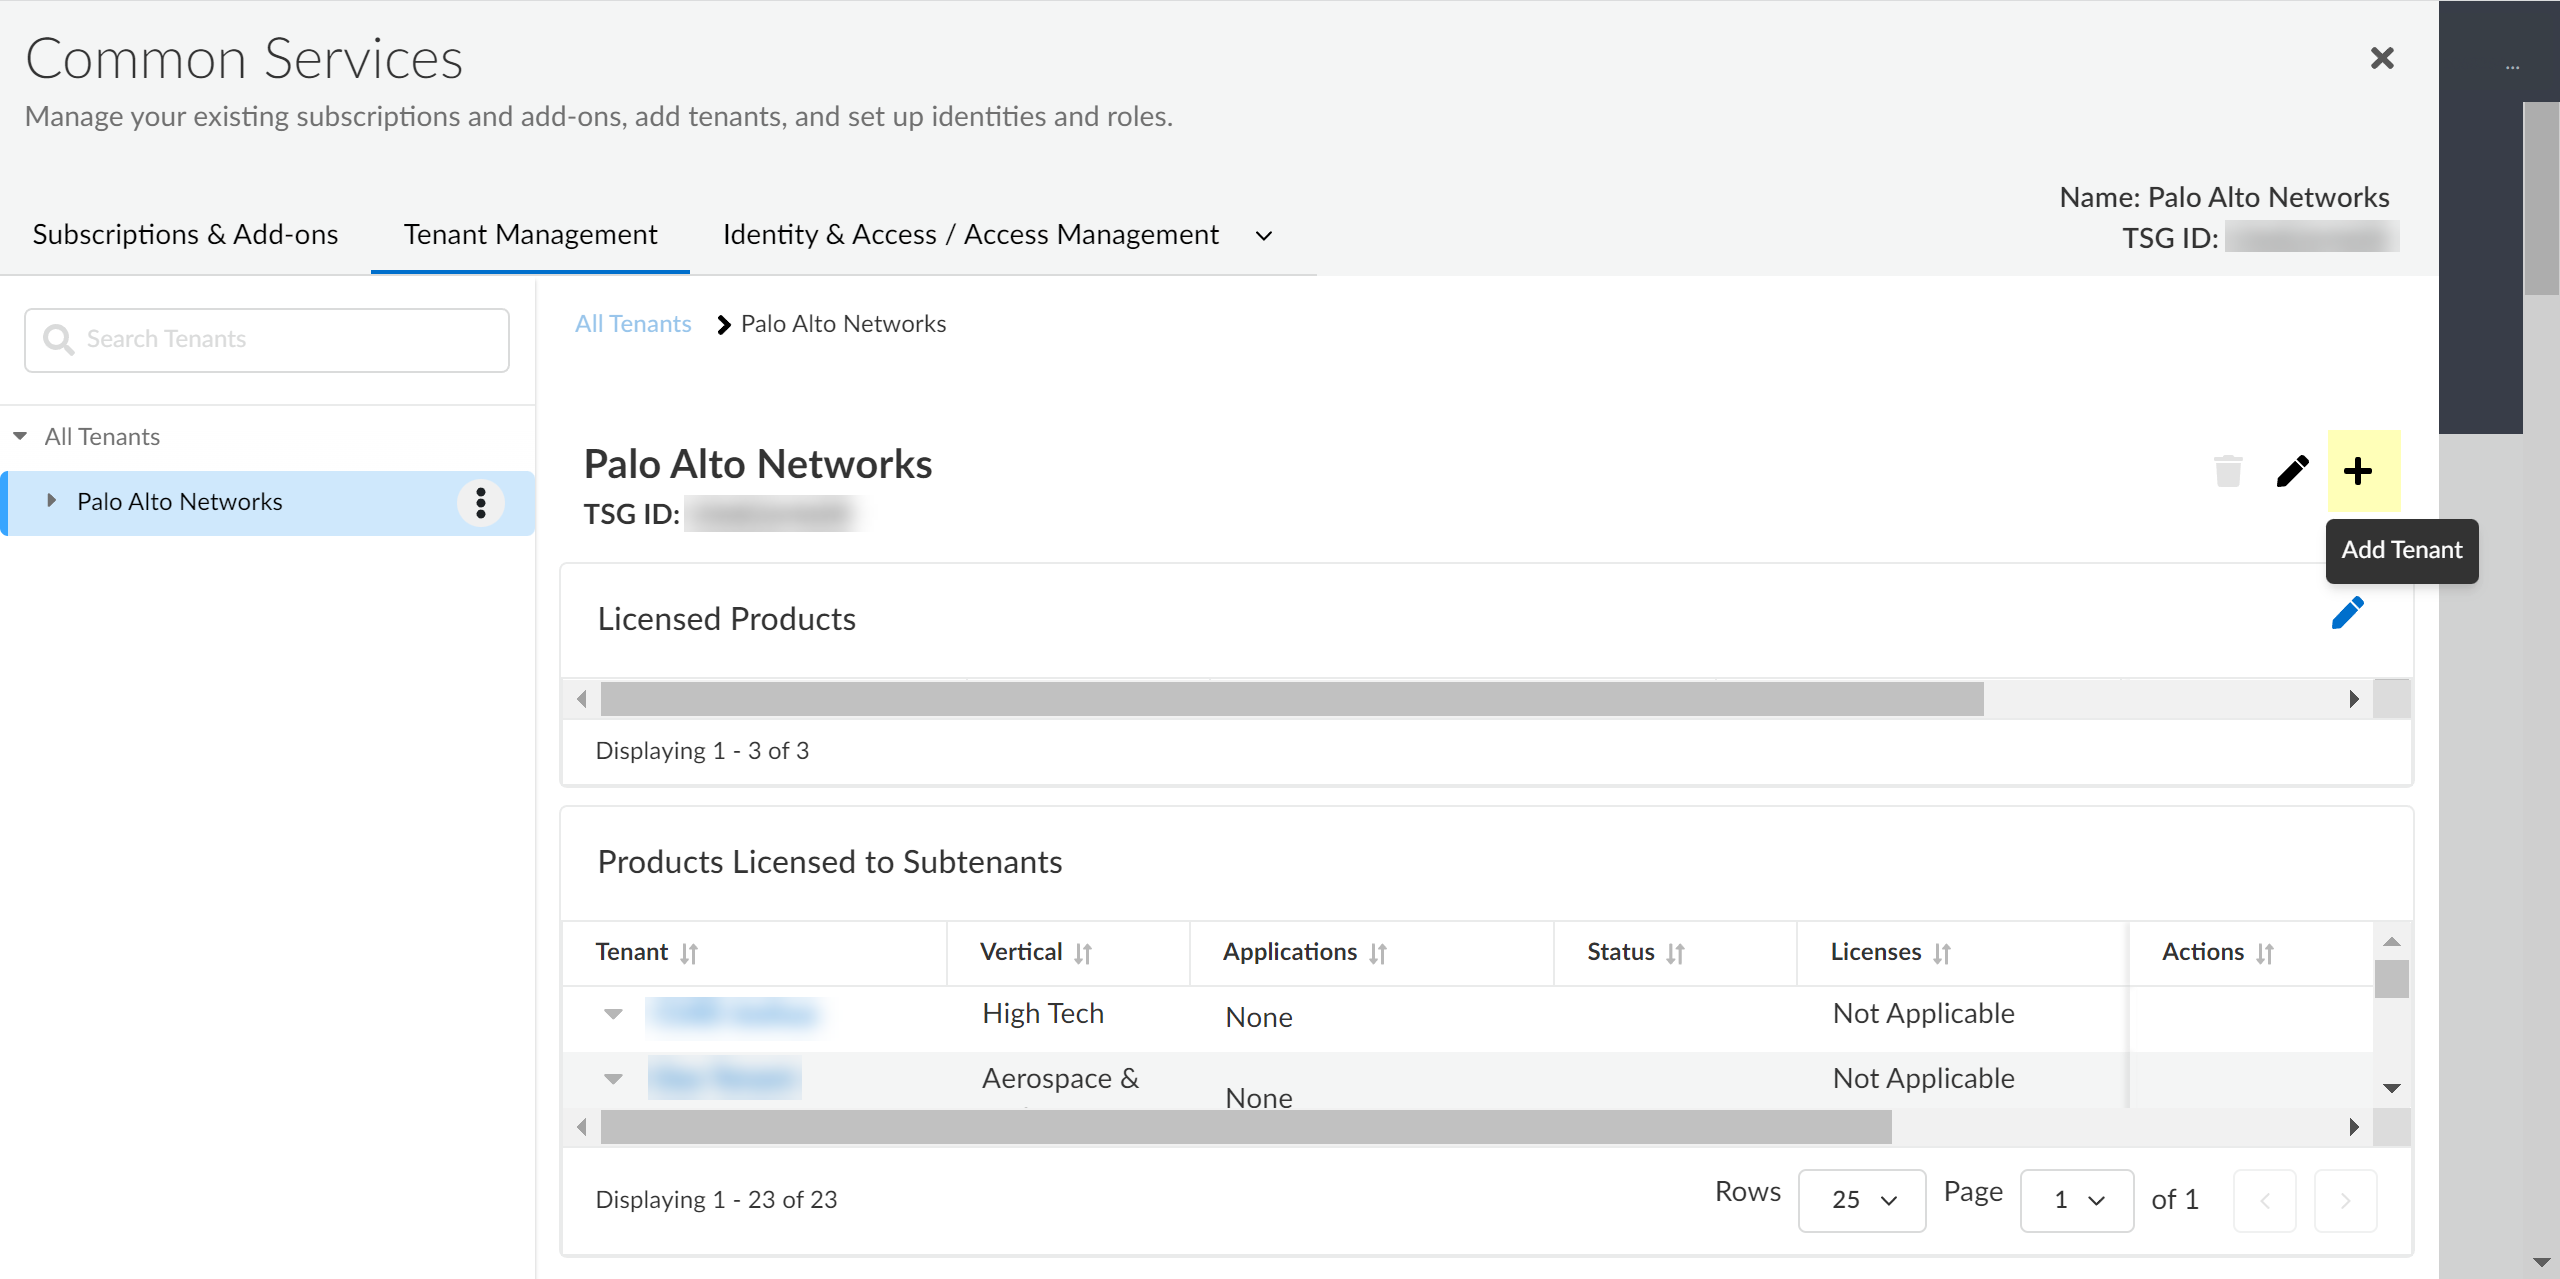
![]() Select Add Tenant.
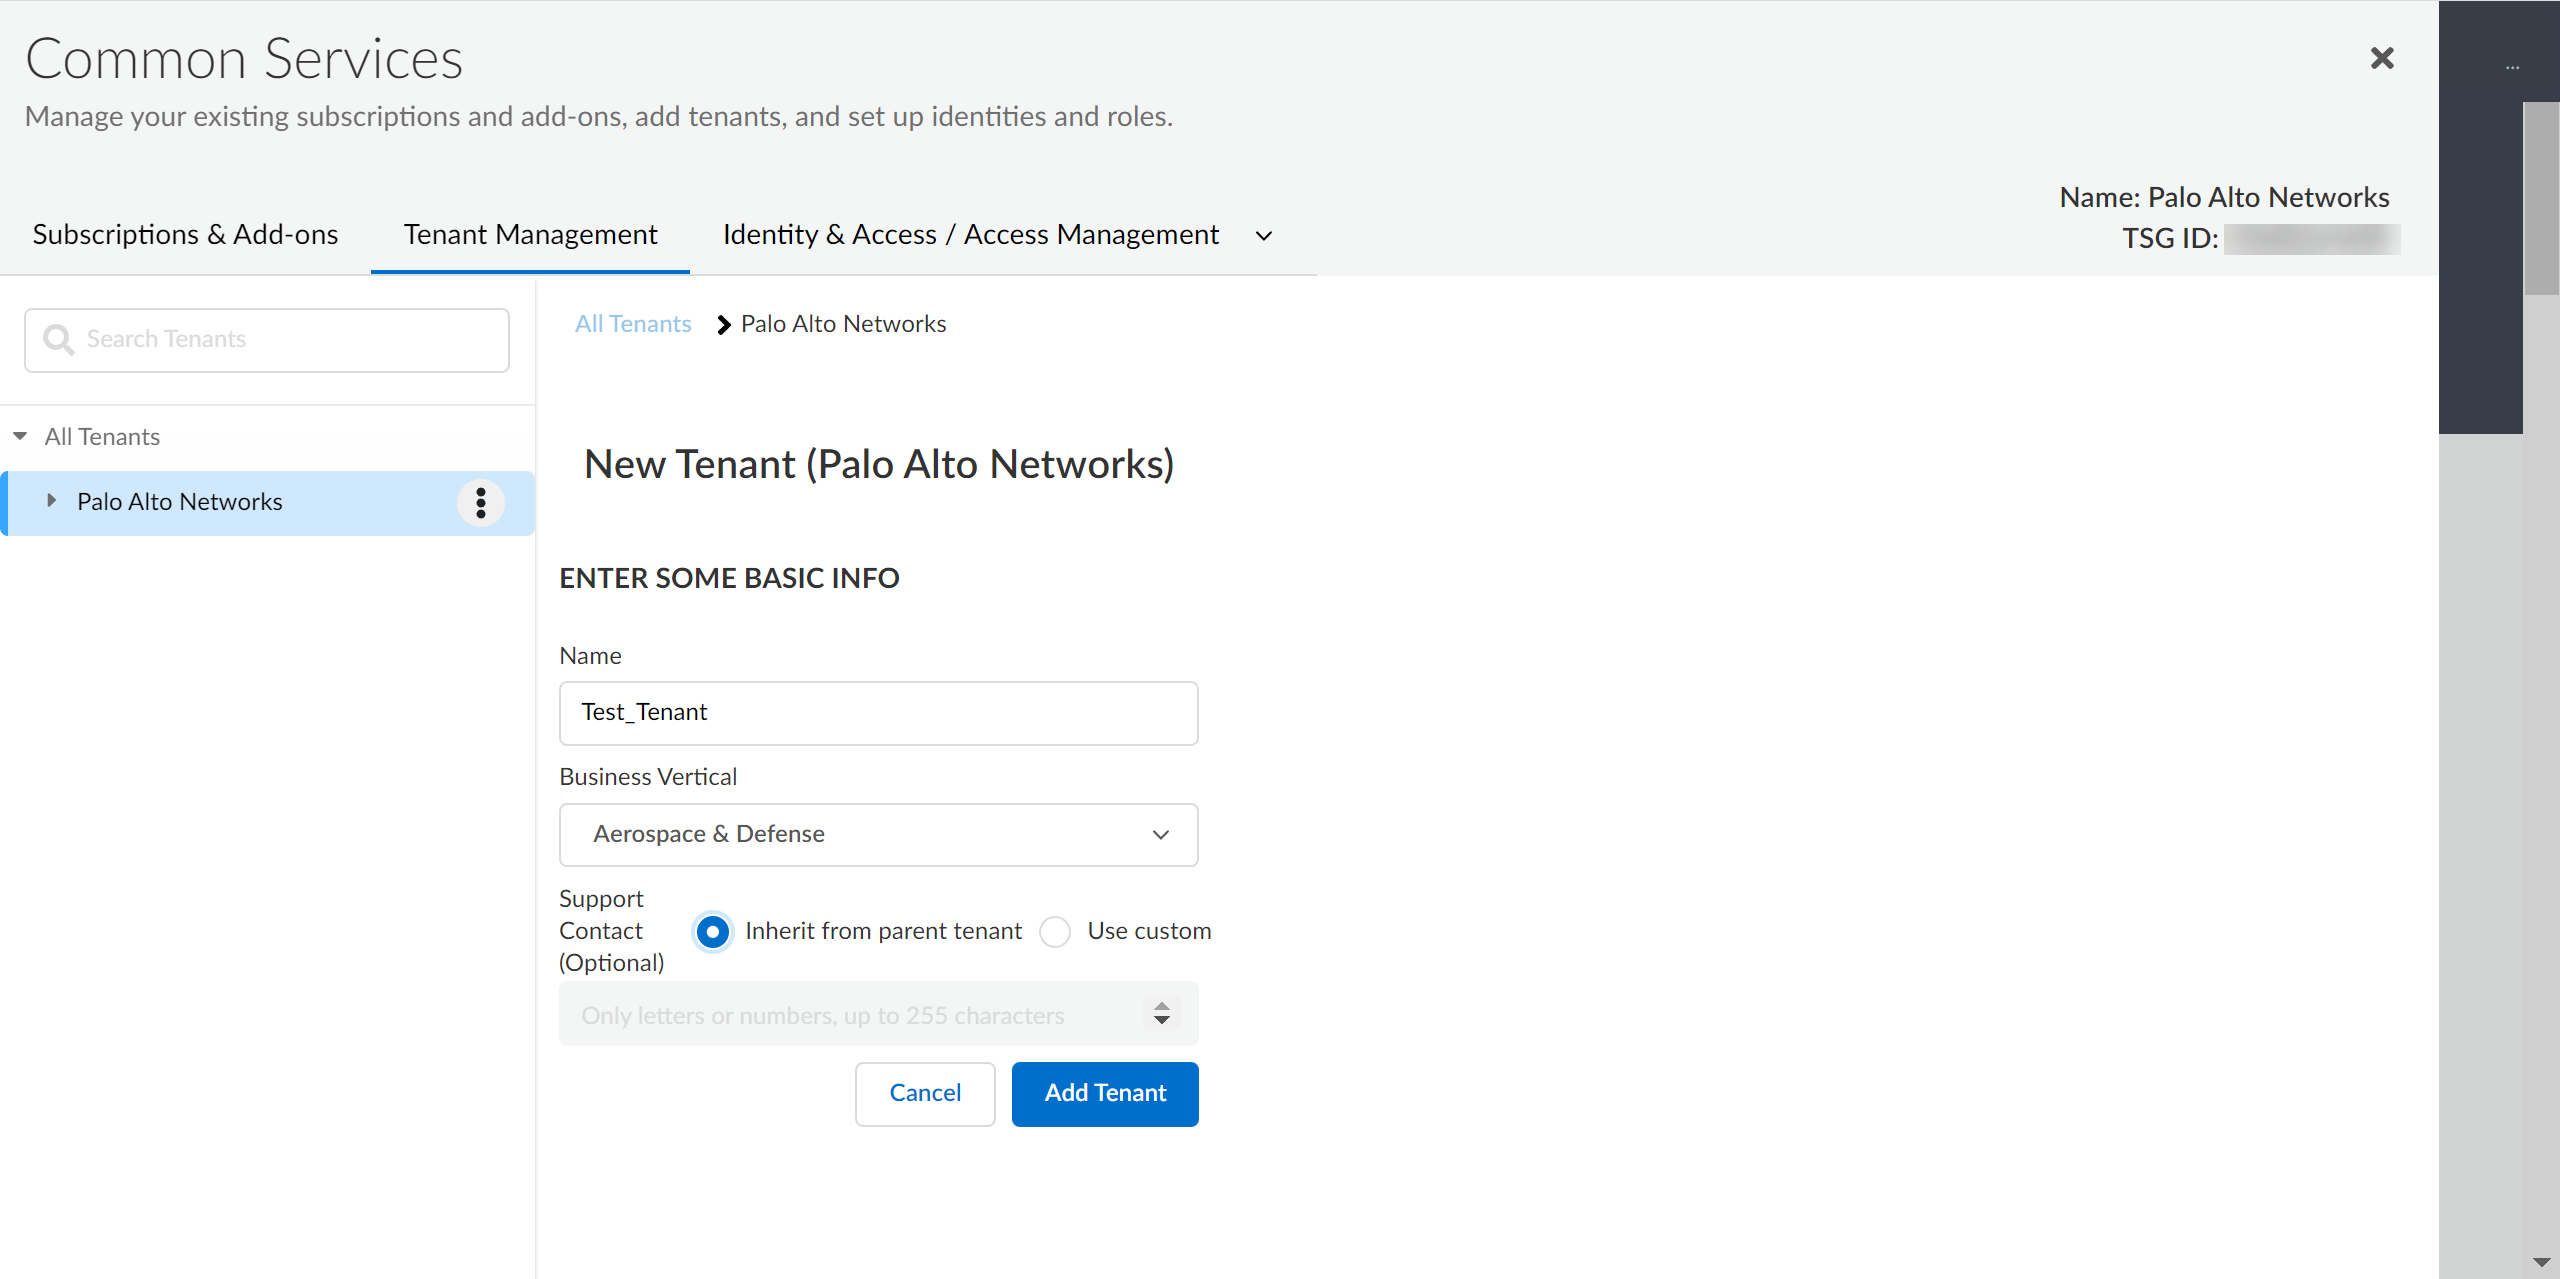
Select Add Tenant.![]() Enter a Name for the tenant and select a Business Vertical.
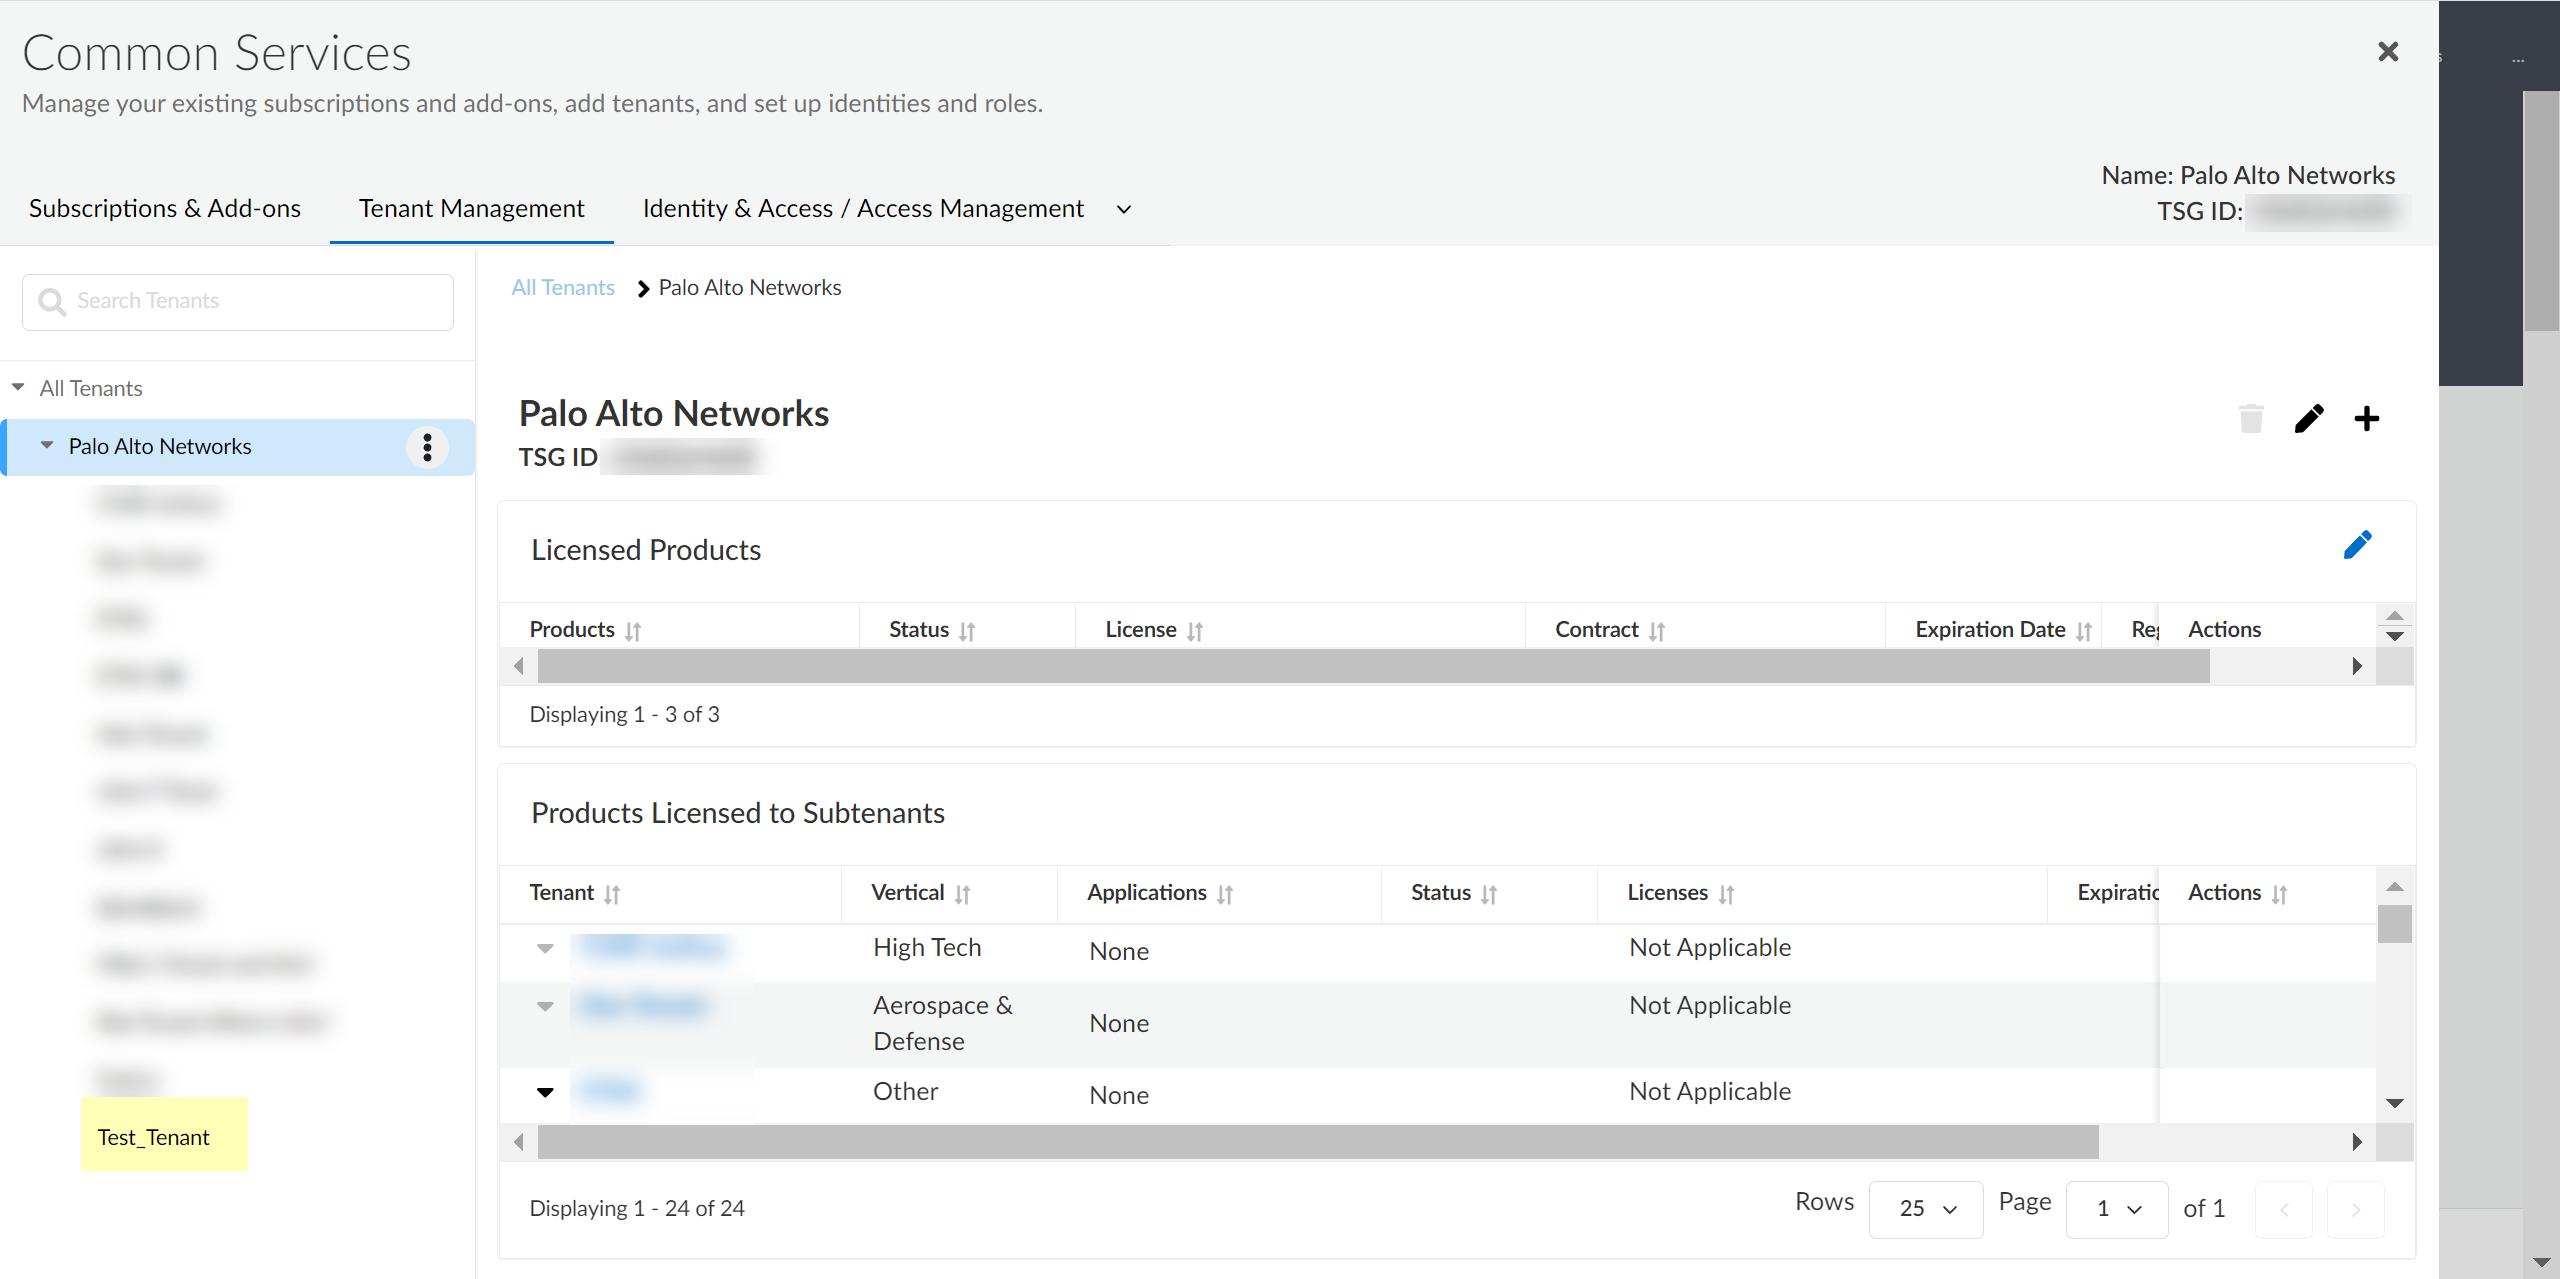
Enter a Name for the tenant and select a Business Vertical.![]() (Optional) To enter custom support contact information, select Use custom and enter the contact information.You can enter up to 255 alphanumeric characters.Click Add Tenant.The Hub lists new tenants at the bottom of the list of tenants.
(Optional) To enter custom support contact information, select Use custom and enter the contact information.You can enter up to 255 alphanumeric characters.Click Add Tenant.The Hub lists new tenants at the bottom of the list of tenants.![]()


