Rename Cloud Identity Engine Tenants
Table of Contents
Expand all | Collapse all
-
- Cloud Identity Engine Attributes
- Collect Custom Attributes with the Cloud Identity Engine
- View Directory Data
- Cloud Identity Engine User Context
- Create a Cloud Dynamic User Group
- Configure Third-Party Device-ID
- Configure an IP Tag Cloud Connection
- View Mappings and Tags
- Configure Dynamic Privilege Access in the Cloud Identity Engine
- Send Cortex XDR Risk Signals to Okta
- Configure SSF Okta Receiver as a Risk Connection
- Configure the Secrets Vault
-
- Set Up Password Authentication
-
- Configure Azure as an IdP in the Cloud Identity Engine
- Configure Okta as an IdP in the Cloud Identity Engine
- Configure PingOne as an IdP in the Cloud Identity Engine
- Configure PingFederate as an IdP in the Cloud Identity Engine
- Configure Google as an IdP in the Cloud Identity Engine
- Configure a SAML 2.0-Compliant IdP in the Cloud Identity Engine
- Set Up a Client Certificate
- Configure an OIDC Authentication Type
- Set Up an Authentication Profile
- Configure Cloud Identity Engine Authentication on the Firewall or Panorama
- Configure the Cloud Identity Engine as a Mapping Source on the Firewall or Panorama
- Configure Dynamic Privilege Access in the Cloud Identity Engine
- Get Help
Rename Cloud Identity Engine Tenants
Learn how to rename Cloud Identity Engine tenants.
If you want to change the name of a Cloud
Identity Engine tenant after you create it, you can rename it in
the Cloud Identity Engine app.
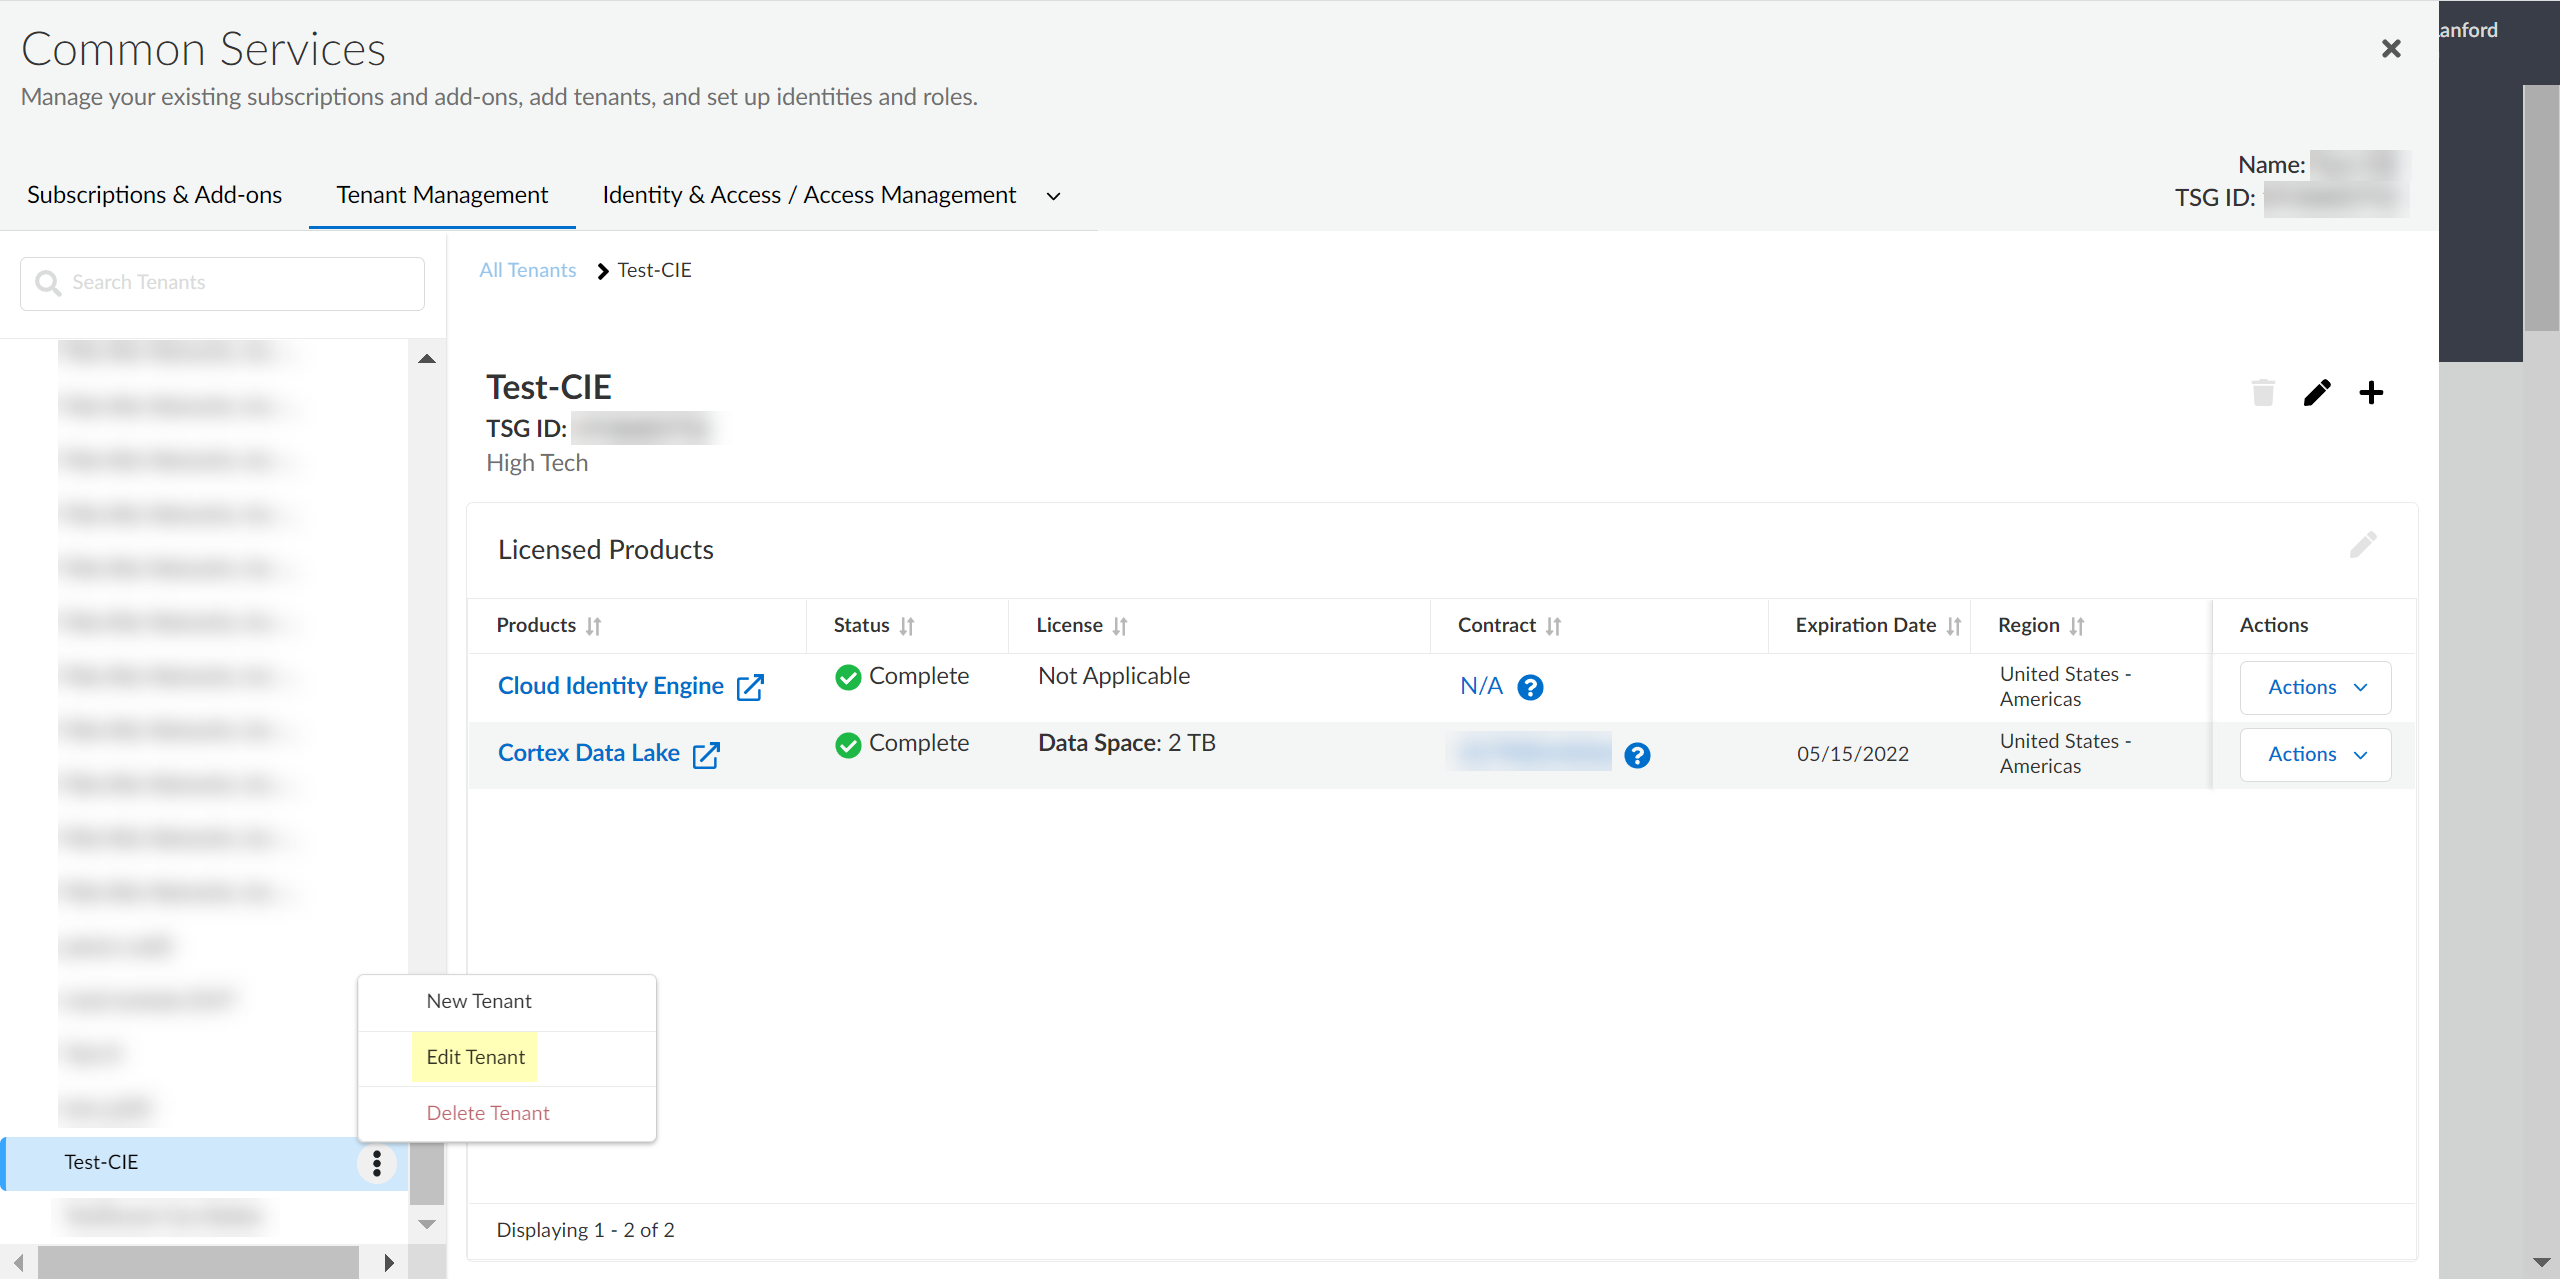
- Log in to the hub.Select Common ServicesTenant Management.Select the tenant you want to rename then click Edit Tenant.
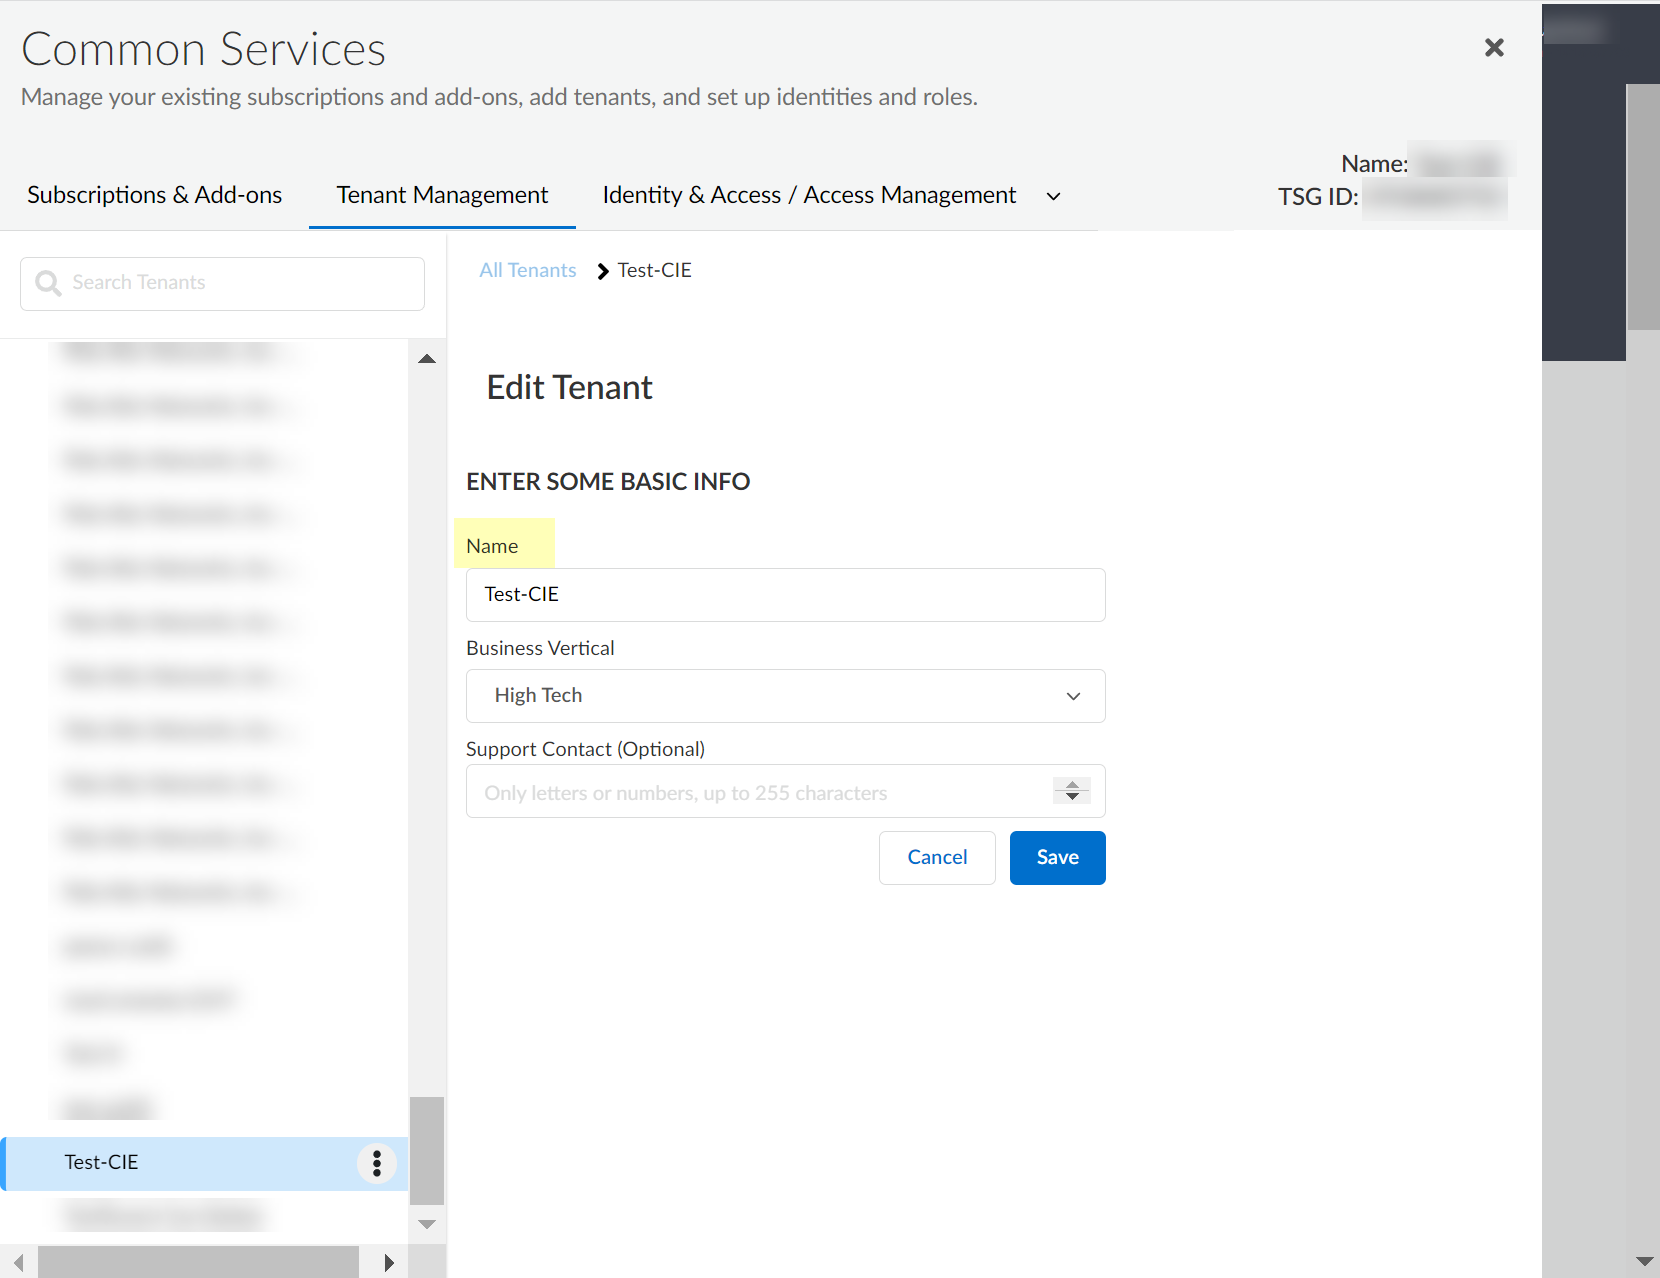
![]() A pop-up displays to allow you to edit the name of the tenant.You cannot change the region. If you need to change the region for an tenant, create a new tenant.Enter the new Name and confirm the change by clicking Save.
A pop-up displays to allow you to edit the name of the tenant.You cannot change the region. If you need to change the region for an tenant, create a new tenant.Enter the new Name and confirm the change by clicking Save.![]() A confirmation message displays to indicate that the tenant was successfully renamed.
A confirmation message displays to indicate that the tenant was successfully renamed.


