Learn how to create a Cloud Dynamic User Group in the Cloud Identity Engine.
Where Can I Use This?
What Do I Need?
NGFW
Prisma Access
The Cloud Identity Engine service is free; however, the
enforcement points utilizing directory data may require specific
licenses. Click here for more
information.
Cloud Dynamic User Groups simplify the creation of group-based Security policy by
providing adaptable and granular group membership that updates automatically based
on the criteria (also known as context or attributes) you specify. This allows you
to create a policy that adapts to changes in user behavior, location, and other
conditions where context plays a key role in determining access.
As work locations change and users take on different roles in an organization,
determining user privileges based on attributes such as department or location is no
longer sufficient. Cloud Dynamic User Groups provide a simplified and automated
solution by allowing you to specify the context for group membership based on
attributes that can change (such as location, department, or title), allowing you to
create more responsive group-based policy.
You can also create static groups where membership remains constant until you
manually add or remove members. For example, you can use static groups to quickly
assign privileges or to isolate an account that’s exhibiting unusual or risky
behavior based on specific events.
If you're using Microsoft Active Directory Identity
Protection, you can use the risk assessment information to create Cloud
Dynamic User Groups based on a user's risk level or anomalous user behavior, such as
an unusual login location.
Using risk assessment information to create Cloud Dynamic
User Groups requires the client credential flow for Azure
AD. You must
allow the following permissions in the Azure Portal to enable support for risk-based
attributes:
IdentityRiskyUser.Read.All
IdentityRiskEvent.Read.All
If you have not already done so, configure your directory for the type of Cloud
Dynamic User Group you want to create.
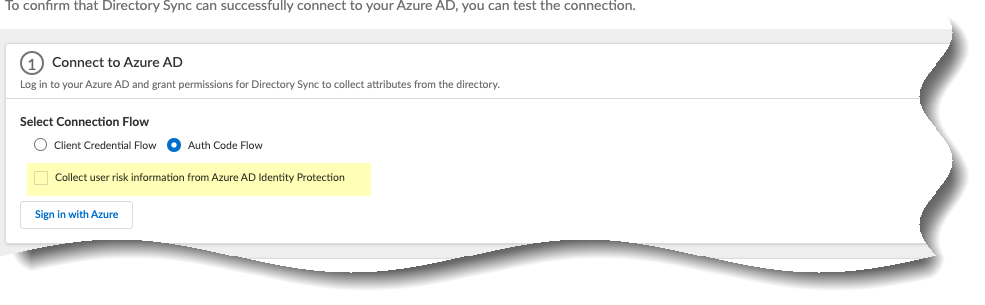
(User Risk Information with Azure AD only) To allow the Cloud
Identity Engine to collect user risk information from your Microsoft Active Directory Identity
Protection, select Collect user risk information
from Azure AD Identity Protection.
For an existing Azure Active Directory (AD)
configuration in the Cloud Identity, reconnect your directory to enable user
risk information collection.
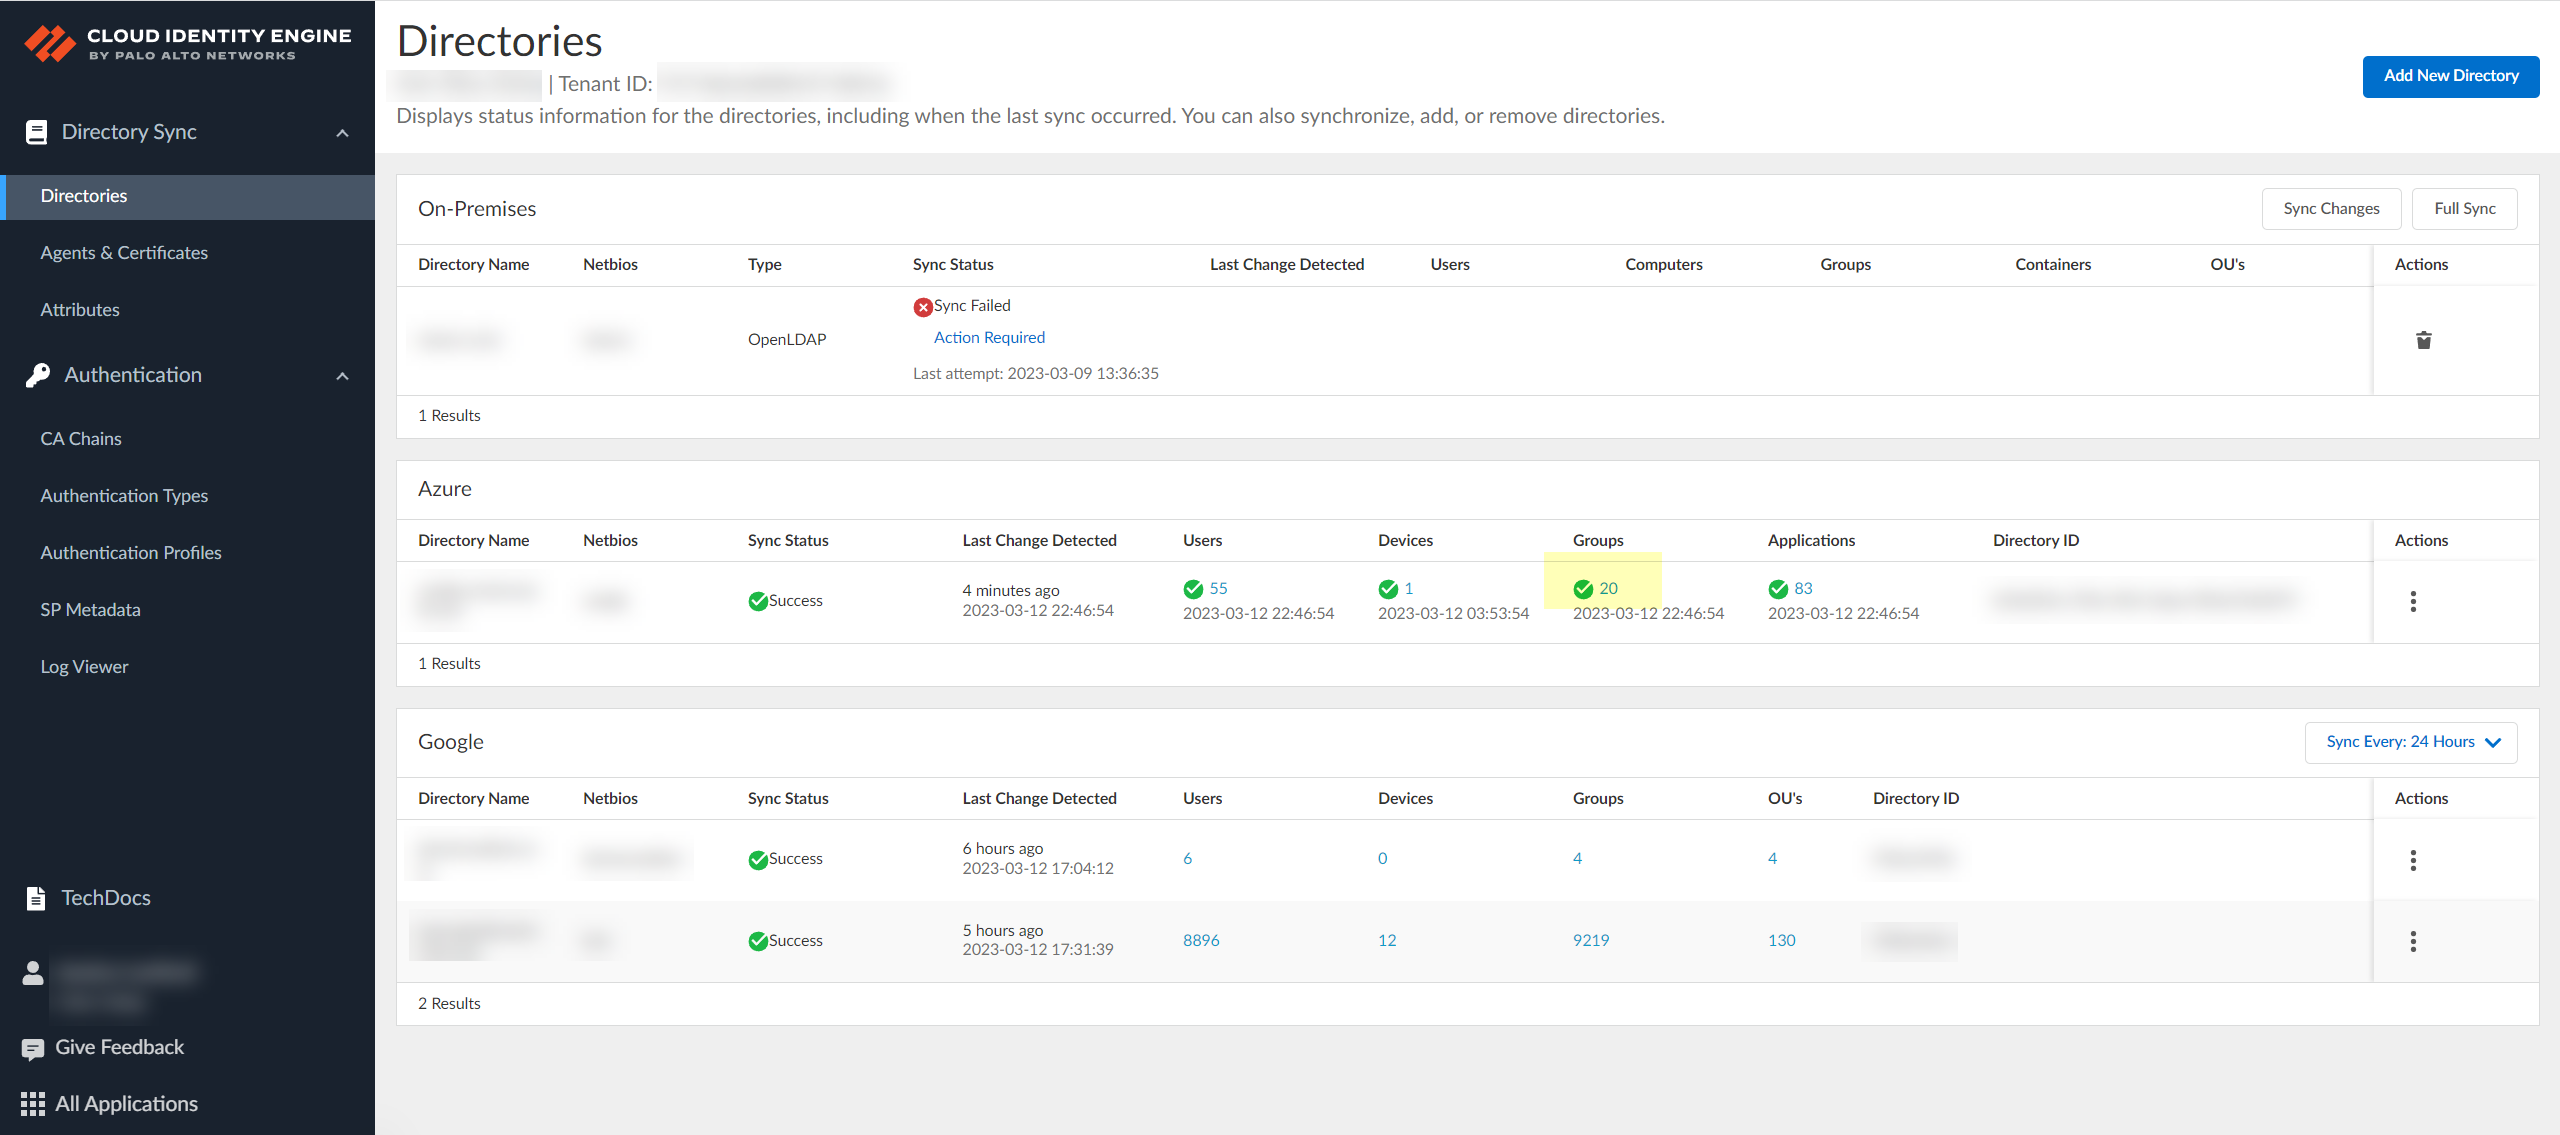
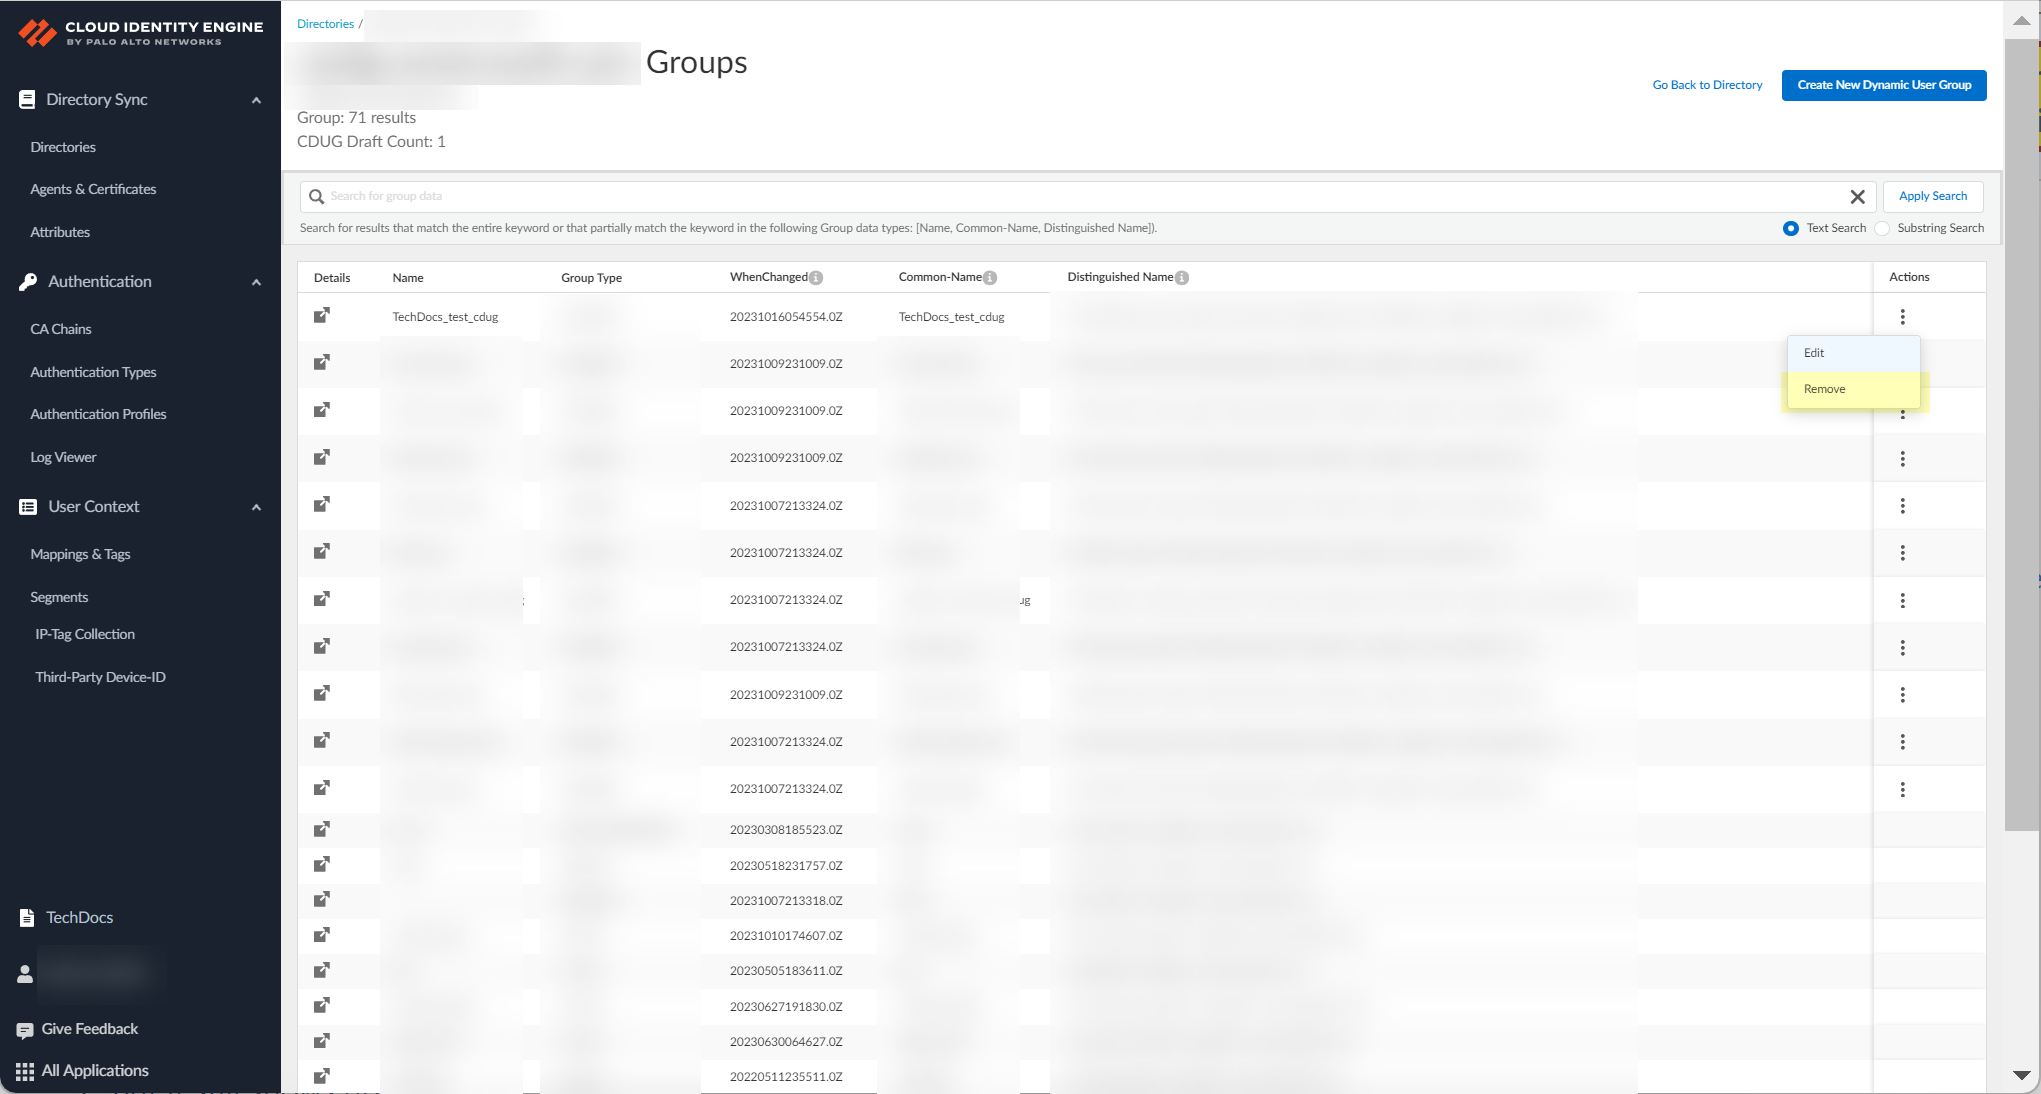
In the Cloud Identity Engine app, select Directories and
click on the number in the Groups column.
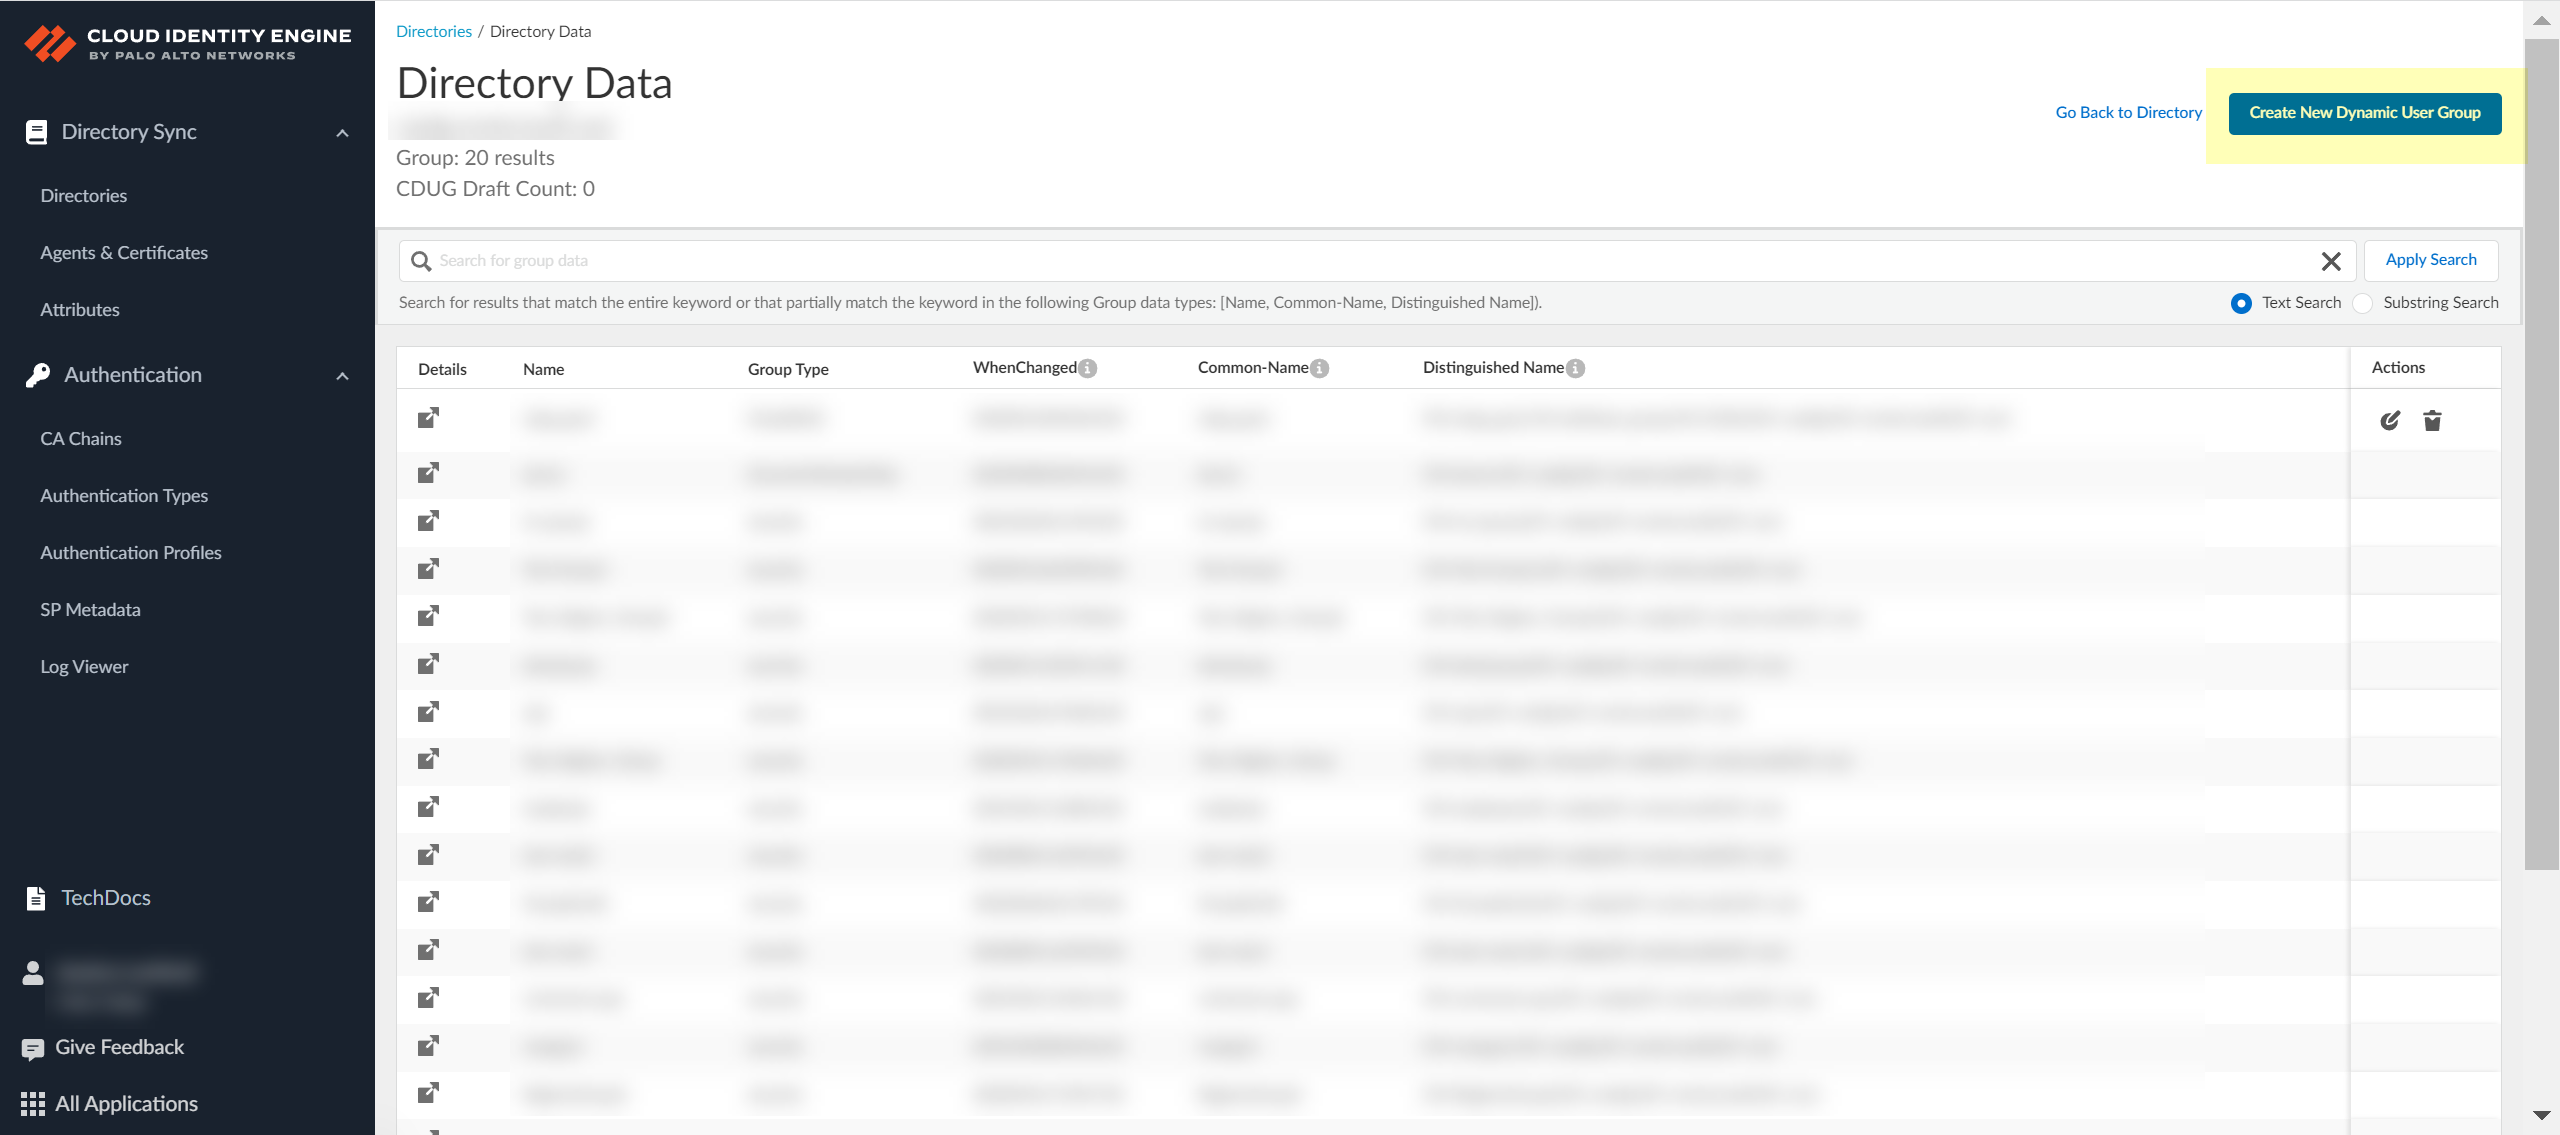
On the Directory Data page, click Create New Dynamic User
Group.
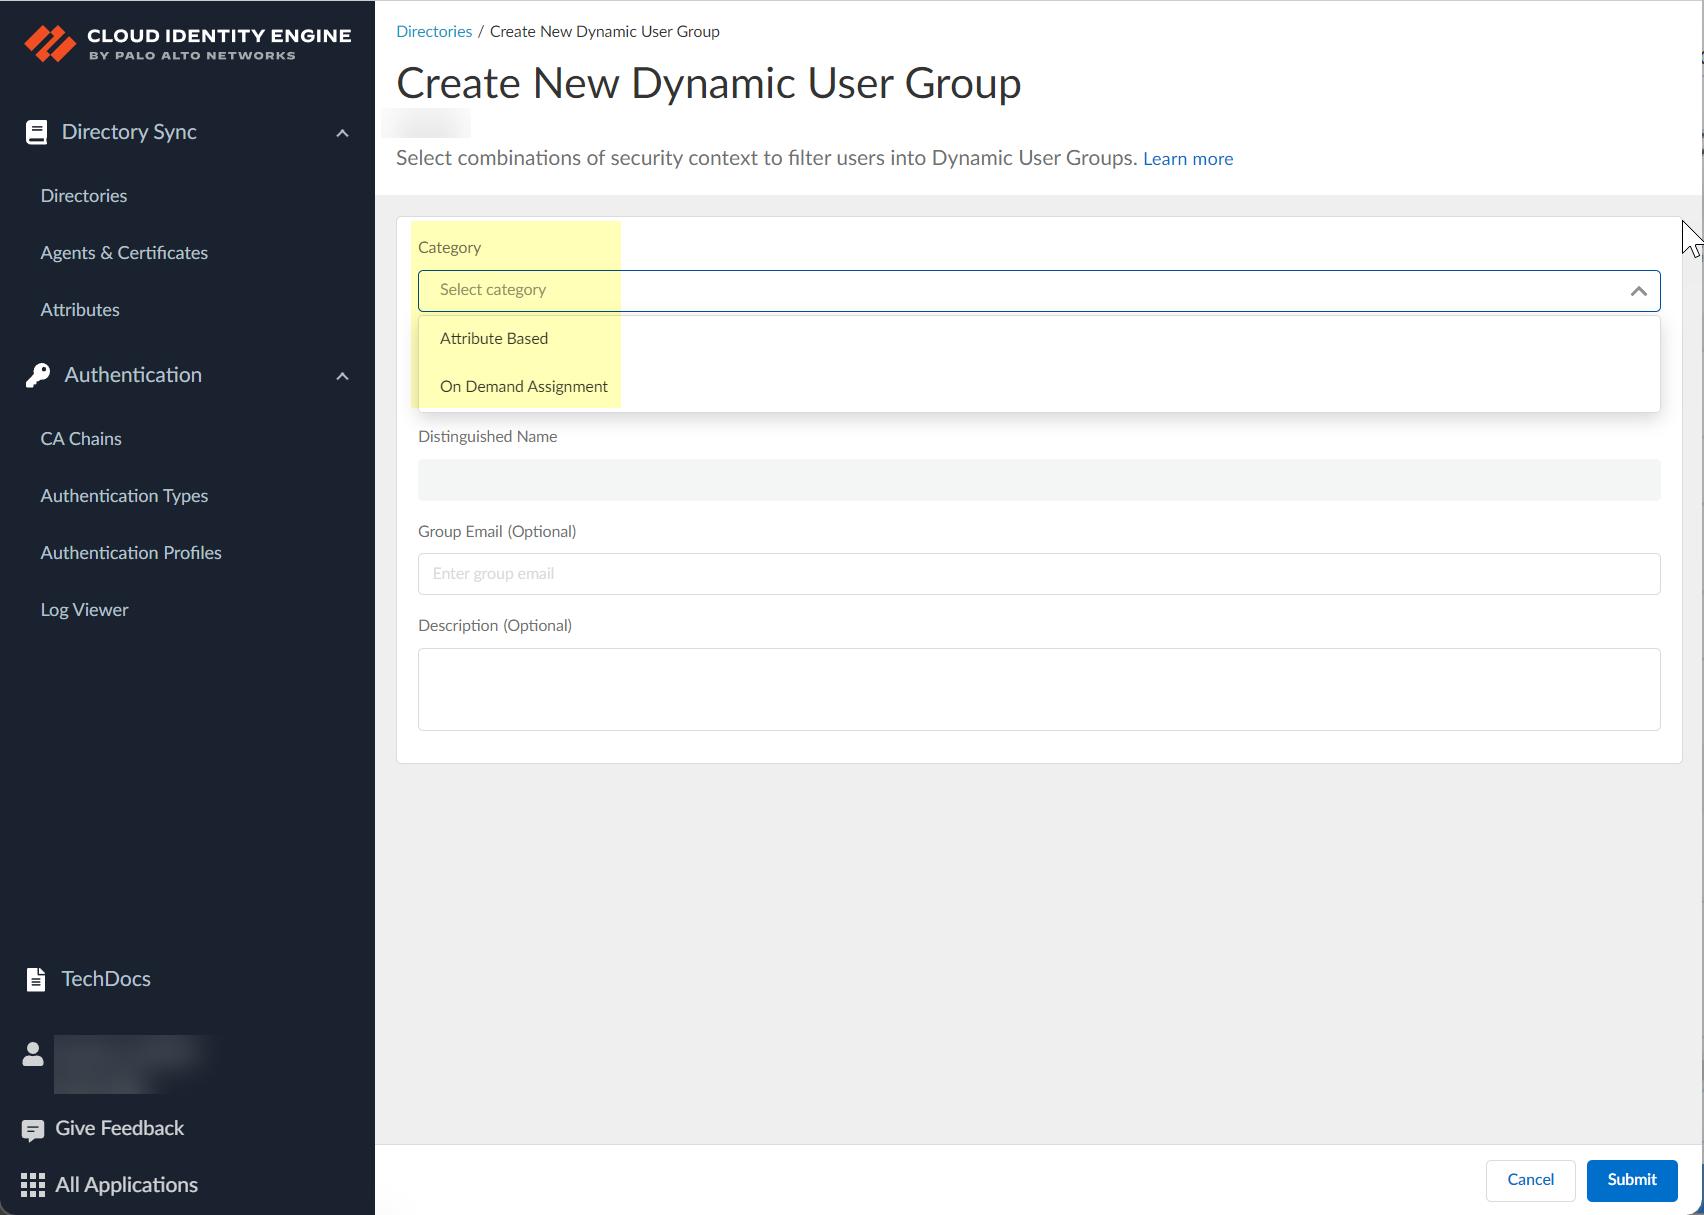
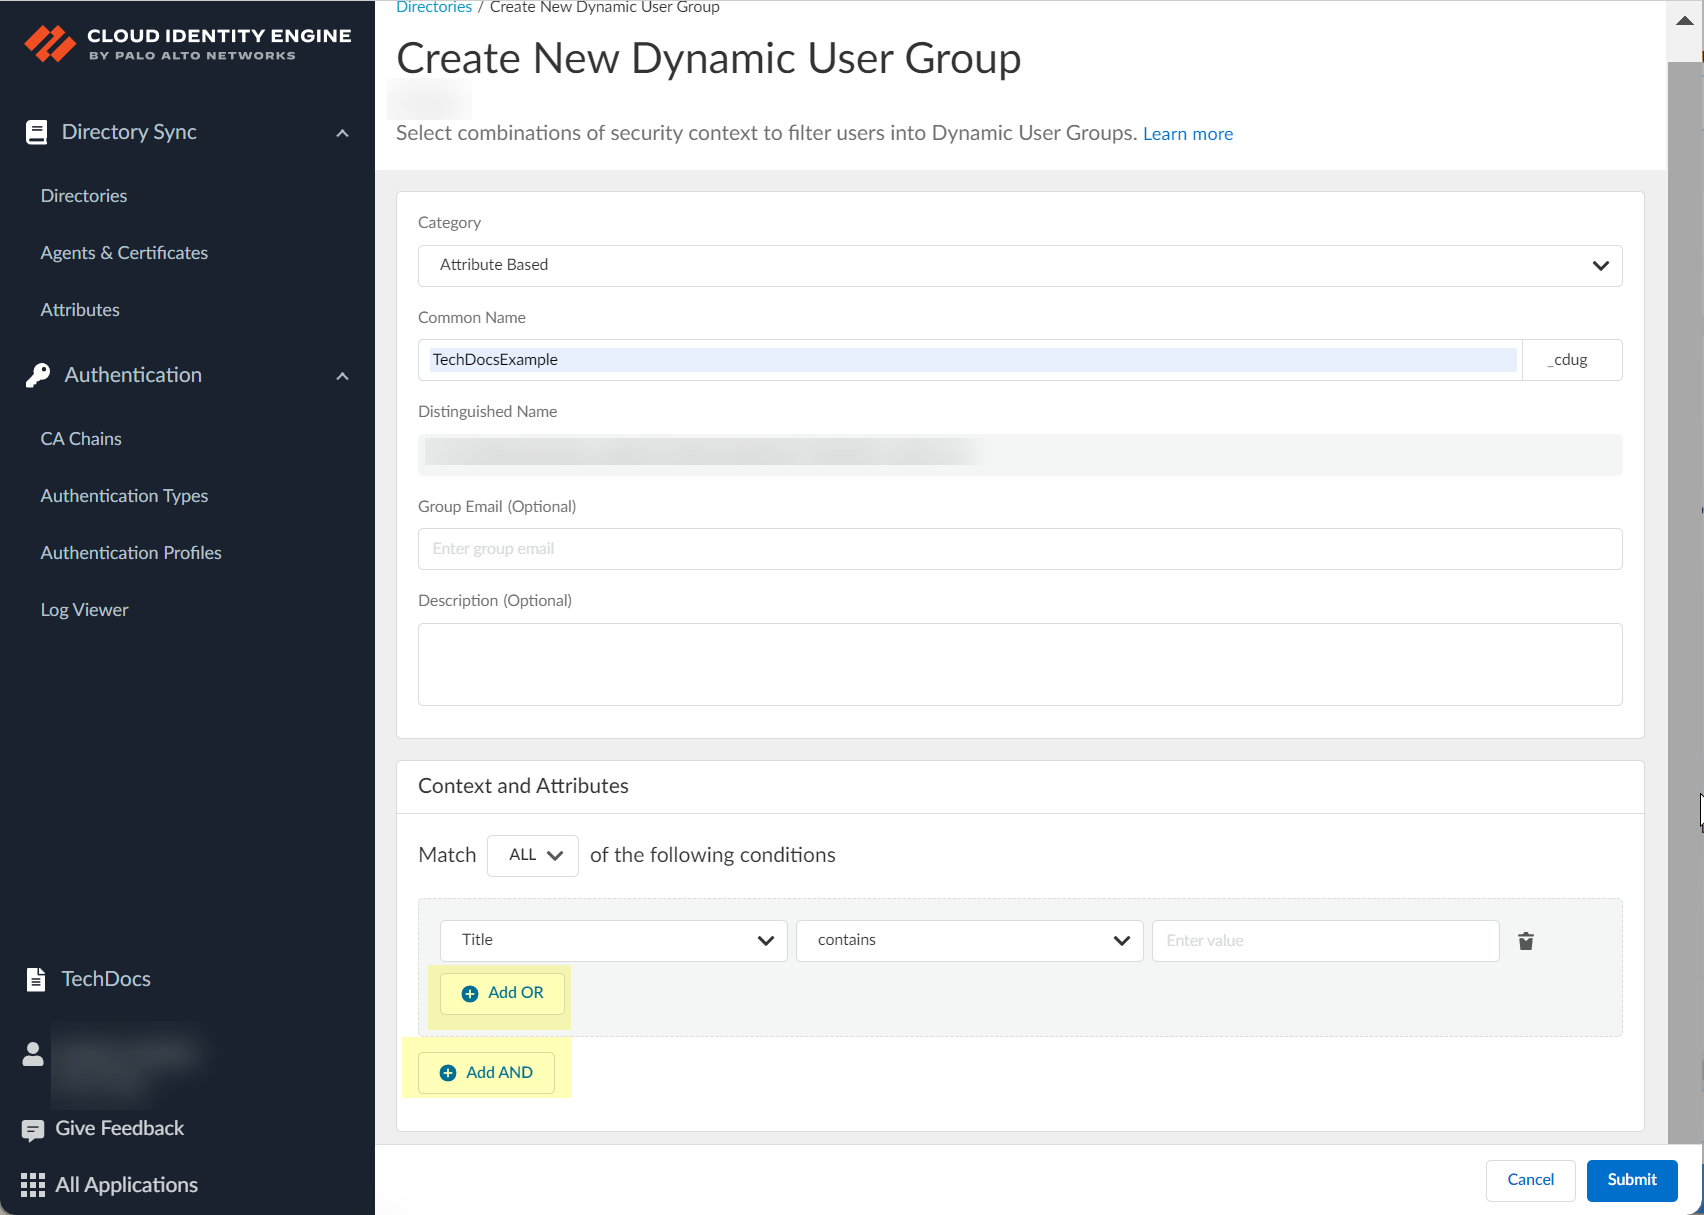
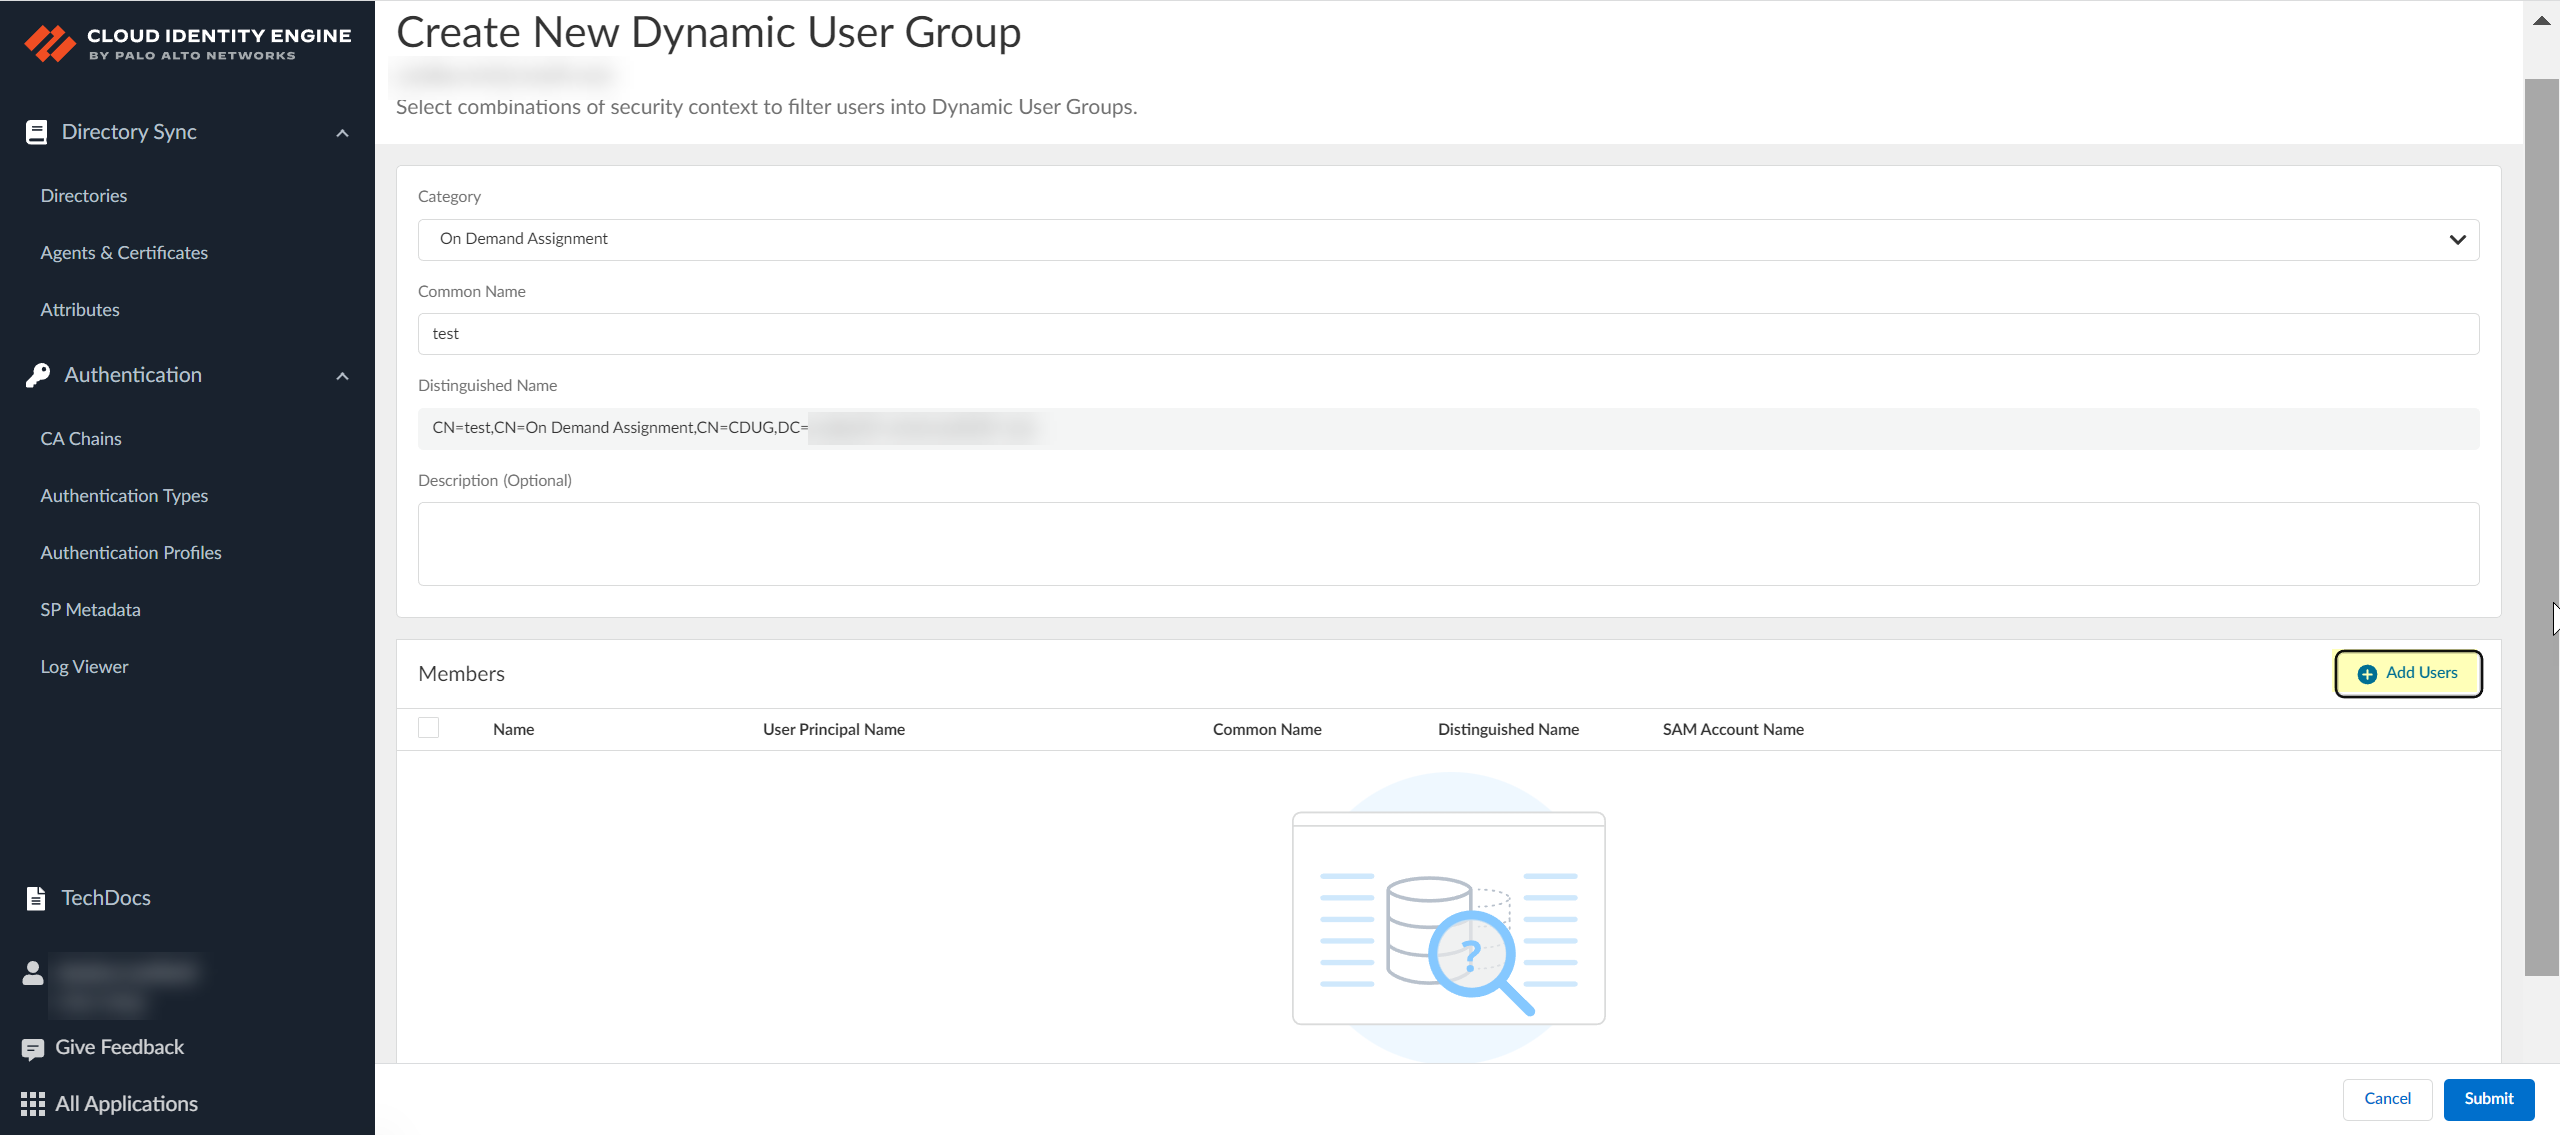
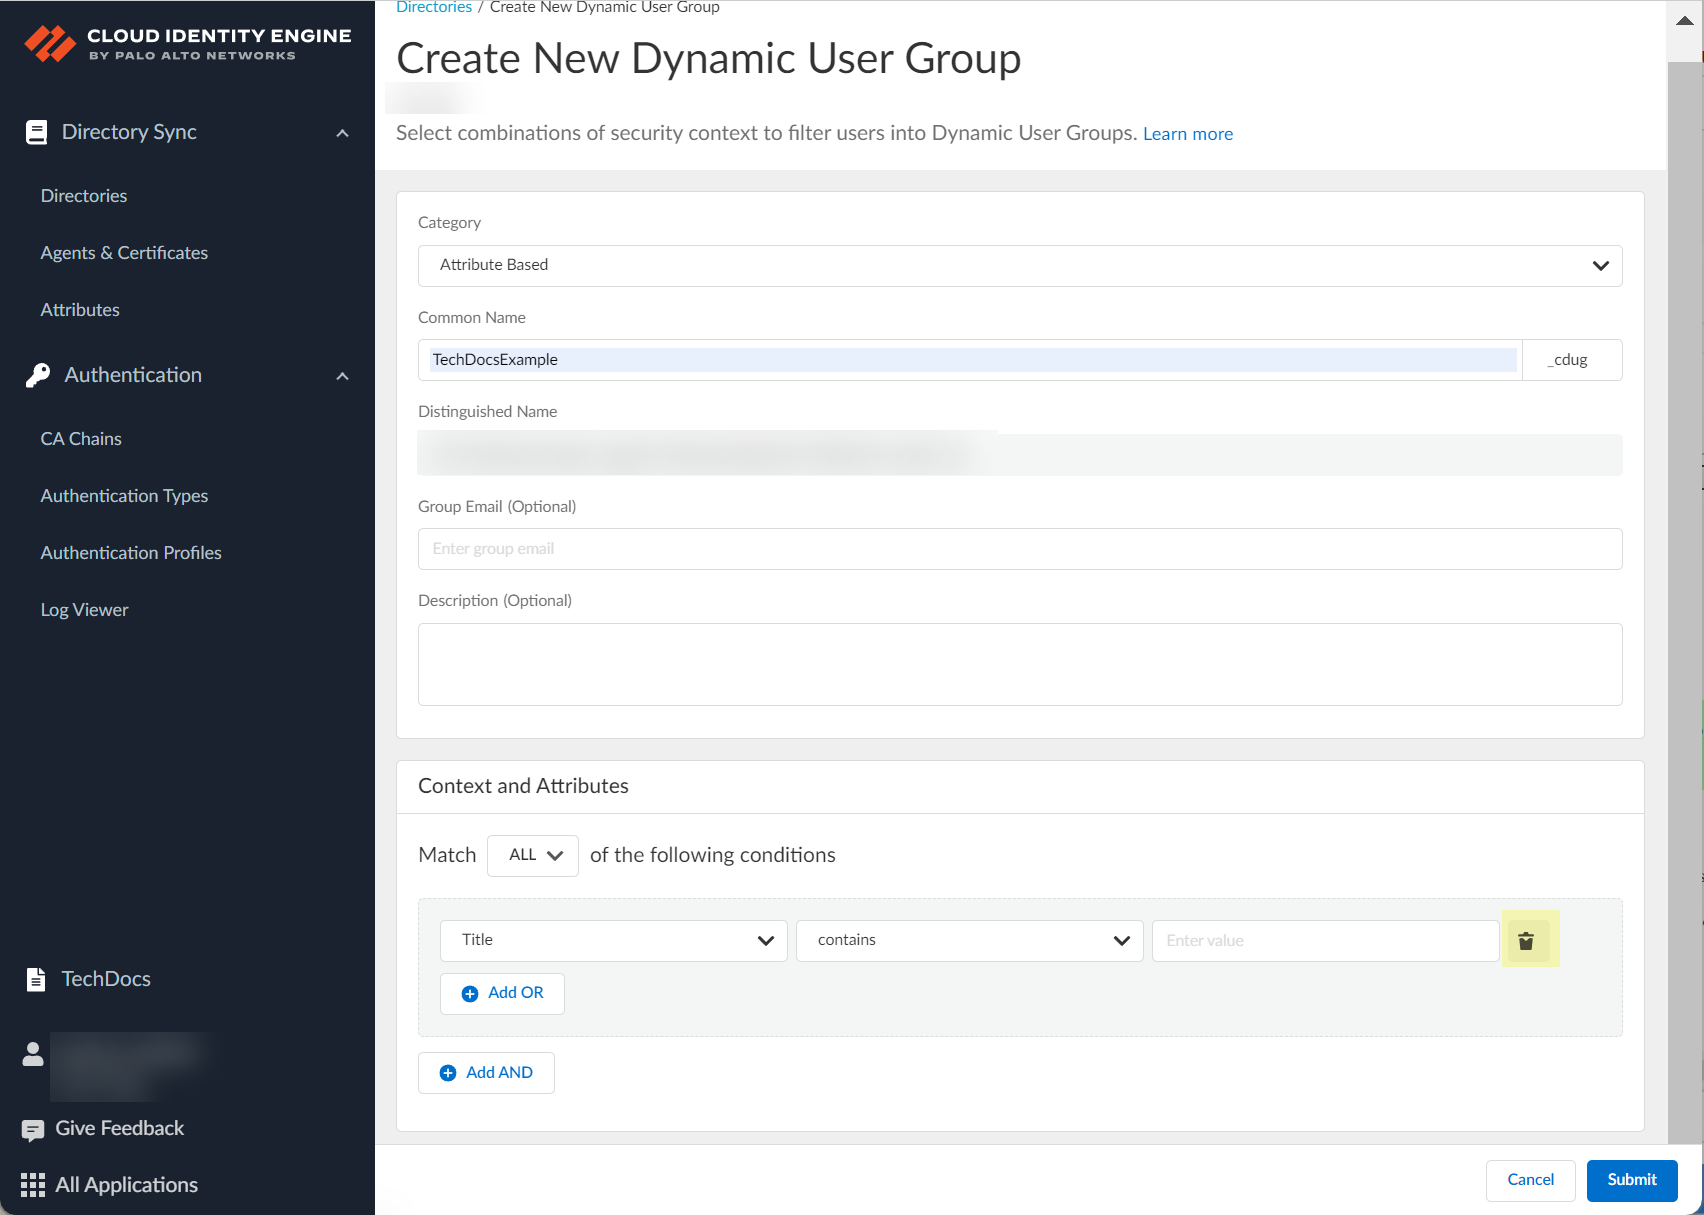
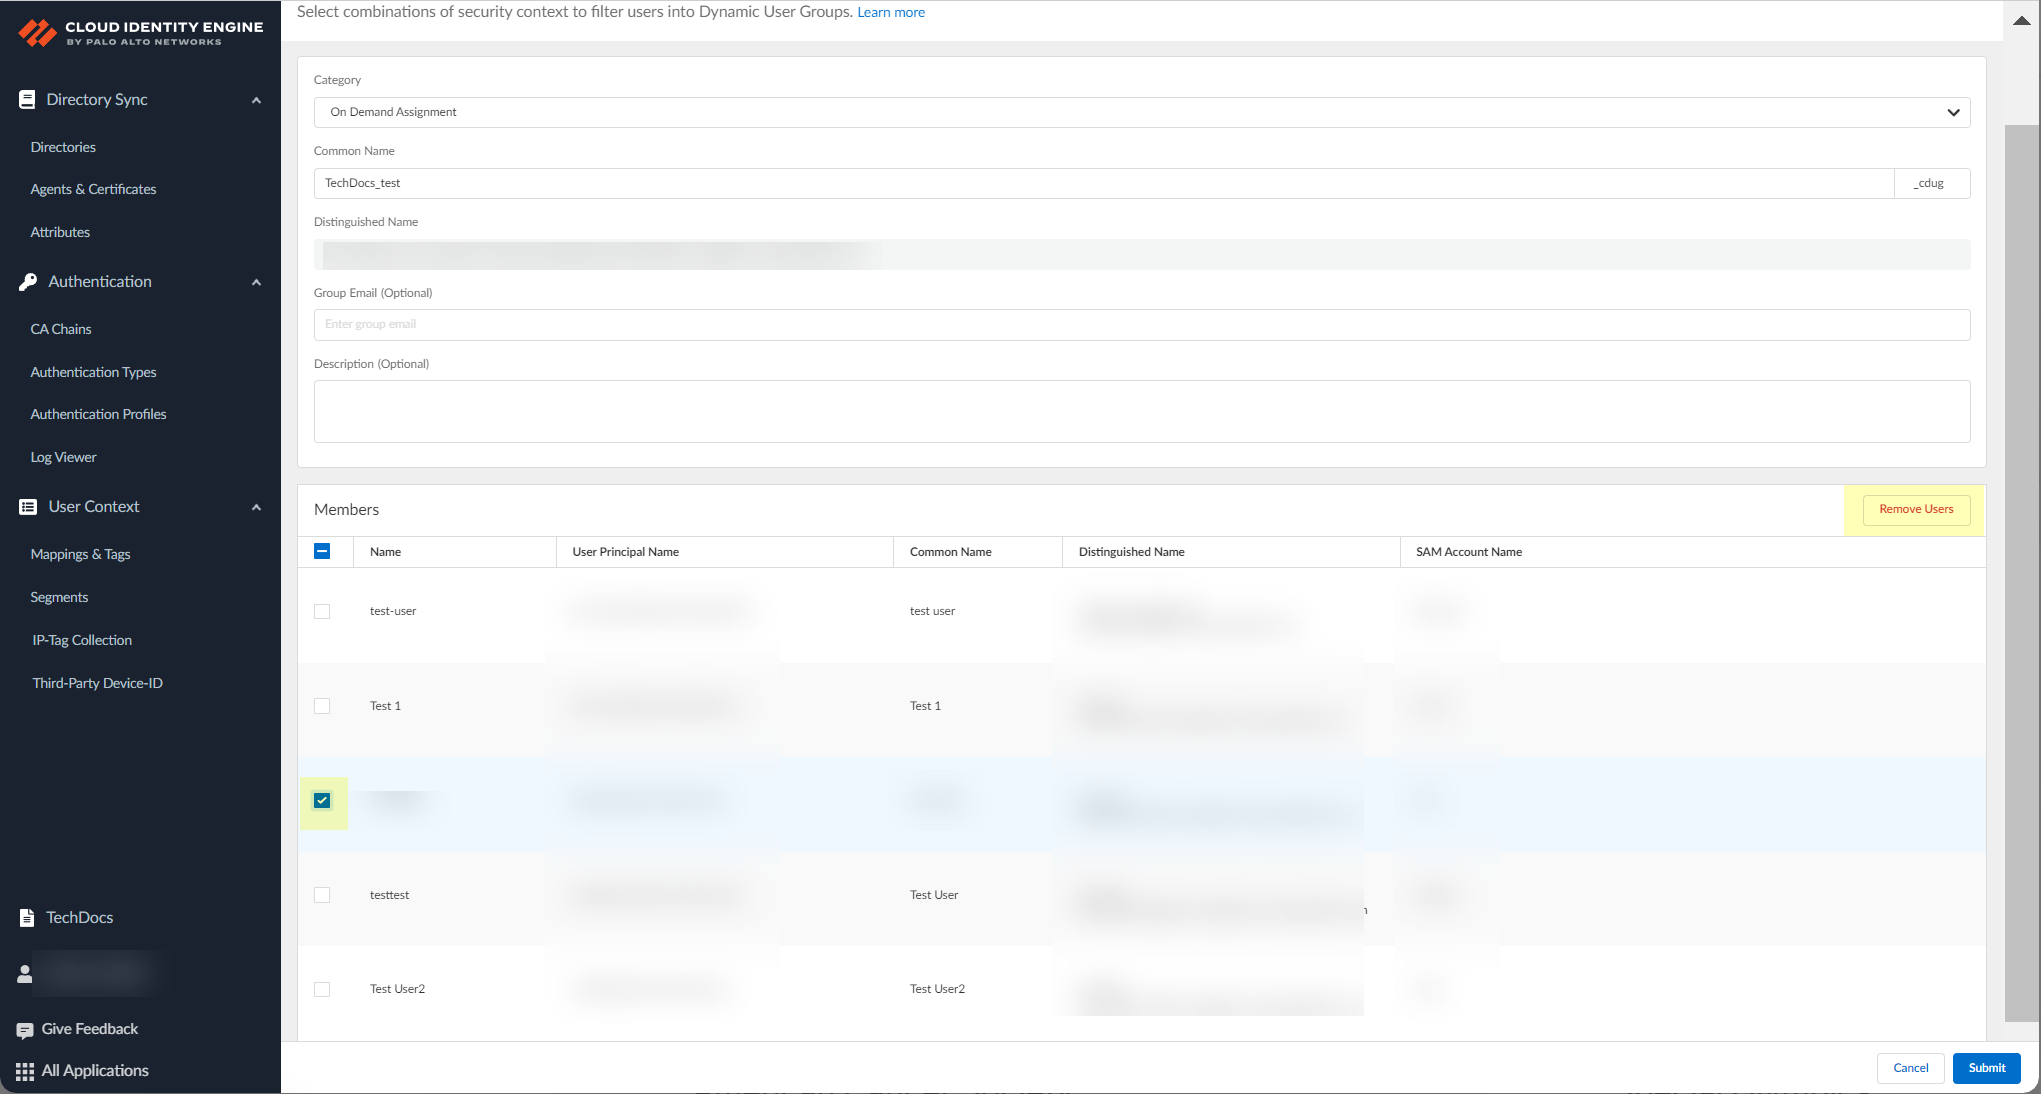
Select the Category for the group.
Attribute Based—Specify the criteria for the
Dynamic User Group using attributes.
On Demand Assignment—Assign specific users to a
static group.
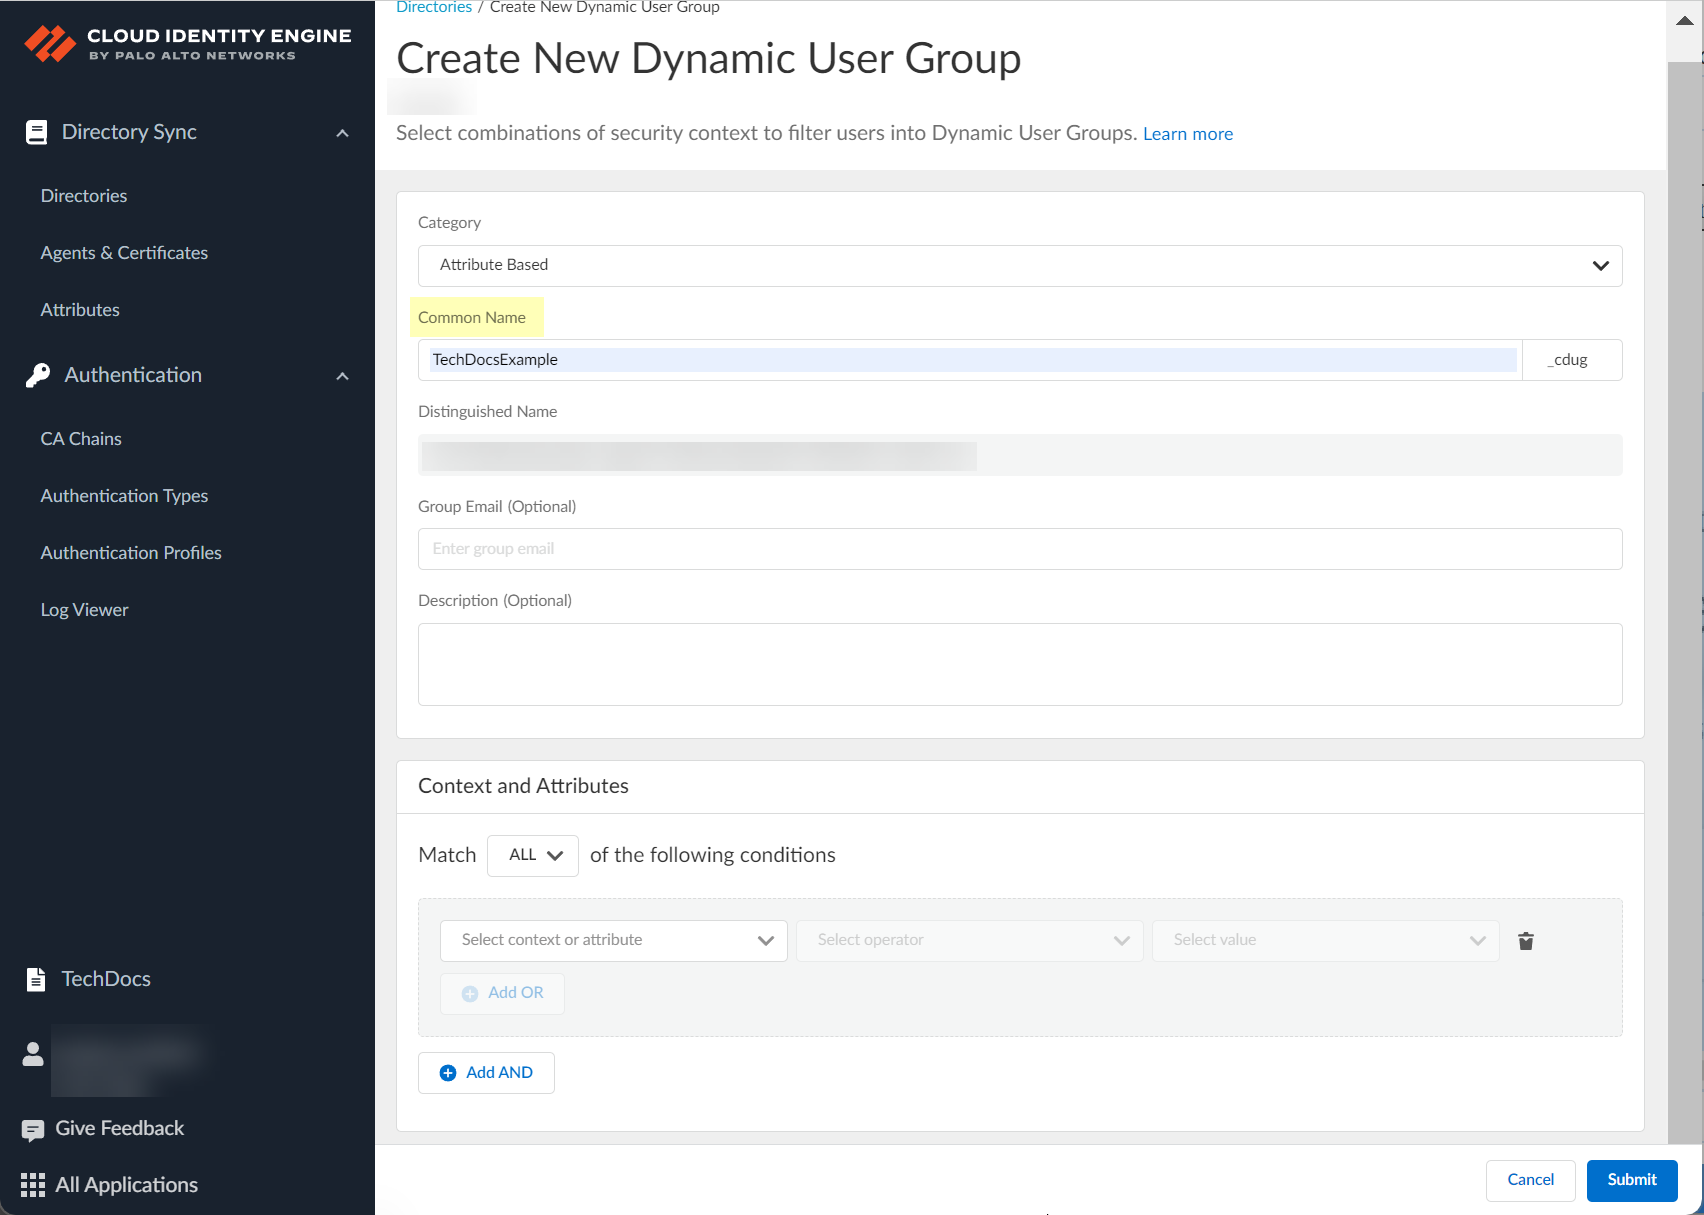
Enter the Common Name for the group.
This automatically generates a Distinguished Name for
the group that the Cloud Identity Engine, Prisma Access, and your firewalls
use to identify the group. The Cloud Identity Engine appends
_cdug to the name you enter to indicate
that the group is a Cloud Dynamic User Group.
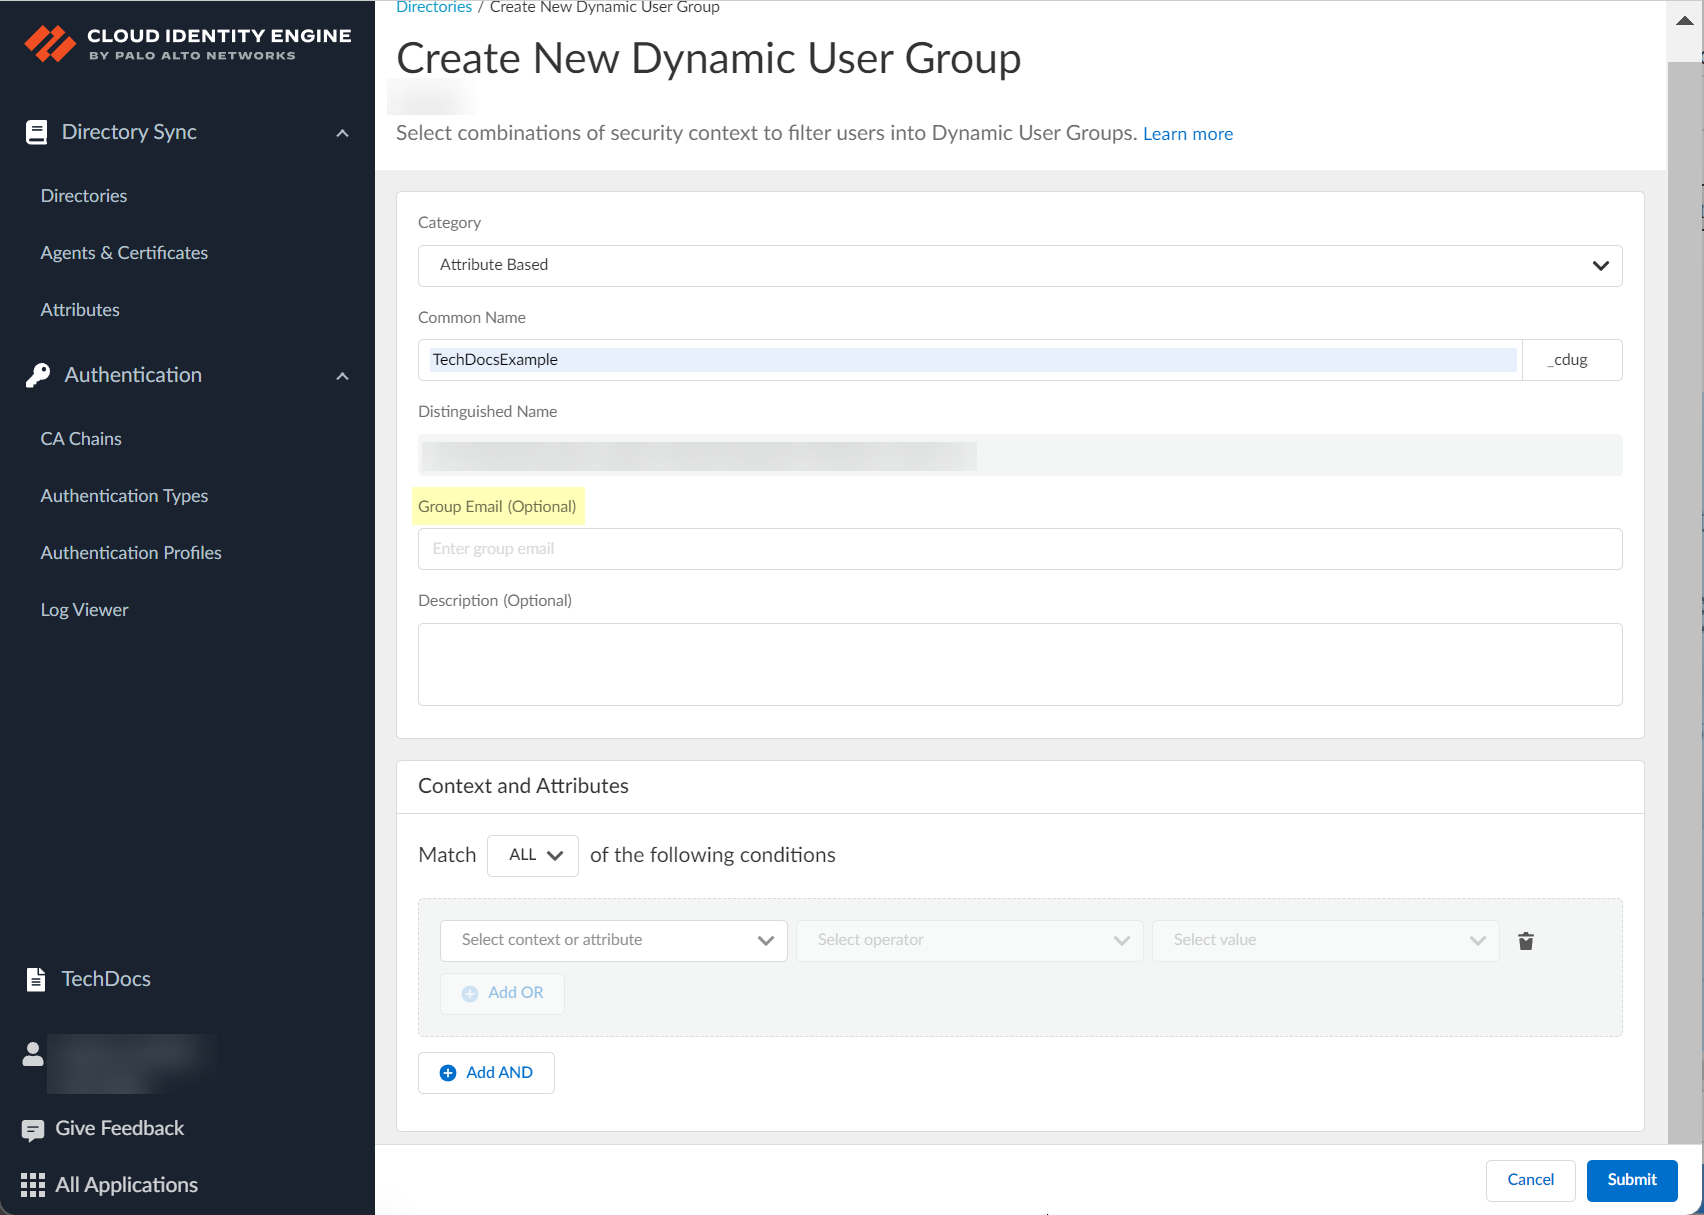
(Optional) Enter a Group Email for the group.
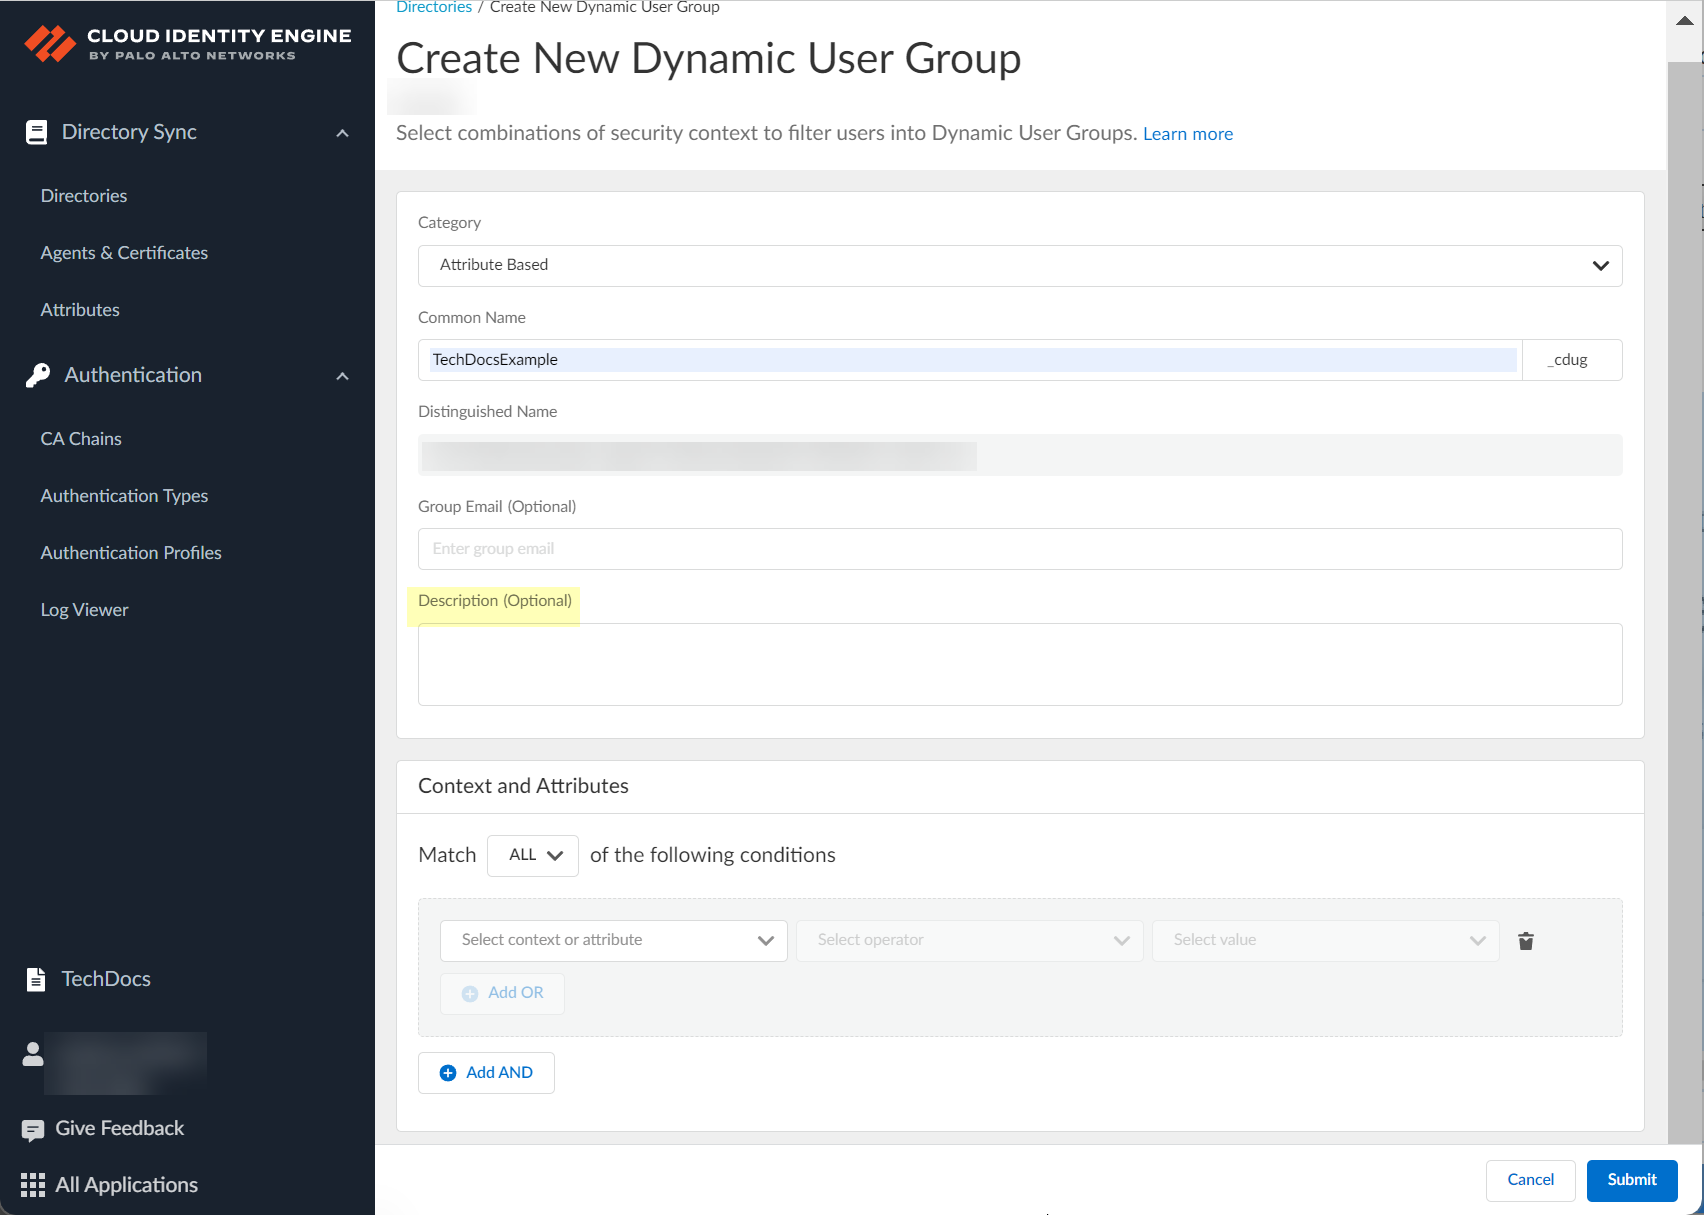
(Optional) Enter a Description for the group.
Depending on the group Category you selected in step
4, select either the attributes you want to use
to define the group or the users you want to add to the group.
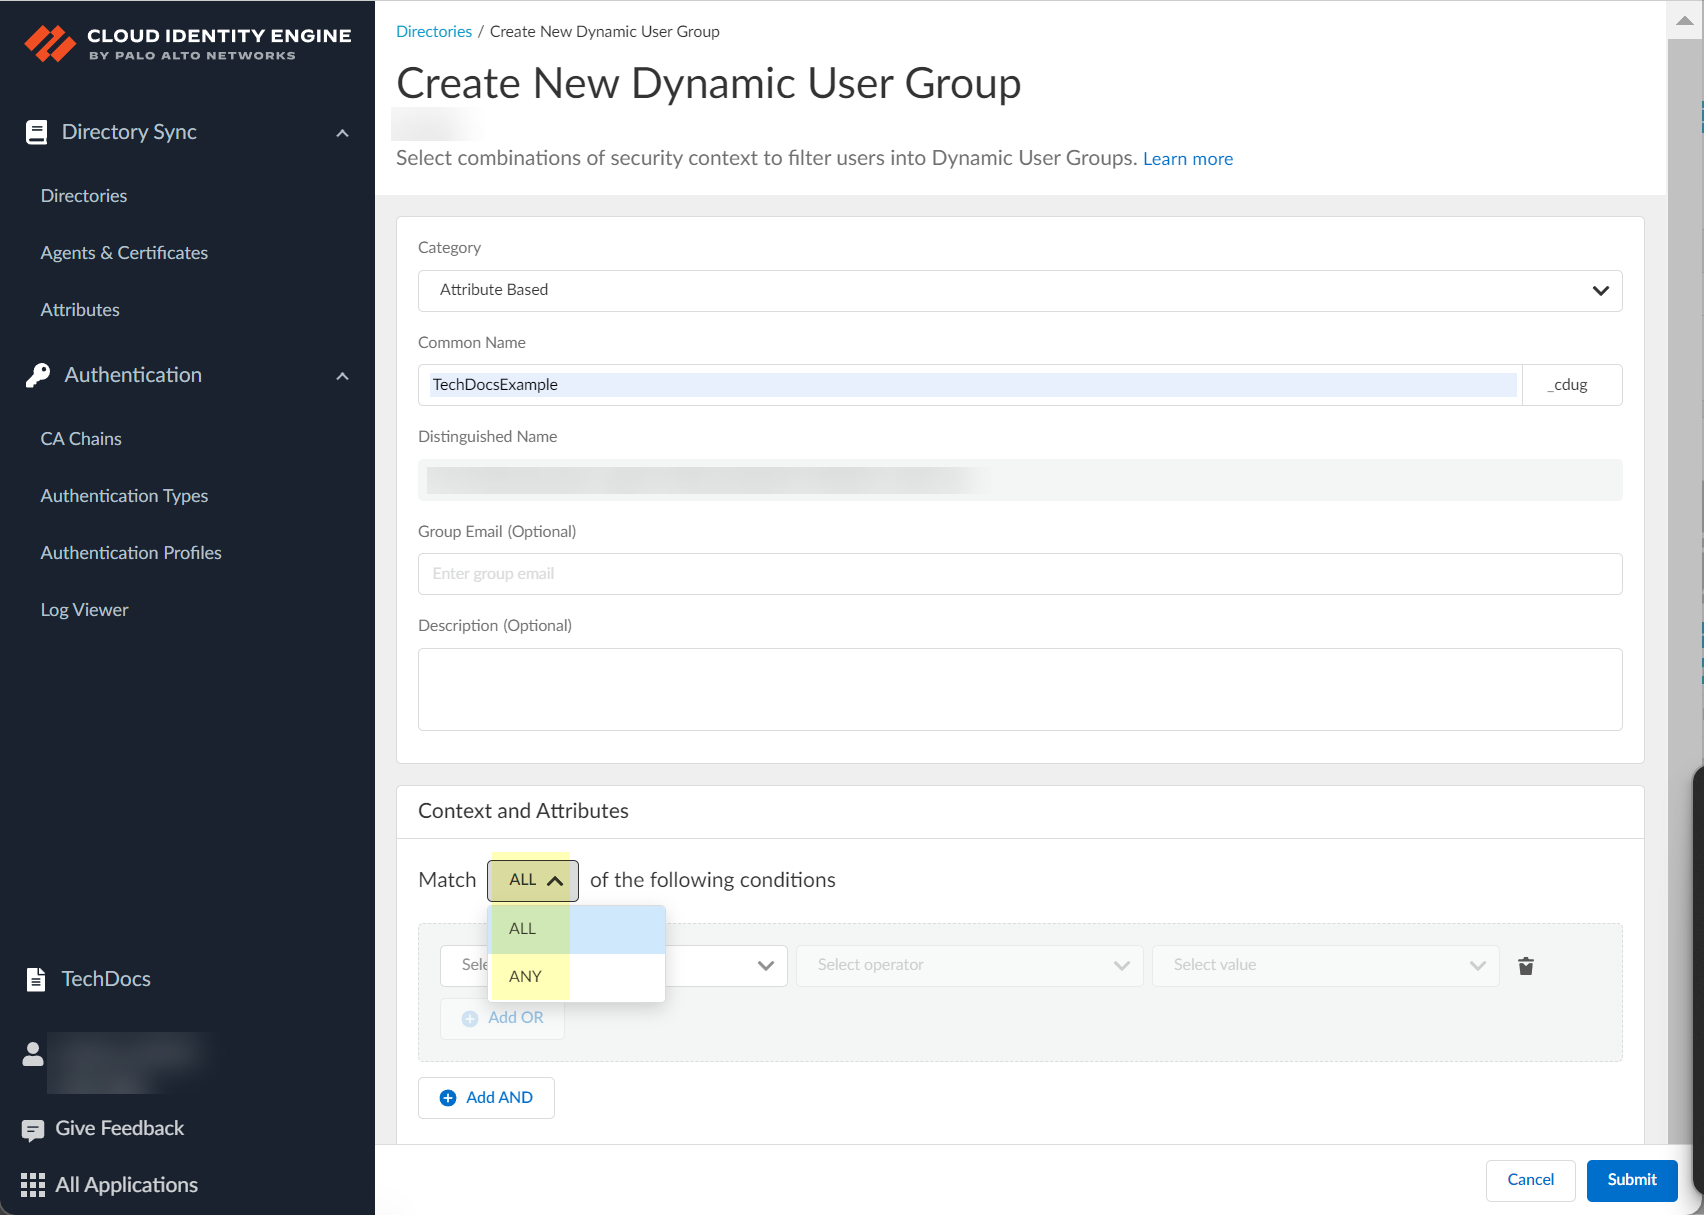
(Attribute Based only) Select whether you want the group members to
match Any of the criteria or if you want them to
match All of the criteria you select.
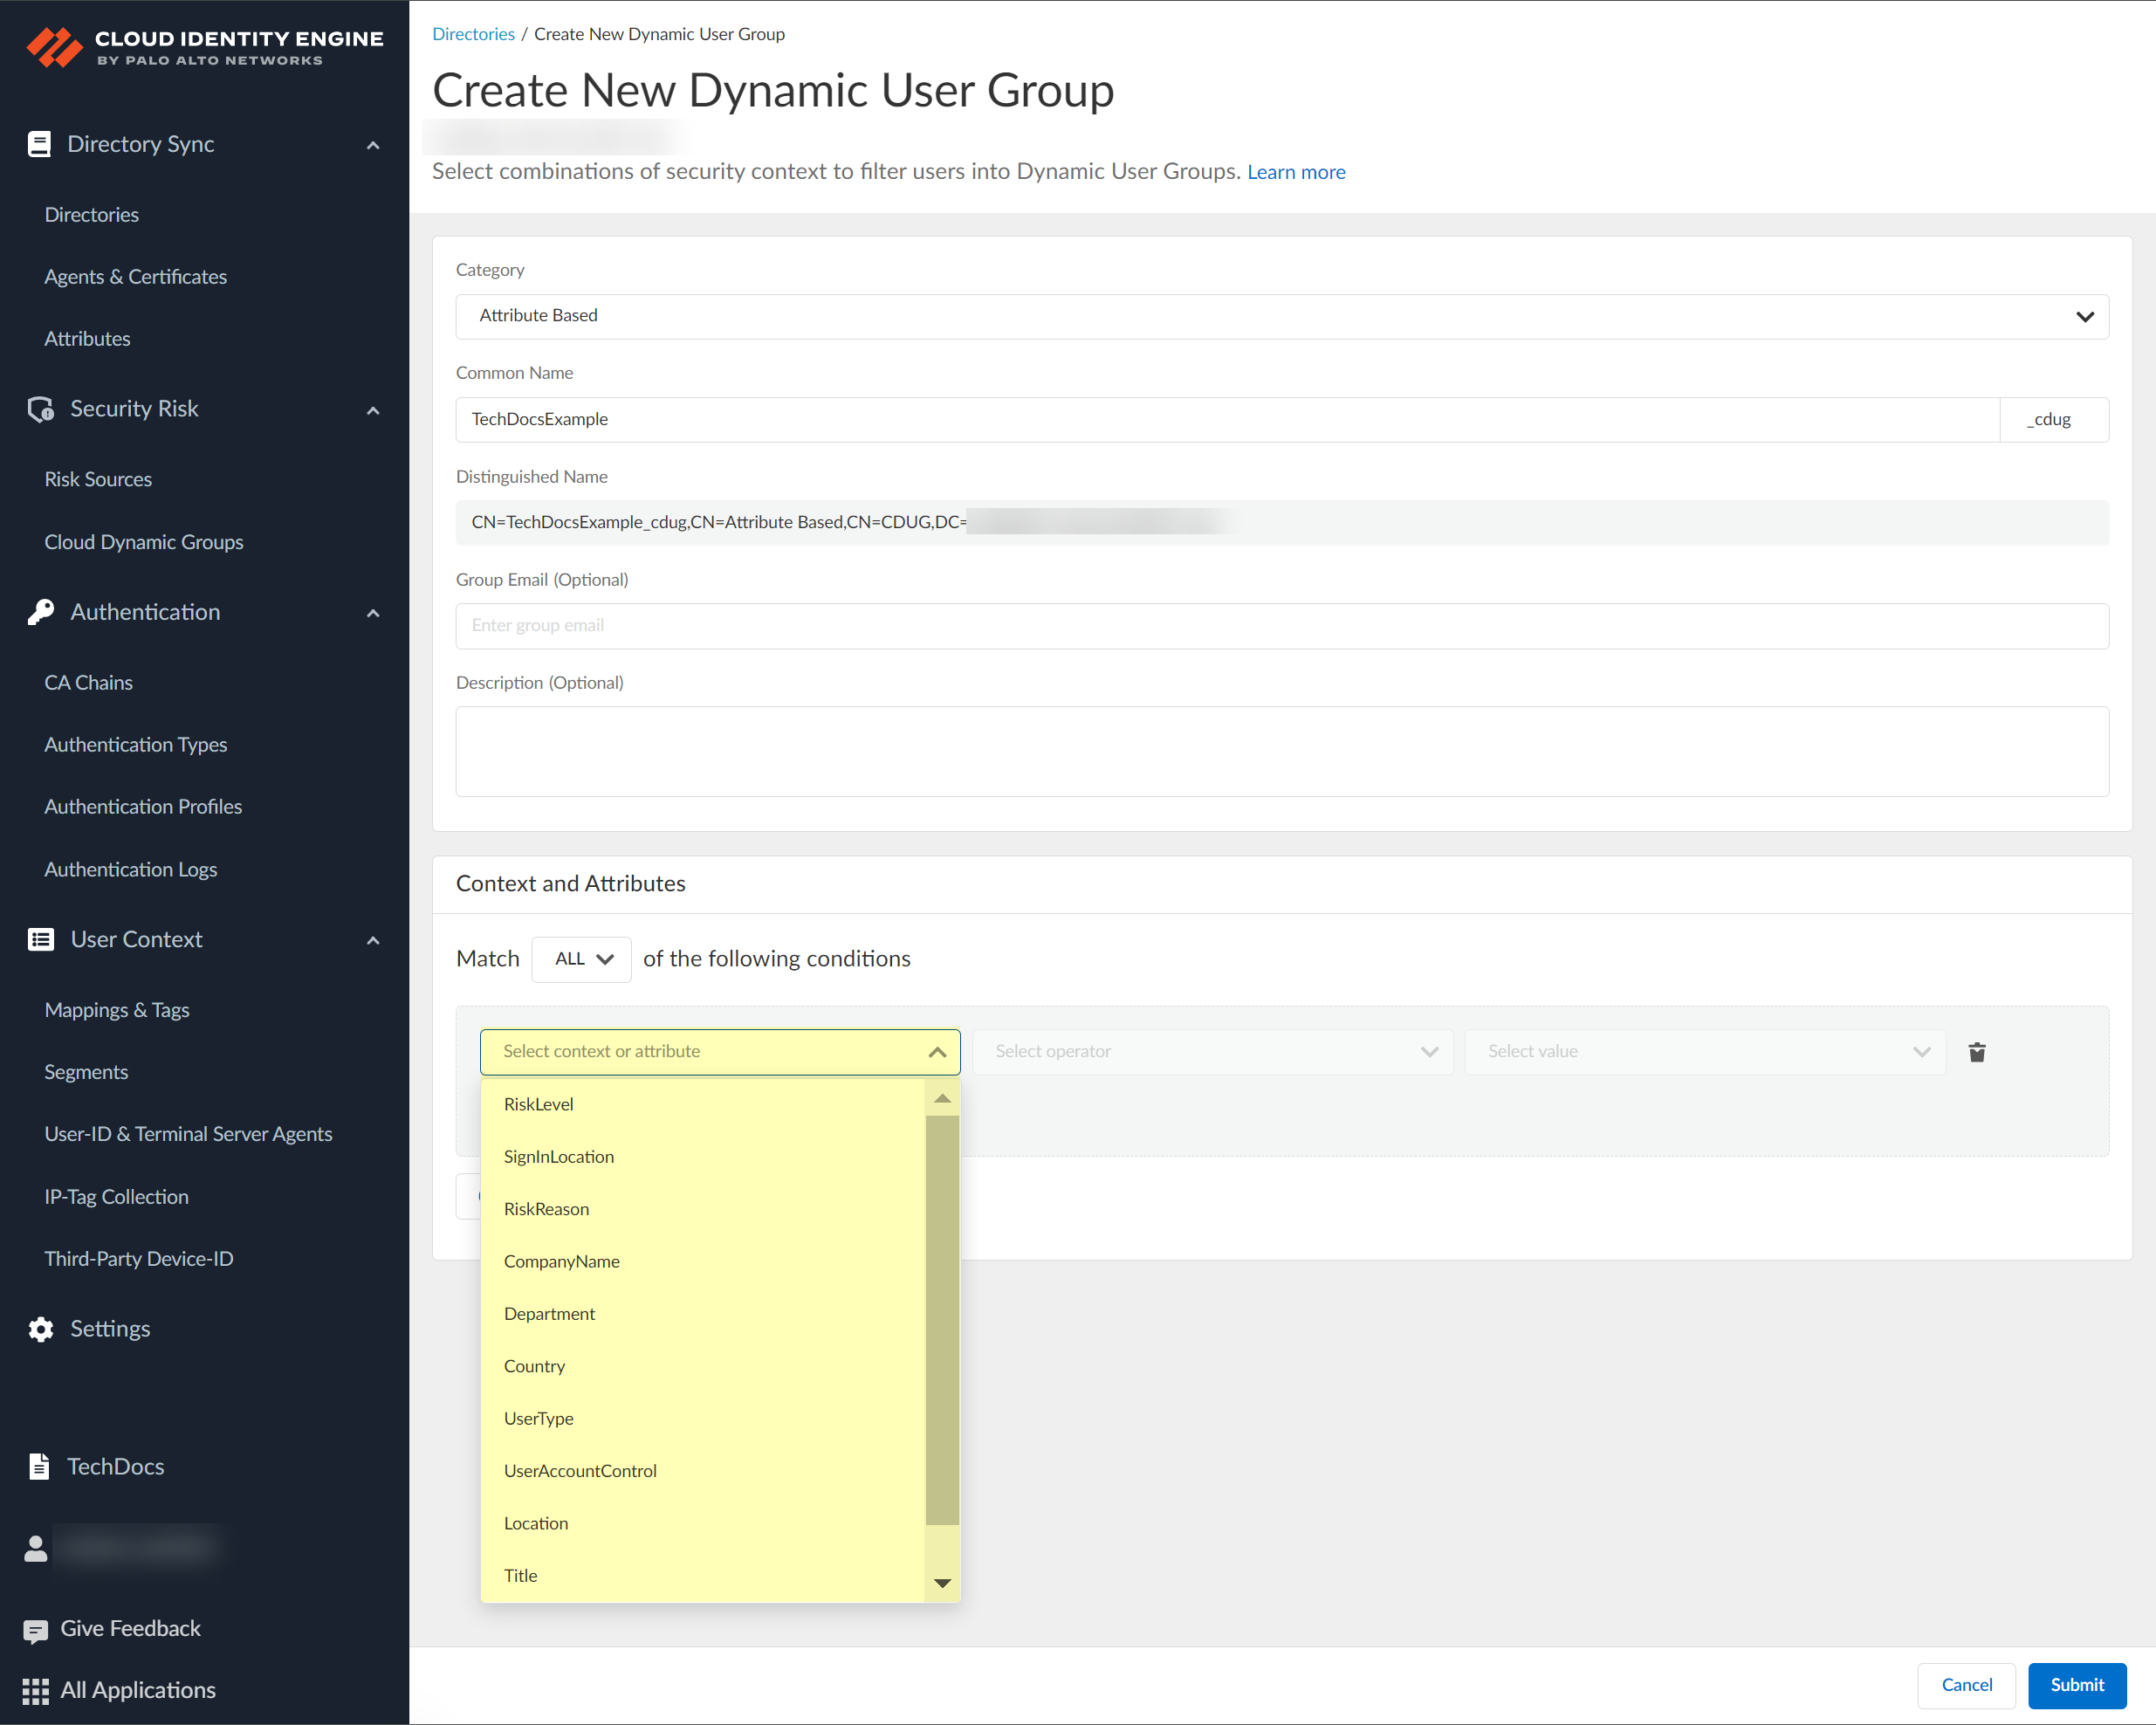
(Attribute Based only) Click Select context or
attribute to select the criteria (also known as context
or attribute) that you want to use to define the group.
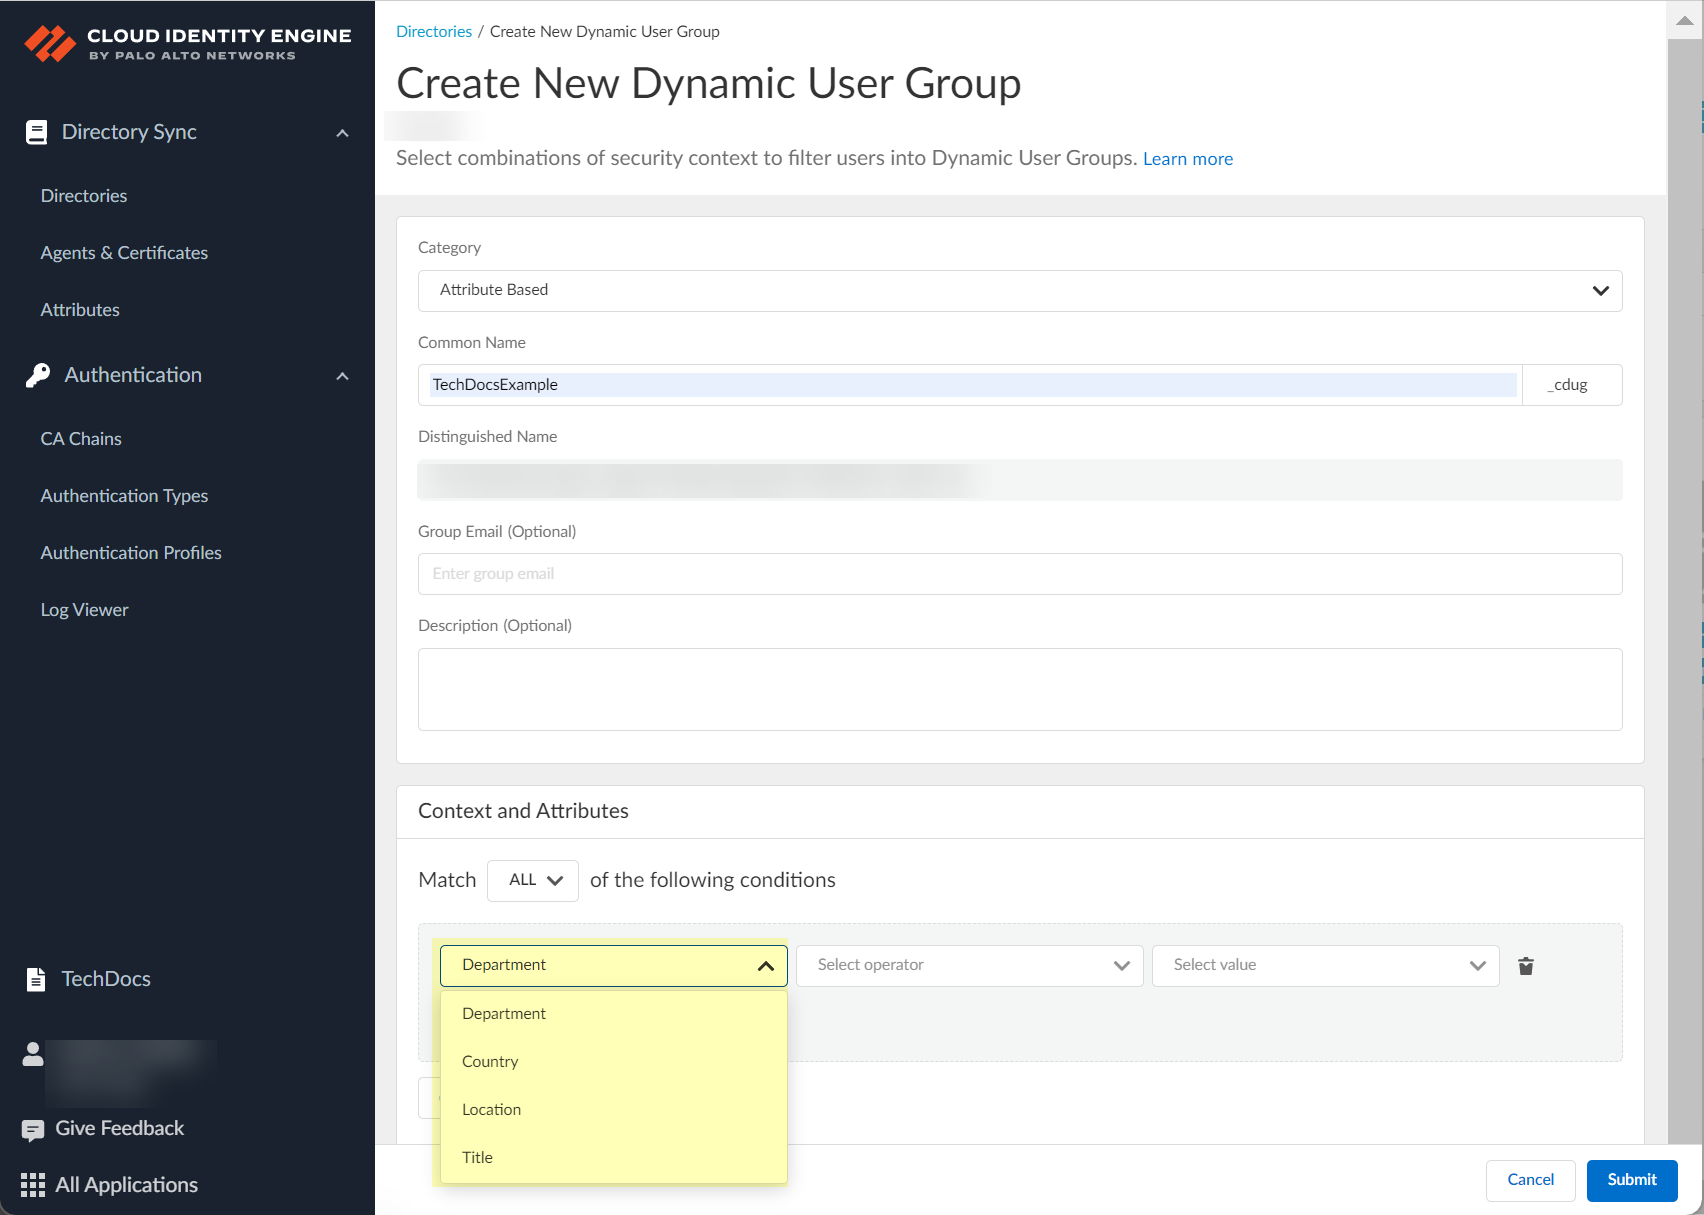
(Attribute Based only) Click Select operator to
select the type of operand.
The operators that are available depend on
your context or attribute selection in the previous step.
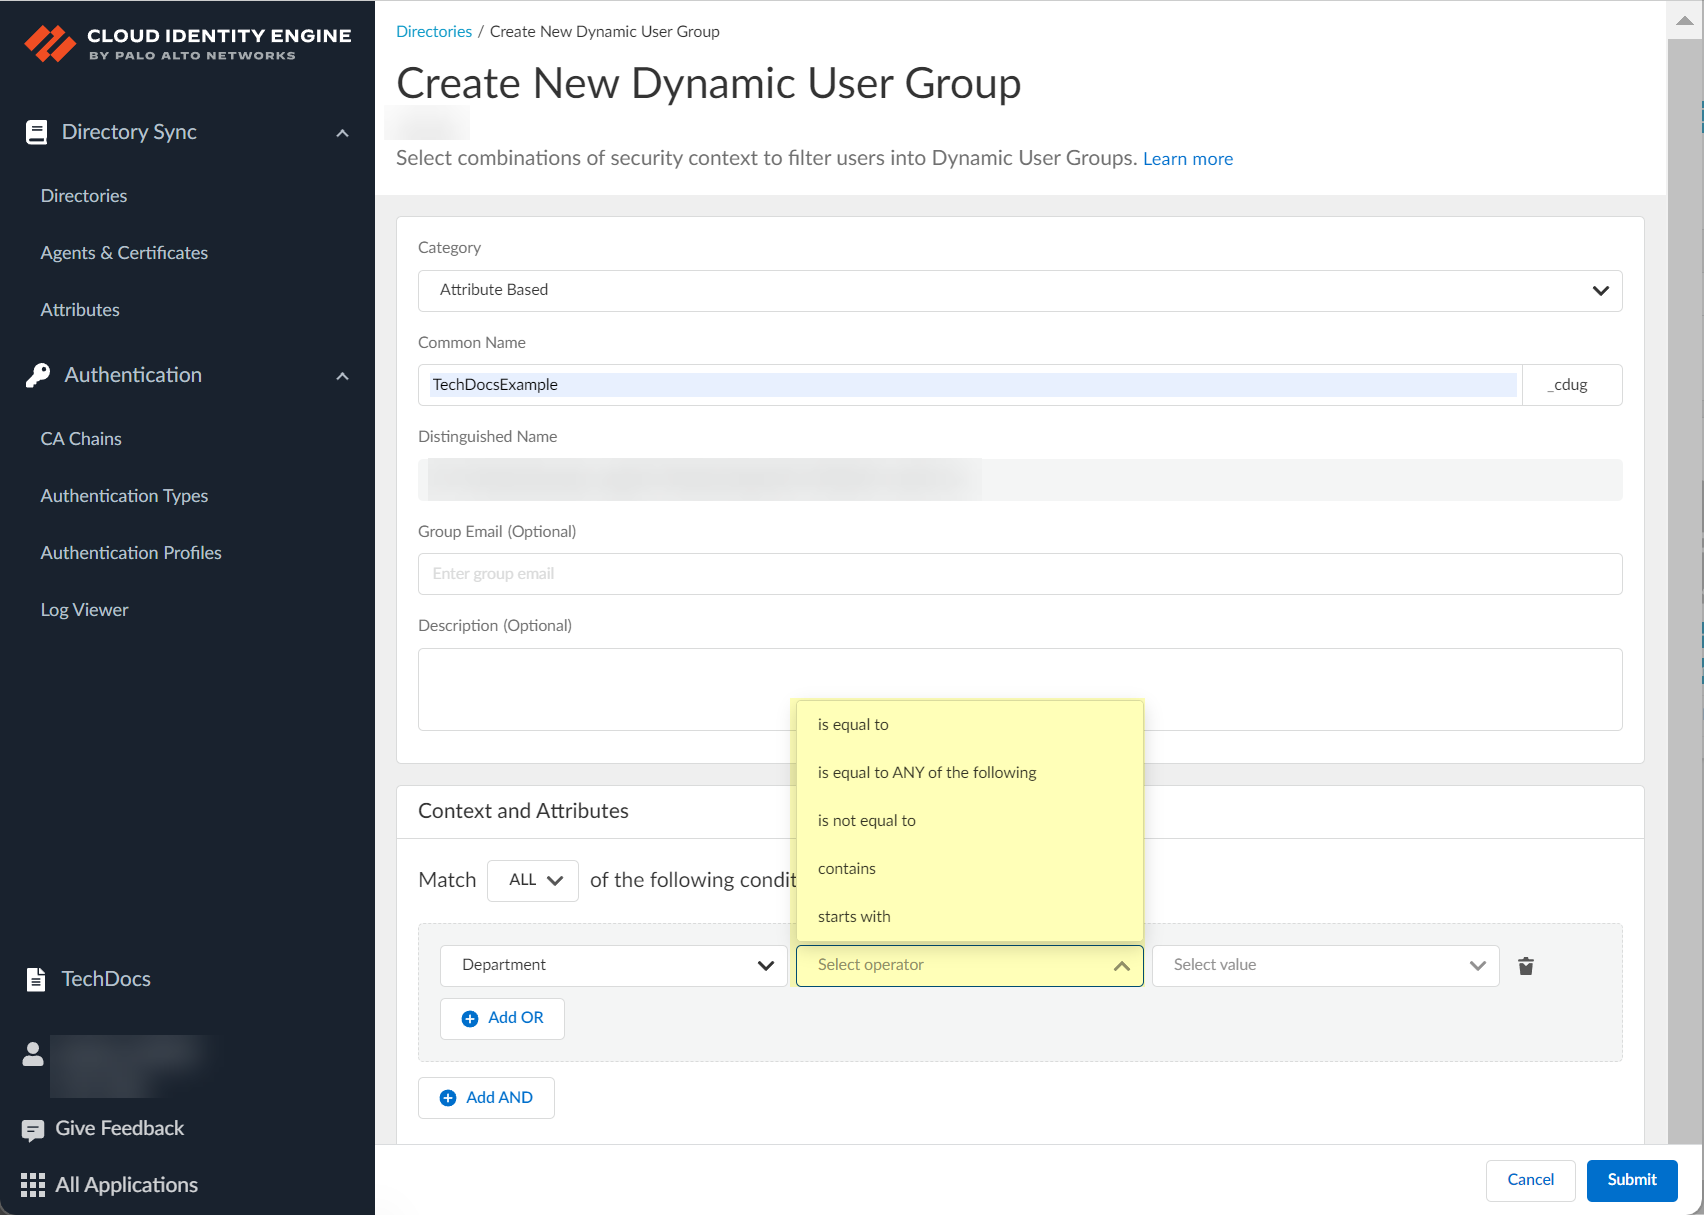
is equal to—Adds members to the group who
are an exact match for a single attribute or context.
is equal to ANY of the following—Adds
members to the group who are an exact match for one or more
attributes or contexts.
is not equal to—Adds members to the group
results who don't match the attribute or context.
contains—Adds members to the group when
they contain the term you enter.
starts with—Adds members to the group
when they begin with the characters you enter.
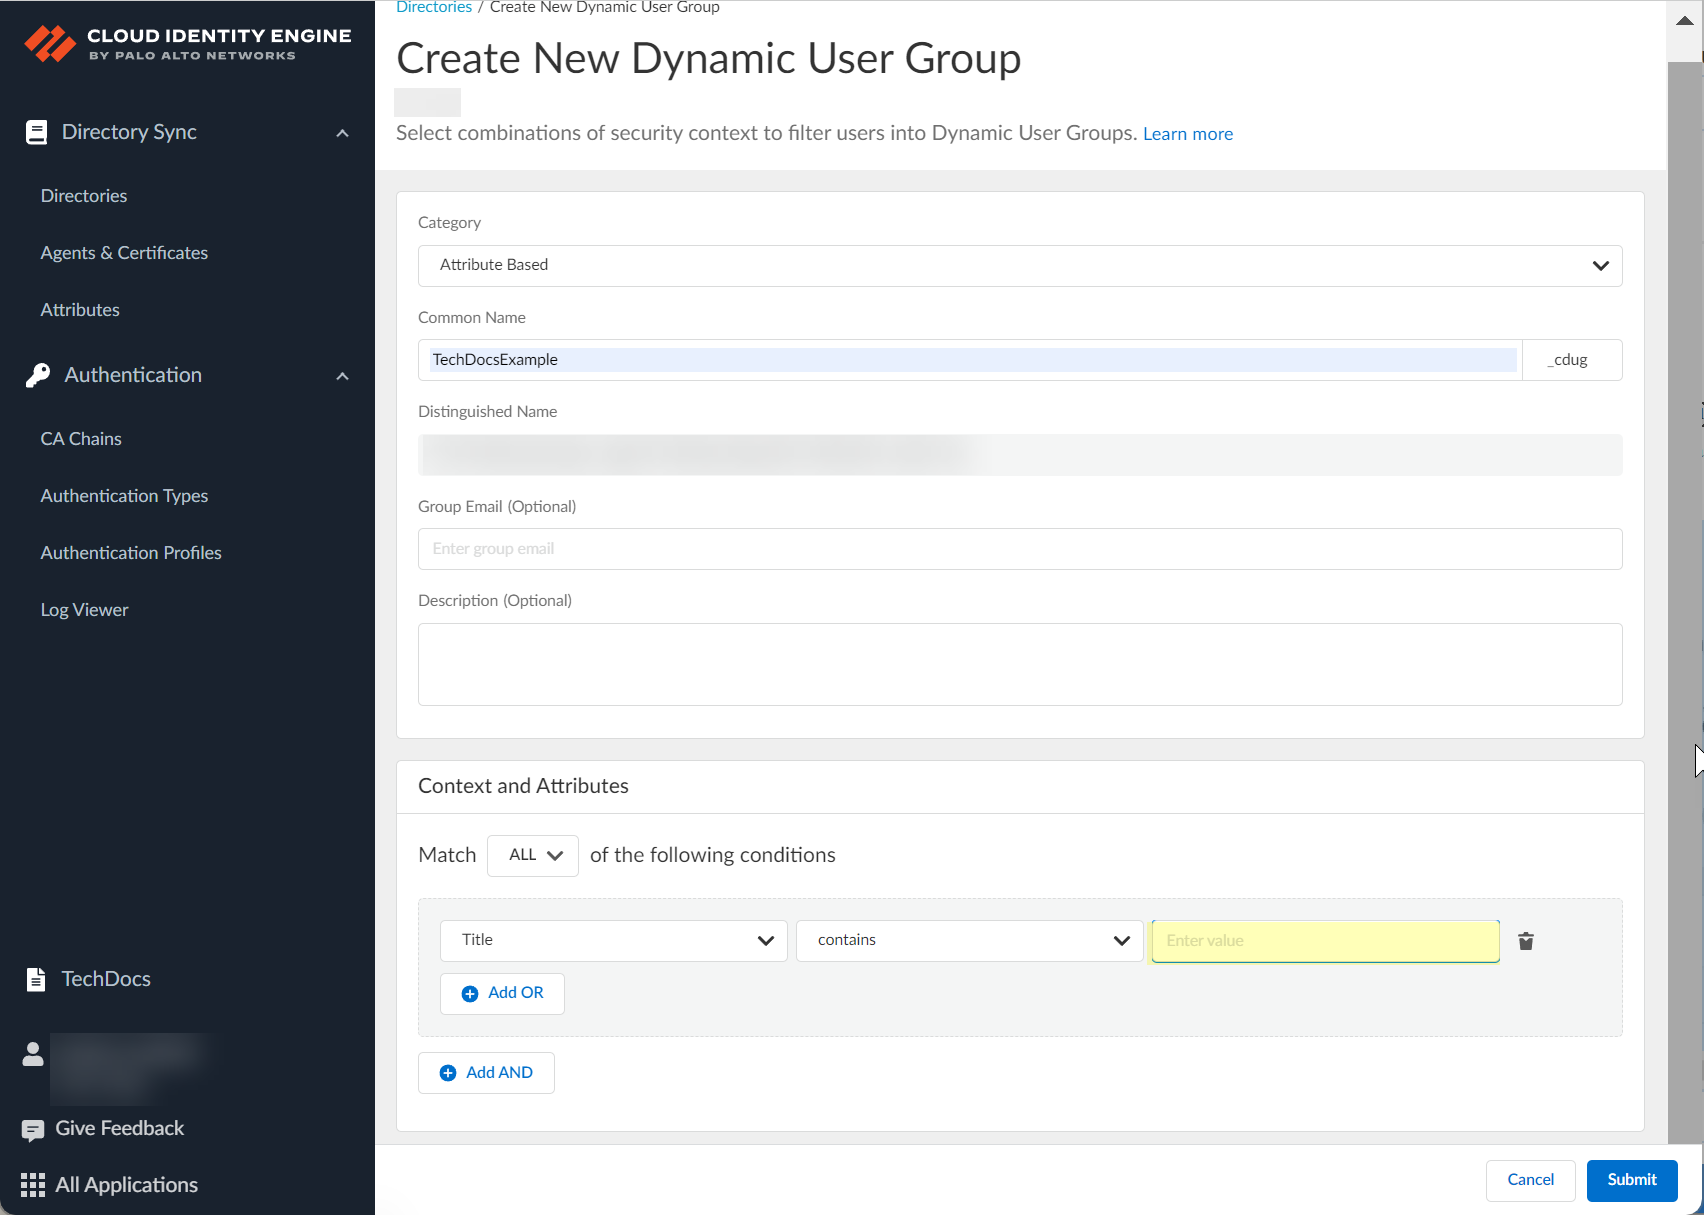
(Attribute Based only) Click Select value to
select the value (if the operand is is equal to)
or values (if the operand is is equal to ANY of the
following) for the group members. If the operand is
contains or starts
with, enter the value.
(Optional) If you want to include additional criteria for the Cloud
Dynamic User Group, select the type of operand and repeat the previous
steps as needed to add the necessary criteria for the group.
Add OR—Adds members to the group when at
least one of the criteria applies.
Add AND—Adds members to the group only
when all criteria apply.
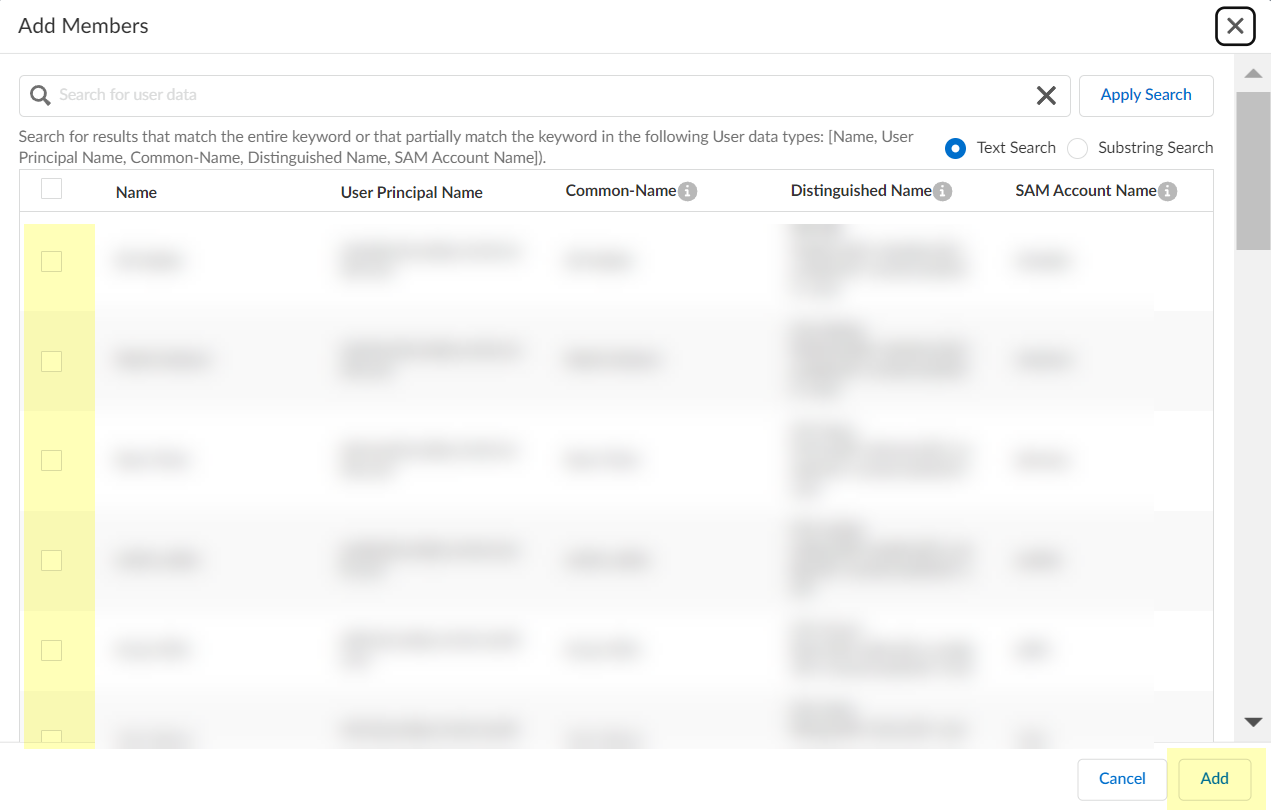
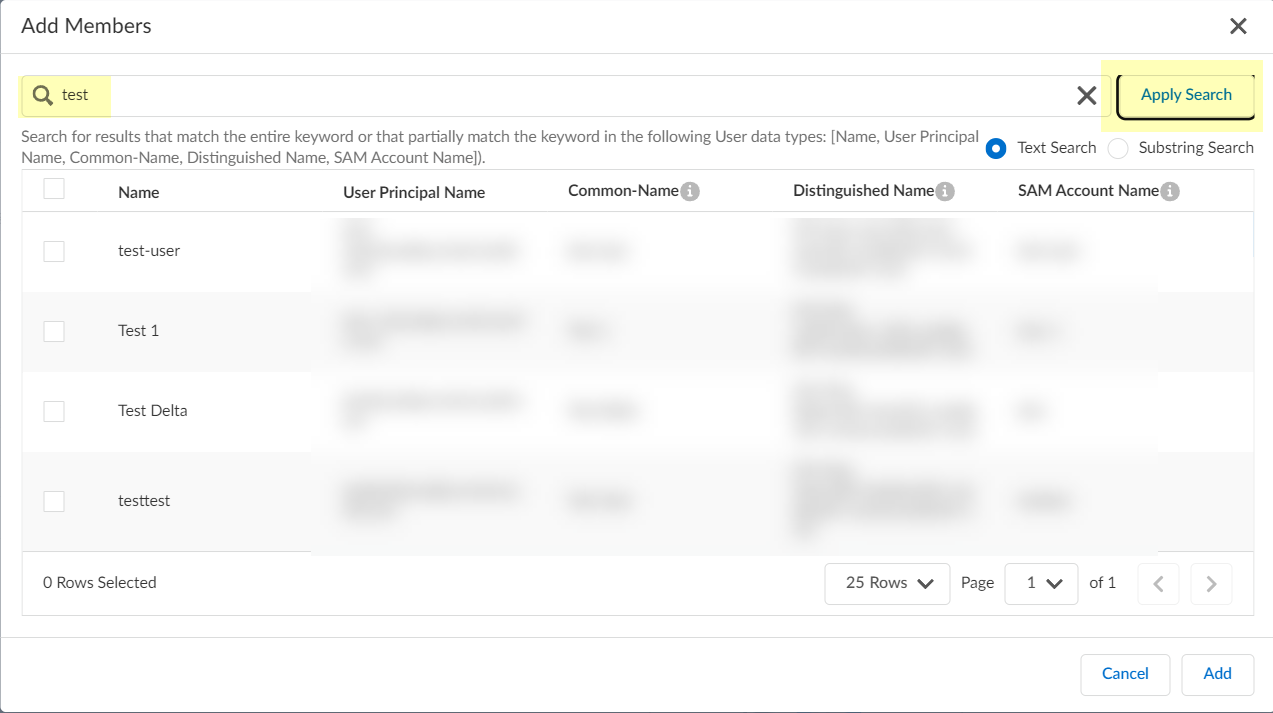
(On Demand Assignment only) Click Add Users to
view the list of possible group members.
(On Demand Assignment only) Select the users you want and
Add them to the group.
To filter the list of possible group members, enter a search term
and Apply Search and optionally select either
Text Search or Substring
Search.
(Optional) If you want to delete one of the contexts or attributes, click
Delete in the row that contains the context or
attribute you want to remove.
(Optional) To remove a user from a cloud Dynamic User Group, select the check
box in the row for the user and click Remove User then
click Continue to confirm.
The Add User button changes to Remove
User when you select a user.
Click Submit to create the Cloud Dynamic User
Group.
(User Risk Information with Azure AD only) If you enabled user risk
information collection in step 1.b, verify that the Cloud Identity Engine can
successfully collect the information by clicking the locked user icon and
verifying that Collect User Risk displays with a
green check mark.
To remove a Cloud Dynamic User Group, select the ellipses button then select
Remove.
If a sync for the removed group is currently in
progress, the removed group could still display on the page. If this occurs,
refresh the page and confirm the removed group no longer displays.