Set Up a Client Certificate
Table of Contents
Expand all | Collapse all
-
- Cloud Identity Engine Attributes
- Collect Custom Attributes with the Cloud Identity Engine
- View Directory Data
- Cloud Identity Engine User Context
- Create a Cloud Dynamic User Group
- Configure Third-Party Device-ID
- Configure an IP Tag Cloud Connection
- View Mappings and Tags
- Configure Dynamic Privilege Access in the Cloud Identity Engine
- Send Cortex XDR Risk Signals to Okta
- Configure SSF Okta Receiver as a Risk Connection
- Configure the Secrets Vault
-
- Set Up Password Authentication
-
- Configure Azure as an IdP in the Cloud Identity Engine
- Configure Okta as an IdP in the Cloud Identity Engine
- Configure PingOne as an IdP in the Cloud Identity Engine
- Configure PingFederate as an IdP in the Cloud Identity Engine
- Configure Google as an IdP in the Cloud Identity Engine
- Configure a SAML 2.0-Compliant IdP in the Cloud Identity Engine
- Set Up a Client Certificate
- Configure an OIDC Authentication Type
- Set Up an Authentication Profile
- Configure Cloud Identity Engine Authentication on the Firewall or Panorama
- Configure the Cloud Identity Engine as a Mapping Source on the Firewall or Panorama
- Configure Dynamic Privilege Access in the Cloud Identity Engine
- Get Help
Set Up a Client Certificate
- Configure a Certificate Authority (CA) chain to authenticate users.Upload the CA chain, including the root certificate and any intermediate certificates, that issues the client certificate. The Cloud Identity Engine supports multiple intermediate certificates but does not support sibling intermediate certificates in a single CA chain.
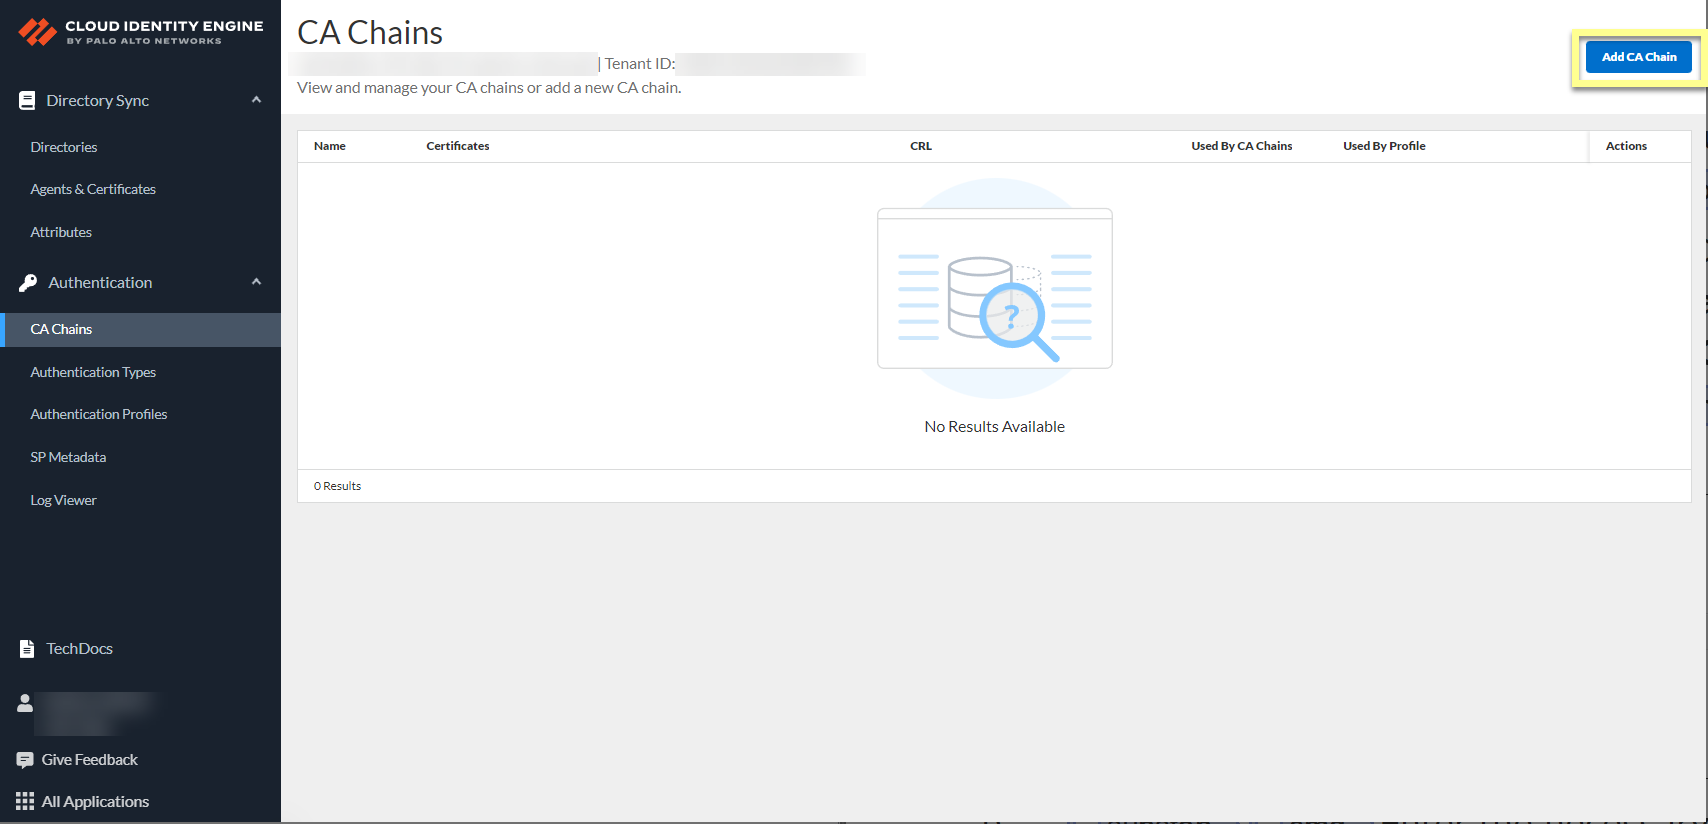
- In the Cloud Identity Engine app, select AuthenticationCA ChainsAdd CA Chain.
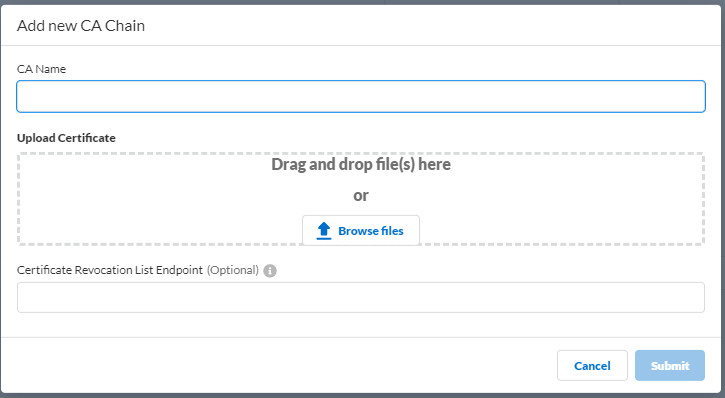
![]() Enter the necessary information for the CA chain profile.
Enter the necessary information for the CA chain profile.![]()
- CA Name—Enter a unique name to identify the CA chain in the Cloud Identity Engine tenant.
- Upload Certificate—Drag and drop file(s) here or Browse
files to your CA certificate then Open the
certificate to select it. The file must end in the .crt or .pem file extension.
- Certificate Revocation List Endpoint (Optional)—(Optional but recommended) Specify the URL for the certificate revocation list (CRL) list that you want the Cloud Identity Engine to use to validate the client certificate.
Submit the changes to complete the configuration.In the Cloud Identity Engine app, select AuthenticationAuthentication TypesAdd New Authentication Type.![]() Select Client CertificateSet Up.
Select Client CertificateSet Up.![]() Enter a unique Authentication Type Name for the client certificate.Select the Username Field that you want the Cloud Identity Engine to use to authenticate users.Select the Username Field based on the attribute type of the client certificate that you want to use to authenticate the user; for example, if the username is defined in the client certificate using Subject, select Subject.
Enter a unique Authentication Type Name for the client certificate.Select the Username Field that you want the Cloud Identity Engine to use to authenticate users.Select the Username Field based on the attribute type of the client certificate that you want to use to authenticate the user; for example, if the username is defined in the client certificate using Subject, select Subject.![]() Configure the Username Attribute based on the previous step and the attribute that your client certificate uses to authenticate users.
Configure the Username Attribute based on the previous step and the attribute that your client certificate uses to authenticate users.- If the Username Field is Subject, the Username Attribute is CN.
- If the Username Field is Subject Alt Name, select Email or User Principal Name based on the attribute that your client certificate specifies.
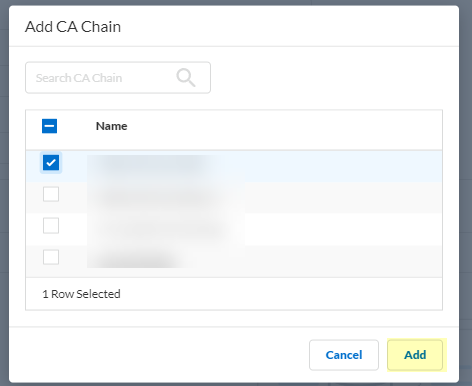
Click Add CA Chain to add one or more CA chains to authenticate users.![]() Enter a search term in the Search CA Chain field or select a CA chain you previously configured and Add it to the configuration.The Cloud Identity Engine supports grouping multiple CA chains in a certificate type to authenticate client certificates issued by multiple CA chains.
Enter a search term in the Search CA Chain field or select a CA chain you previously configured and Add it to the configuration.The Cloud Identity Engine supports grouping multiple CA chains in a certificate type to authenticate client certificates issued by multiple CA chains.![]() Submit your changes to configure the authentication type.
Submit your changes to configure the authentication type.


