Identity
Configure Dynamic Privilege Access in the Cloud Identity Engine
Table of Contents
Configure Dynamic Privilege Access in the Cloud Identity Engine
Learn how to configure the Dynamic Privilege Access (DPA) capability in the Cloud
Identity Engine.
| Where Can I Use This? | What Do I Need? |
|---|---|
| The Cloud Identity Engine service is free; however, the enforcement points utilizing directory data may require specific licenses. Click here for more information. |
Enabling Dynamic Privilege Access (DPA) allows you to isolate network resources so
they are only accessible to users on a per-project basis.
Contact your Palo Alto Networks account representative to
activate this functionality.
Complete the following steps to enable and configure DPA in the Cloud Identity
Engine. For more information, refer to the Prisma Access documentation. The Prisma Access release notes have
information on known issues for DPA.
Syncing new user groups for SAML applications in Azure may
require up to 3 hours for the Cloud Identity Engine to complete the sync. Wait until
the sync is complete before assigning projects to the new group.
- Configure an authentication type in the Cloud Identity Engine.The authentication type you configure in the Cloud Identity Engine is only for use with DPA authentication; don't use the same authentication type you use for DPA for another authentication type.
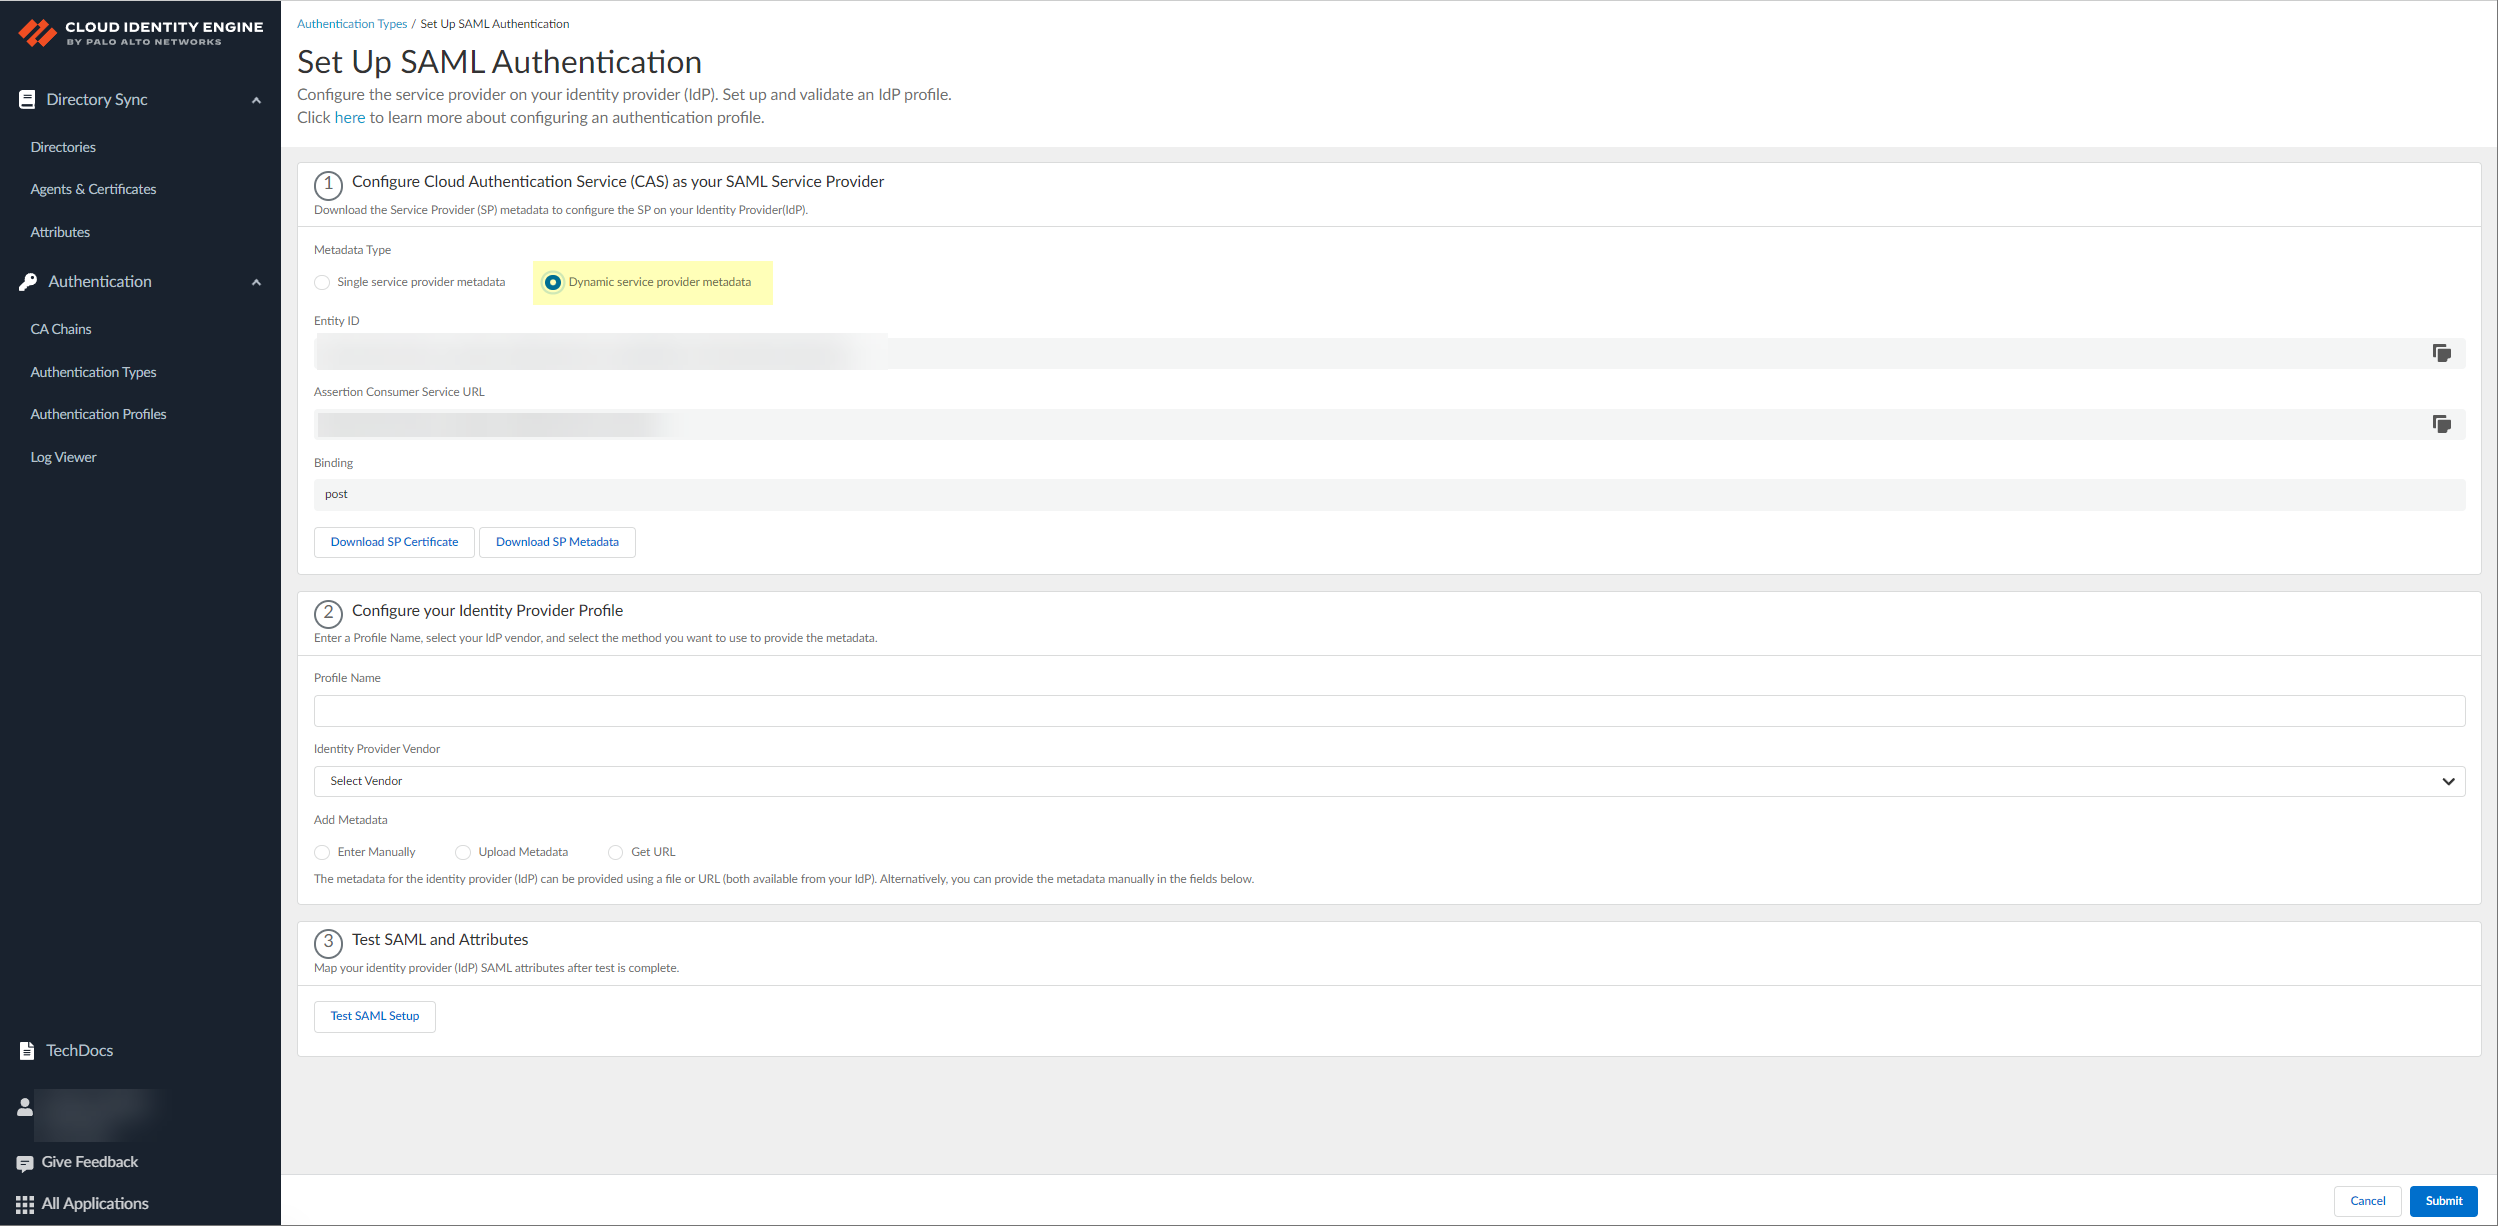
- In the Cloud Identity Engine, select .The Cloud Identity Engine supports Azure Active Directory (Azure AD) in this release. To use an existing Azure IdP configuration, select .If you Set Up a new SAML 2.0 authentication type, configure Azure as the identity provider (IdP) in a new configuration.If you edit the configuration for an existing Azure IdP authentication type, synchronize all attributes for the directory (also known as a full sync) after editing and submitting the configuration.Select Dynamic service provider metadata as the Metadata Type.
![]() Copy and save the information from the Cloud Identity Engine that you must configure in your identity provider.Select one of the following methods to obtain the information you need to configure for the Cloud Identity Engine to communicate with your identity provider:
Copy and save the information from the Cloud Identity Engine that you must configure in your identity provider.Select one of the following methods to obtain the information you need to configure for the Cloud Identity Engine to communicate with your identity provider:- Copy the Entity ID and the Assertion
Consumer Service URL, then save them in a secure
location.Don't edit the Entity ID or use the Entity ID for other applications. You don't need to download the SP metadata if you use the Entity ID.
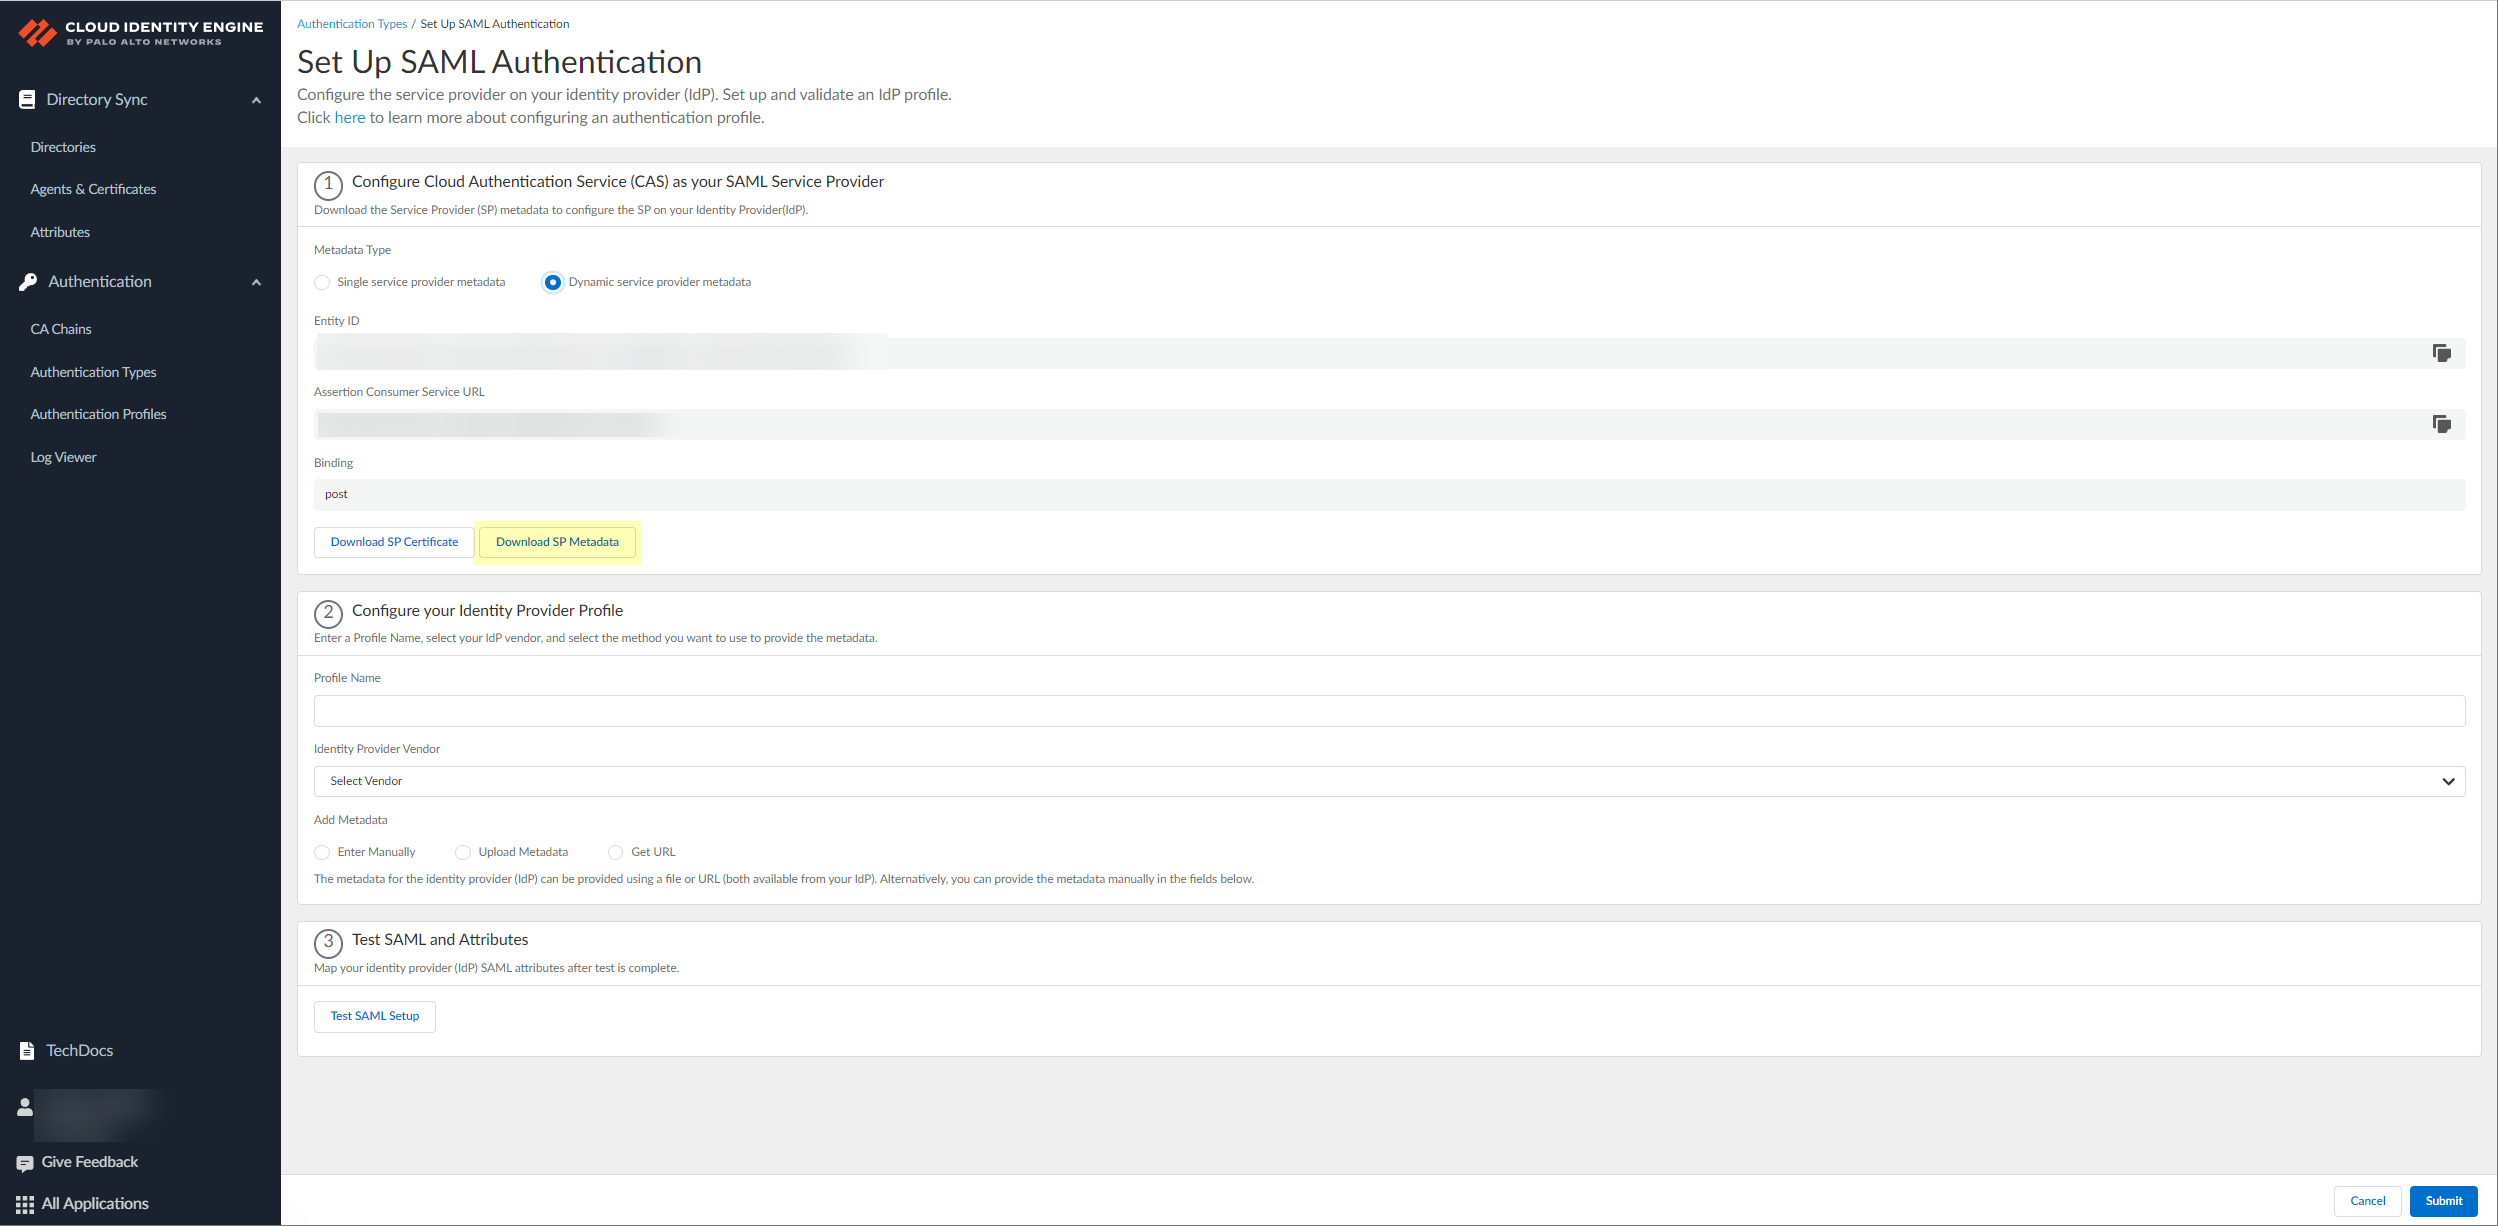
- Click Download SP Metadata and save the metadata
in a secure location. For more information, refer to the first step in
the procedure for configuring Azure as an IdP in
the Cloud Identity Engine. This step is mandatory for successful DPA configuration using SP metadata, even if you edit an existing Azure IdP configuration. The SP metadata provides the Entity ID, the Reply URL (Assertion Customer Service URL) and the Logout URL; you must manually enter the Sign on URL.
![]()
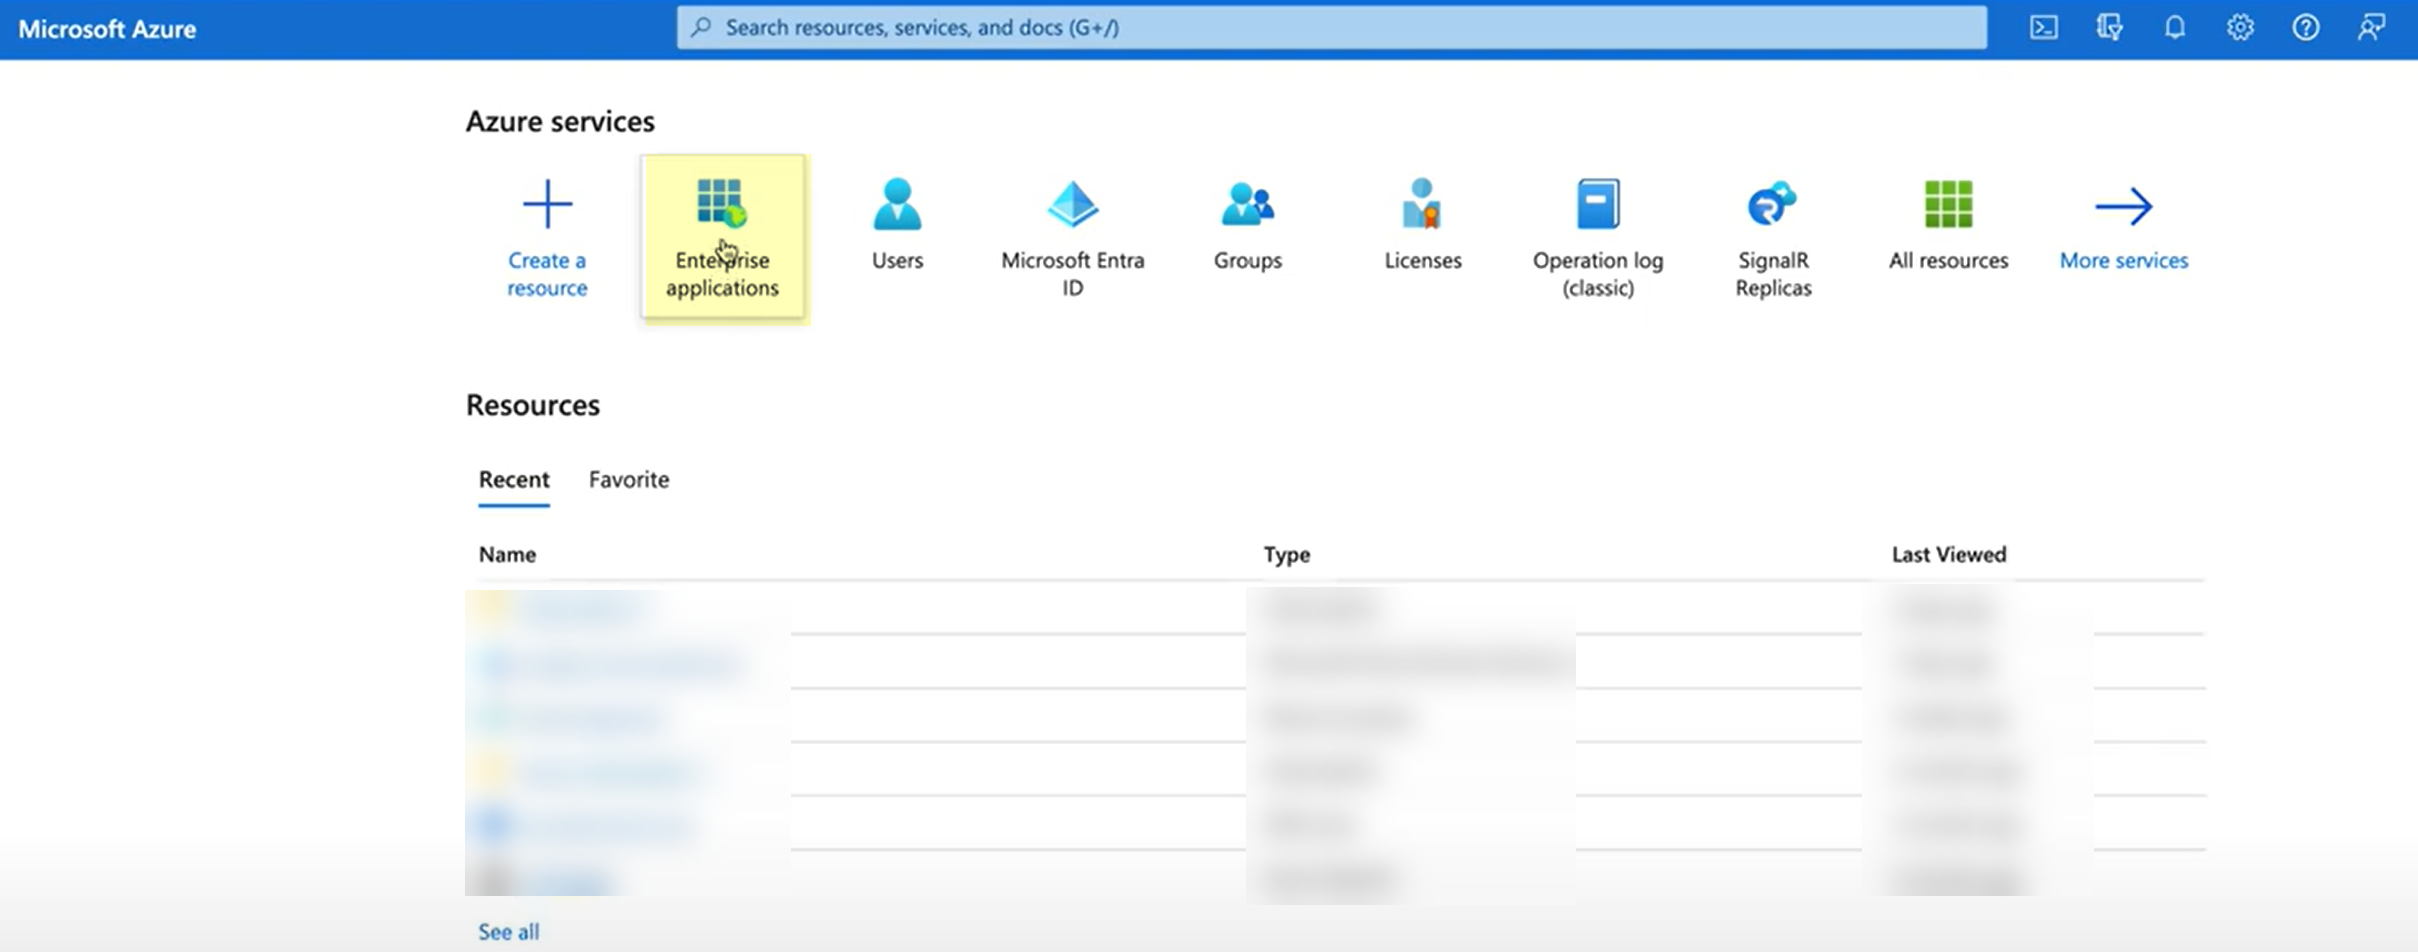
If you want to configure the authentication type so you can obtain the necessary information and you don't want to enter the metadata now, you can choose to Do It Later. This option allows you to generate the data you need to enter in the IdP for the next steps; however, you must enter the metadata before submitting the configuration to successfully use the authentication type with the Cloud Identity Engine.In the IdP administrator portal, download the SAML application for the Cloud Identity Engine from the gallery.- Log in to the Azure Portal and select Enterprise Applications.
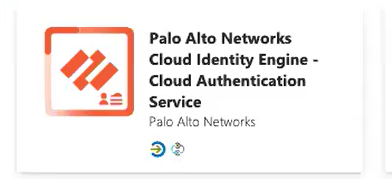
![]() Search for the Palo Alto Networks Cloud Identity Engine - Cloud Authentication Service gallery application and select it.
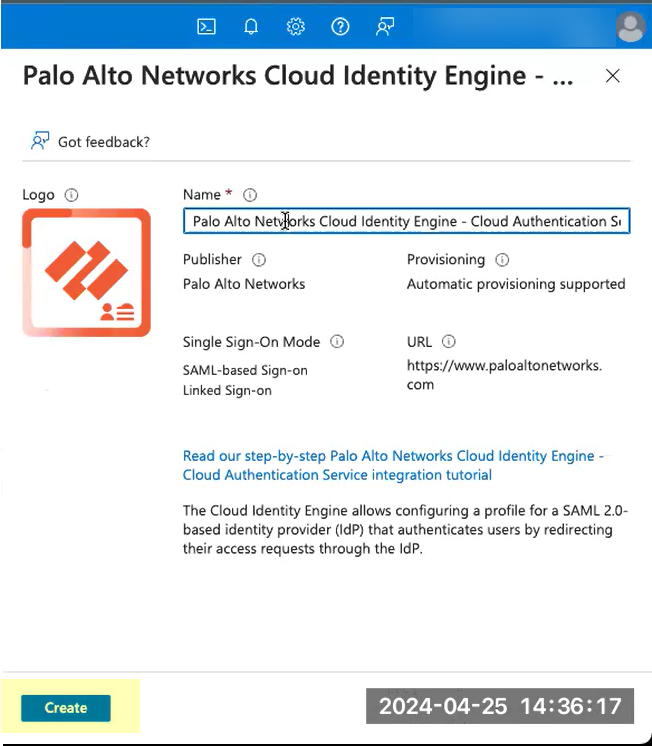
Search for the Palo Alto Networks Cloud Identity Engine - Cloud Authentication Service gallery application and select it.![]() (Optional) Edit the application Name.Create the configuration.
(Optional) Edit the application Name.Create the configuration.![]() For Set up single sign-on, click Get started.
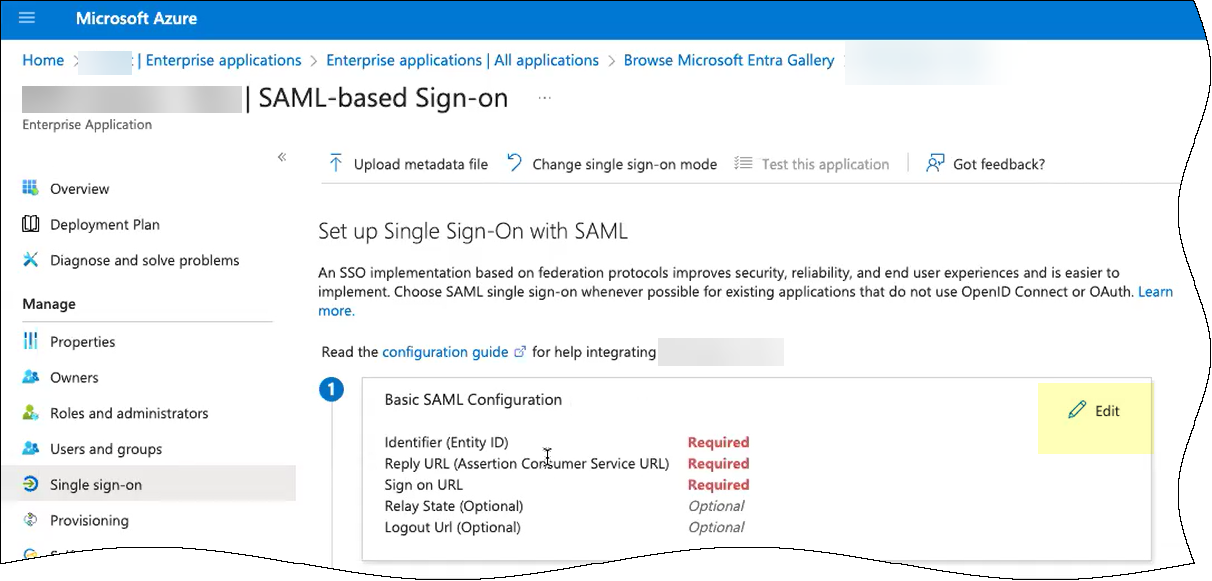
For Set up single sign-on, click Get started.![]() Depending on the method you used in step 2, complete the necessary steps to configure the SAML application.
Depending on the method you used in step 2, complete the necessary steps to configure the SAML application.- If you copied the Entity ID and Assertion Consumer Service URL:
- Edit the Basic SAML
Configuration you created.
![]()
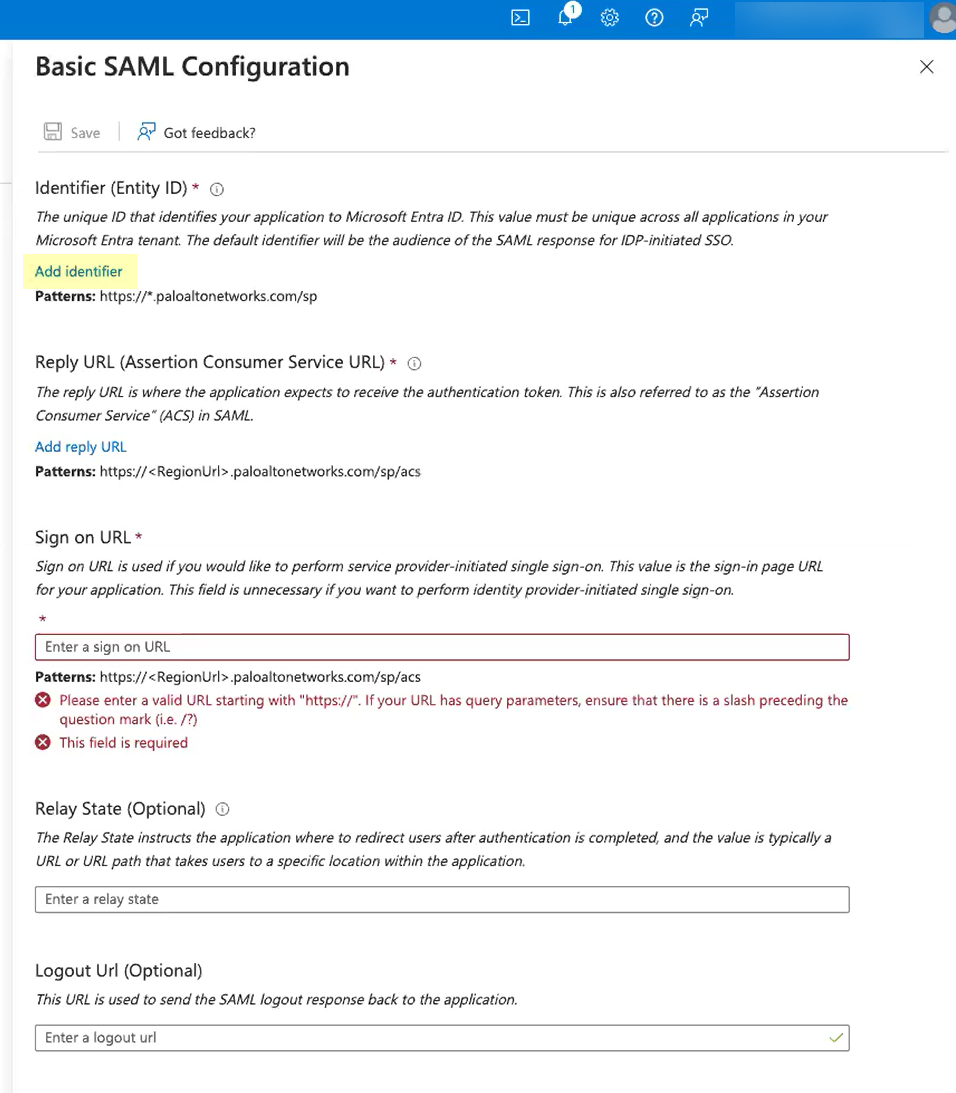
- Click Add identifier and paste the
Entity ID you copied from the Cloud
Identity Engine.
![]()
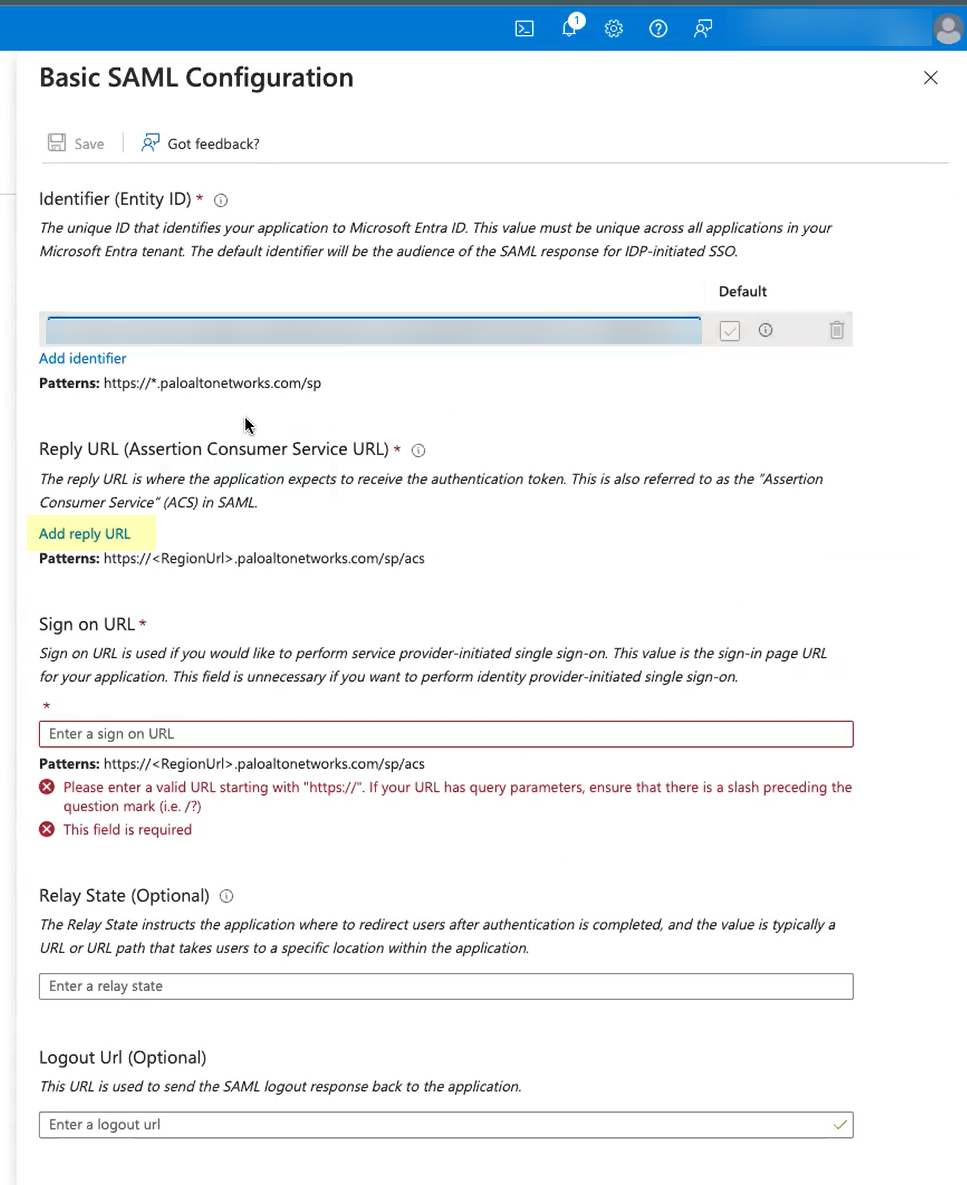
- Click Add reply URL and paste the
Assertion Consumer Service URL you
copied from the Cloud Identity Engine.
![]()
- Enter your regional endpoint as the Sign on URL using the following format: https://<RegionUrl>.paloaltonetworks.com/sp/acs (where <RegionUrl> is your regional endpoint). For more information on regional endpoints, see Configure Cloud Identity Engine Authentication on the Firewall or Panorama.
- Save your configuration.
- Close the window and Copy the App Federation Metadata URL.
- Edit the Basic SAML
Configuration you created.
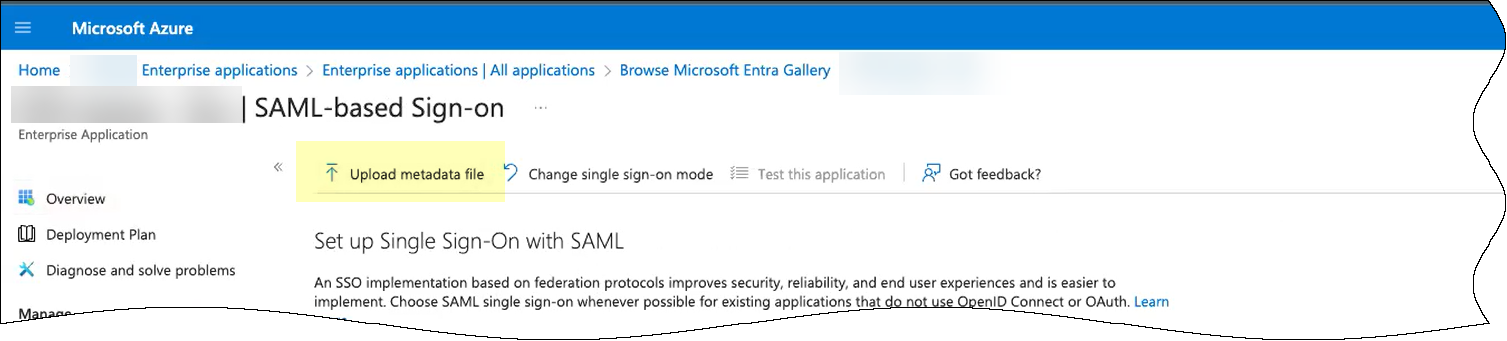
- If you downloaded the SP metadata:
- Click Upload metadata file to upload the
SP metadata file from the Cloud Identity Engine.
![]()
- Browse to the SP metadata file you downloaded from the Cloud Identity Engine.
- Add the file.
- Edit the Basic SAML
Configuration you created.
![]()
- Enter your regional endpoint as the Sign on URL using the following format: https://<RegionUrl>.paloaltonetworks.com/sp/acs (where <RegionUrl> is your regional endpoint). For more information on regional endpoints, see Configure Cloud Identity Engine Authentication on the Firewall or Panorama.
- Save your configuration.
- Close the window and Copy the App Federation Metadata URL.
- Click Upload metadata file to upload the
SP metadata file from the Cloud Identity Engine.
Assign your account to the application and save the configuration.- Assign your account to ensure your access to the application and to any other users you want to authenticate using the SAML application. For more information, refer to step 3 in configuring Azure as an IdP.Save the configuration.Continue the IdP configuration in the Cloud Identity Engine.
- Enter the remaining information to configure your identity provider (refer to step 5).In the Cloud Identity Engine, enter the App Federation Metadata URL you copied as the Identity Provider Metadata URL .Click Get URL to confirm the Cloud Identity Engine can connect to the URL.This step is mandatory to confirm the configuration. If you don't click Get URL before clicking Test SAML Setup, the test isn't successful.Select whether Multi-factor Authentication is Enabled on the Identity Provider and whether you want to Force Authentication.Refer to steps 6-7 in Configure Azure as an IdP in the Cloud Identity Engine for more information.Configure the SAML attributes for the Cloud Identity Engine to use for authentication.
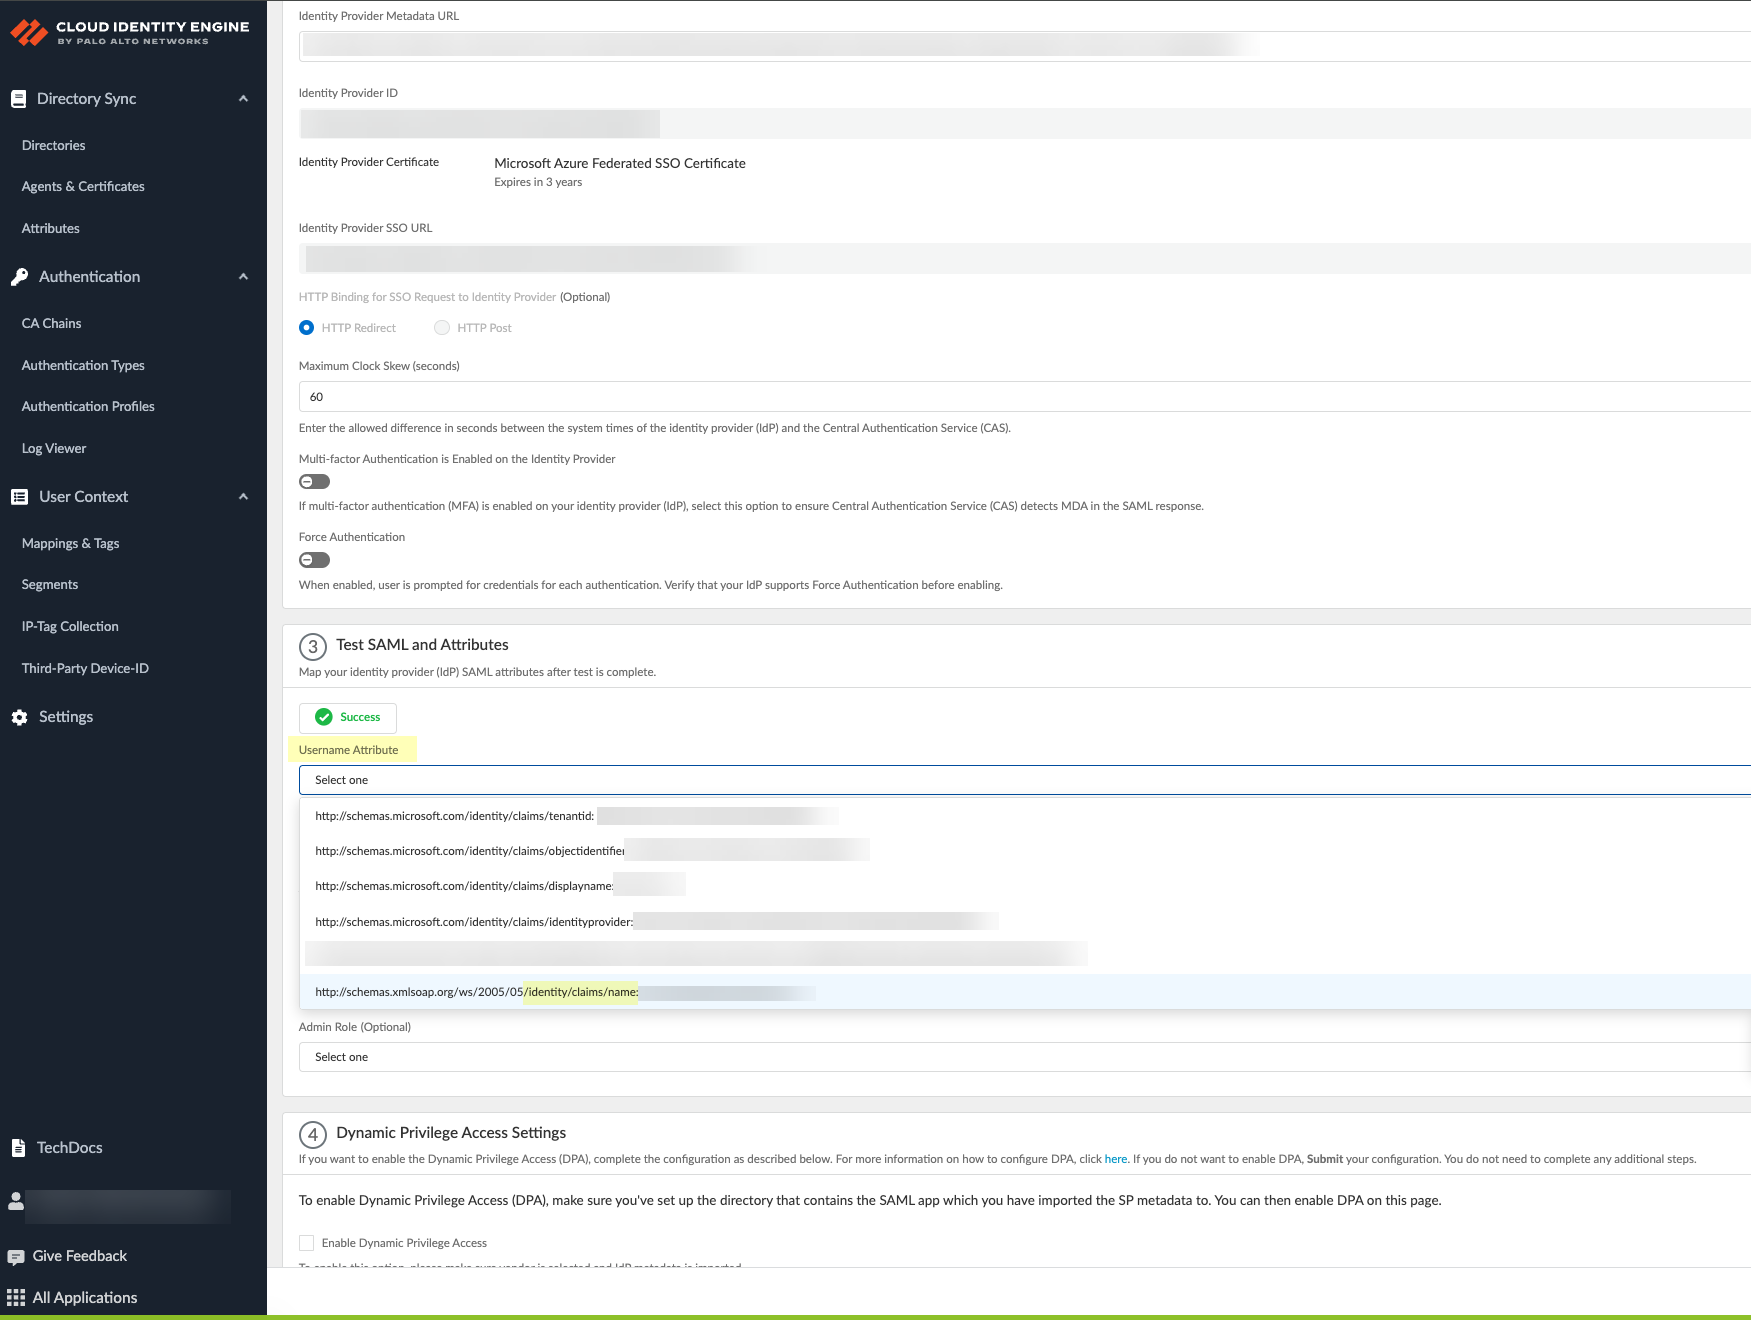
- Click Test SAML Setup to verify the configuration.Select the Username Attribute for the Cloud Identity Engine to use for authentication.Select the username attribute that uses the Name (/identity/claims/name:) format. If you do not select the correct username attribute, user authentication for projects is not successful. For more information, refer to the Microsoft documentation.
![]() (Optional) Select other attributes to use for authentication, such as Usergroup Attribute, Access Domain, User Domain, and Admin Role.If you have not already done so, Collect enterprise applications data from your Azure directory. Sign in to confirm the changes and Submit the update to the configuration.The Cloud Identity Engine begins a complete synchronization of the attributes (also known as a full sync) when you submit the configuration. Wait until the sync is complete before continuing.This step is mandatory to complete the configuration regardless of whether you're creating a new configuration or editing an existing configuration. You must complete this step before enabling Dynamic Privilege Access in the Cloud Identity Engine.Enable Dynamic Privilege Access in the Cloud Identity Engine authentication profile.
(Optional) Select other attributes to use for authentication, such as Usergroup Attribute, Access Domain, User Domain, and Admin Role.If you have not already done so, Collect enterprise applications data from your Azure directory. Sign in to confirm the changes and Submit the update to the configuration.The Cloud Identity Engine begins a complete synchronization of the attributes (also known as a full sync) when you submit the configuration. Wait until the sync is complete before continuing.This step is mandatory to complete the configuration regardless of whether you're creating a new configuration or editing an existing configuration. You must complete this step before enabling Dynamic Privilege Access in the Cloud Identity Engine.Enable Dynamic Privilege Access in the Cloud Identity Engine authentication profile.- Select Enable Dynamic Privilege Access.Click Detect Directory and SAML to allow the Cloud Identity Engine to detect available directories and SAML attributes.When the Cloud Identity Engine completes the collection of the attributes, the Directory and SAML 2.0 Application information displays.If the Cloud Identity Engine can't detect the SAML application, complete a full sync then reattempt this step.After confirming the information is correct, Submit the configuration.Configure an authentication profile in the Cloud Identity Engine to use the authentication type you configured.