Dynamically Quarantine Infected Guests
Table of Contents
Dynamically Quarantine Infected Guests
Threat and traffic logs in PAN-OS include
the source or destination universally unique identifier (UUID) of
guest VMs in your NSX-V deployment. This allows the VM-Series for
NSX-V to support the tagging of guest VMs with NSX-V security tags. With
the guest VMs’ UUID now included in the log events, the firewall,
based on the filtered log events, can tag the affected guest VM
via NSX-V Manager API. This allows for automatic location of compromised
VMs in the NSX-V environments. NSX-V can then put all associated
UUIDs under policies to quarantine those VMs from the rest of the
network.
Panorama includes predefined payload formats for
threat and traffic logs in the HTTP Server Profile. These payload
formats correspond to predefined security tags in NSX-V. When a
guest VM is found in the threat or traffic logs, Panorama makes an
API call to NSX-V Manager telling NSX-V Manager to tag the guest
VM with the tag specified in the HTTP Server Profile. When the guest
VM becomes tagged, NSX-V Manager dynamically moves the tagged guest
VM into the quarantine security group, which places the guest VM
into the quarantine dynamic address group.
- Confirm that you have content update version 636 or later installed on Panorama.
- Create a dynamic address group to be your
quarantine dynamic address group.
![]()
- Create
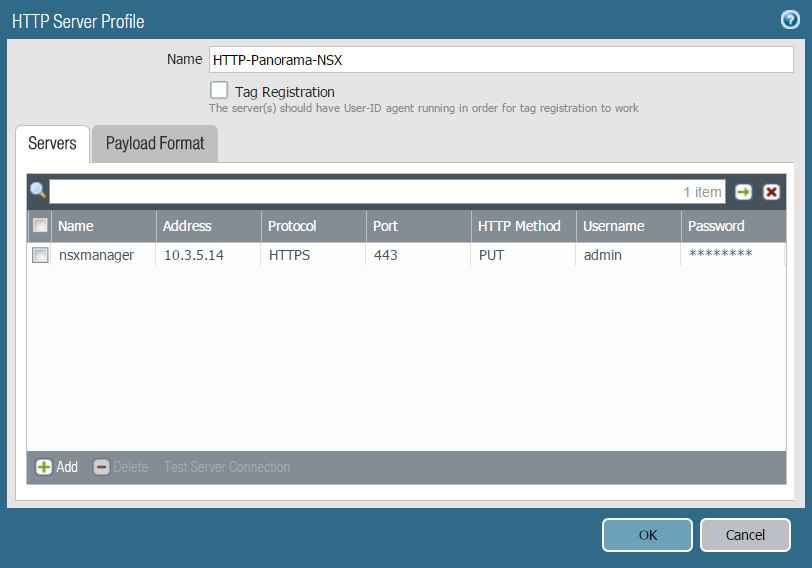
an HTTP Server Profile to send API calls to NSX-V Manager.
- Select and Add a new HTTP Server Profile.
- Enter a descriptive Name.
- Select Add to provide the details of NSX-V Manager.
- Enter a Name for NSX-V Manager.
- Enter the IP Address of NSX-V Manager.
- Select the Protocol (HTTP or HTTPS). The default Port is 80 or 443 respectively.
- Select PUT under the HTTP Method column.
- Enter the username and password for NSX-V Manager.
![]()
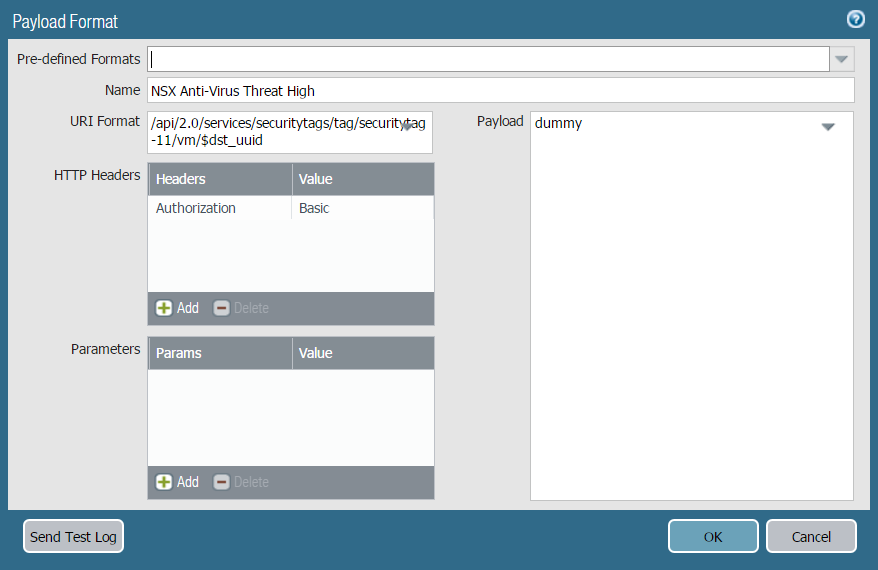
- Select Payload Format and choose
an NSX-V payload format from the Pre-defined Formats drop-down.
This populates the URI Format, HTTP Headers, and Payload fields
with the correct information to send the HTTP API call to NSX-V
Manager. Additionally, the chosen format determines which security
tag NSX-V Manager applies to infected guest VMs. In the example
below, NSX-V Anti-Virus Threat High is selected which corresponds
to the ANTI_VIRUS.VirusFound.threat=high security tag on
NSX-V Manager.
![]()
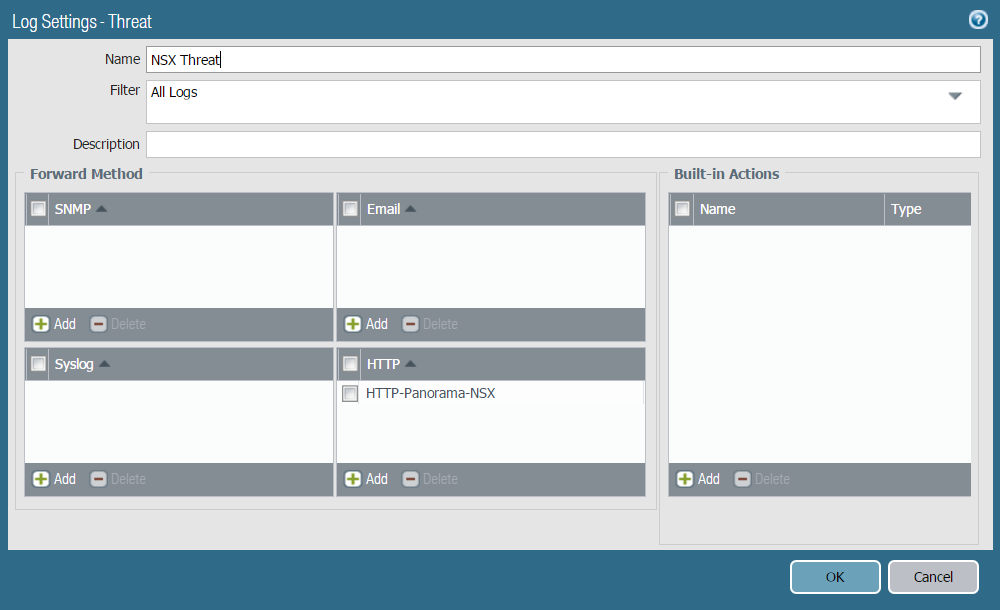
- Define the match criteria for when Panorama will forward
logs to the NSX-V Manager, and attach the HTTP server profile to
use.
- Select for Threat or Traffic logs.
- Click Traffic or Threat and Add.
- Enter a descriptive name for the new log settings.
- (Optional) Under Filter, you can add filters such as severity to narrow the logs that are forwarded to NSX-V Manager. If All Logs is selected, all threat or traffic logs that meet the criteria set in the HTTP Server profile are sent to NSX-V Manager.
- Click Add under HTTP and select the HTTP Server Profile configured in Step 3.
- Click OK.
![]()
- Configure an NSX-V server certificate for Panorama to
forward logs to NSX-V manager.
- Select .
- Create a root CA certificate with CN=IP address of Panorama.
- Create a signed certificate with CN=IP address of NSX-V Manager.
- Export the root CA certificate in PEM format without a private key.
- Export the signed certificate
in PEM format with a private key.
![]()
- Using a tool such as OpenSSL, concatenate the exported
certificates into a single PEM file for upload to NSX-V manager.
Use the following commands in OpenSSL to complete this step.
cat cert_NSX_Root_CA.crt
cert_NSX_Signed1.pem > cert_NSX_cert_chain.pem
openssl pkcs12 -export -in cert_NSX_cert_chain.pem -out cert_NSX_cert.p12
- Log in to NSX-V Manager and select . Click Choose File, locate the p12 file you created in the previous step, and click Import.
- Associate a security group with a security tag in vCenter.
- Log in to vCenter.
- Select .
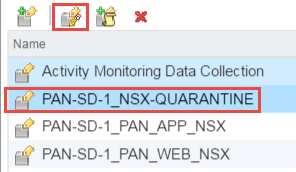
- Select a security group that is counterpart to the
quarantine dynamic address group you created previously and click Edit
Security Group.
![]()
- Select Define dynamic membership and click the + icon.
- Click Add.
- Set the criteria details to Security Tag Contains
and then enter the NSX-V security tag that corresponds to the NSX
payload format you chose in 3. Each of
the predefined NSX-V payload formats corresponds to an NSX-V security
tag. To view the NSX-V security tags in NSX-V, select .In this example, NSX Anti-Virus Threat High is used in the HTTP Server Profile so ANTI_VIRUS.VirusFound.threat=high is the NSX-V Security Tag that is used here.
- Click Finish.
![]()
- After the guest VM is cleared for removal from quarantine,
manually remove the NSX-V security tag from the guest VM in NSX-V.
- Log in to vCenter.
- Select VMs and Templates and choose the quarantined guest.
- Select .
- Uncheck the security tag used by the quarantine security group and click OK.
- Refresh the page and the quarantine security will no longer be listed under .
Source and destination UUID fields in threat and traffic logs may be blank after a guest VM is removed from quarantine. This can occur when running NSX-V 6.2.3 or earlier or if NSX-V steering rules do not use the inout direction. You can resolve this by upgrading NSX-V to 6.2.4 or issue an NSX Config-sync under and reboot the PA-VM to resolve this issue.