Download PDF
GlobalProtect
Configure DHCP Server on the GlobalProtect Gateway to Assign DHCP IP Addresses to the Endpoints
Table of Contents
Configure DHCP Server on the GlobalProtect Gateway to Assign DHCP IP Addresses to the Endpoints
Configure DHCP Server on the GlobalProtect Gateway to Assign DHCP IP Addresses to the
Endpoints
DHCP Based IP Address Assignment feature in PAN OS
11.2.0 release is supported for VM-Series Virtual Firewalls only. The feature is
not supported for hardware Next Generation Firewall platforms.
Use the following procedure to configure the DHCP server on the
GlobalProtect gateway for assigning DHCP IP addresses to the endpoints:
- Configure a DHCP server on the Windows server or on the Infoblox server
- Configure the GlobalProtect portal
- Create Create DHCP Profiles on the Firewall
- Configure the GlobalProtect gateway
- Enable DHCP Server on the GlobalProtect Gateway
- View and Verify the DHCP-based IP address assignment
- Configure Service Routes for DHCP Requests
To configure DHCP server on the Windows or Infoblox server:
Configure a DHCP server on the Windows server or on the Infoblox Server
Configure a DHCP server on the Windows server
with DHCP Selection Subnet Options or DHCP server on the Infoblox server /
Configure IPv4 Shared Networks..
The DHCP lease time you configure on the DHCP server must not be less than 5
minutes.
See Configure DHCP Server on the Infoblox Server and Configure DHCP Server on the Windows Server to know more about configuring DHCP server on
the Windows or Infoblox server:
Configure GlobalProtect Portal
Configure the GlobalProtect portal.
Create DHCP Profiles on the Firewall
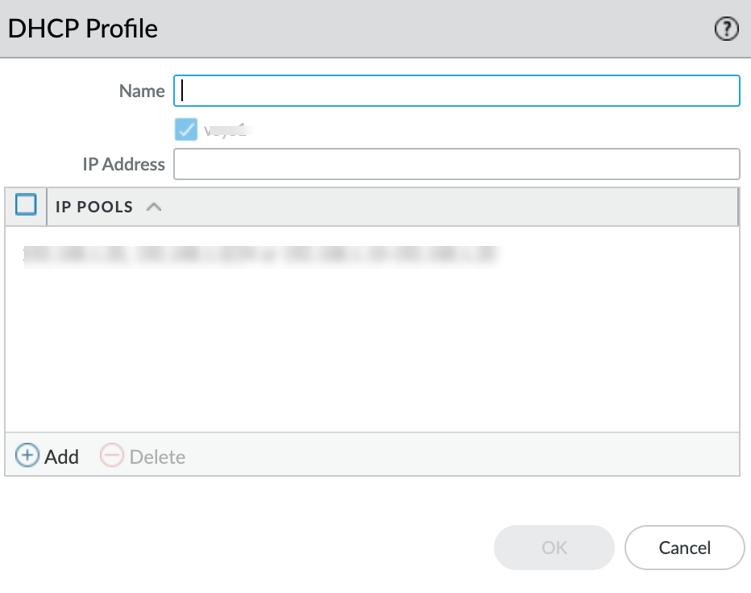
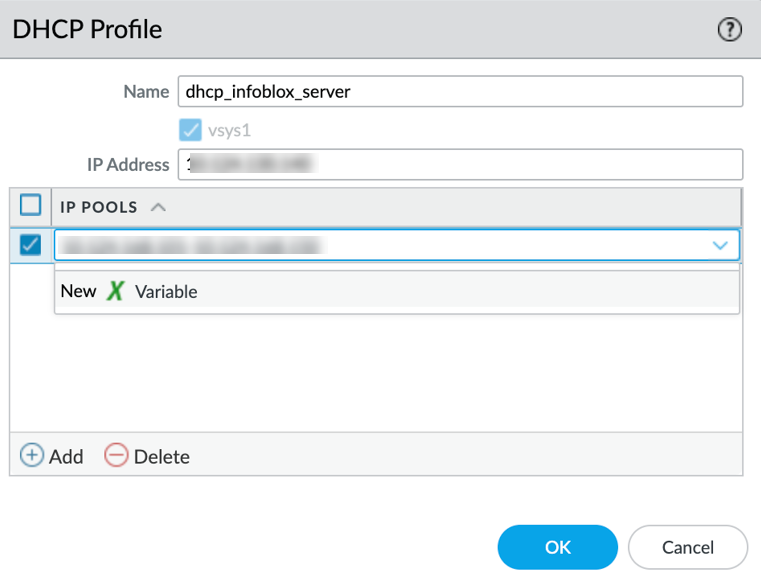
- Select NetworkGlobalProtectDHCP Profile.You can create a maximum of five DHCP profiles.Enter a descriptive Name for the DHCP profile.
![]() Specify the IP address of the DHCP server that you want to configure on the GlobalProtect gateway.Select the range of DHCP IP addresses that you want the GlobalProtect gateway to use and assign to the endpoints.The DHCP IP address pool you configure on the GlobalProtect gateway should match the IP pool in the DHCP server. If you configure DHCP IP addresses incorrectly on the GlobalProtect gateway, the traffic will not flow as expected.
Specify the IP address of the DHCP server that you want to configure on the GlobalProtect gateway.Select the range of DHCP IP addresses that you want the GlobalProtect gateway to use and assign to the endpoints.The DHCP IP address pool you configure on the GlobalProtect gateway should match the IP pool in the DHCP server. If you configure DHCP IP addresses incorrectly on the GlobalProtect gateway, the traffic will not flow as expected.![]() Click OK to save the DHCP profile.
Click OK to save the DHCP profile.Configure the GlobalProtect Gateway
Configure the GlobalProtect Gateway.Enable DHCP Server on the GlobalProtect Gateway
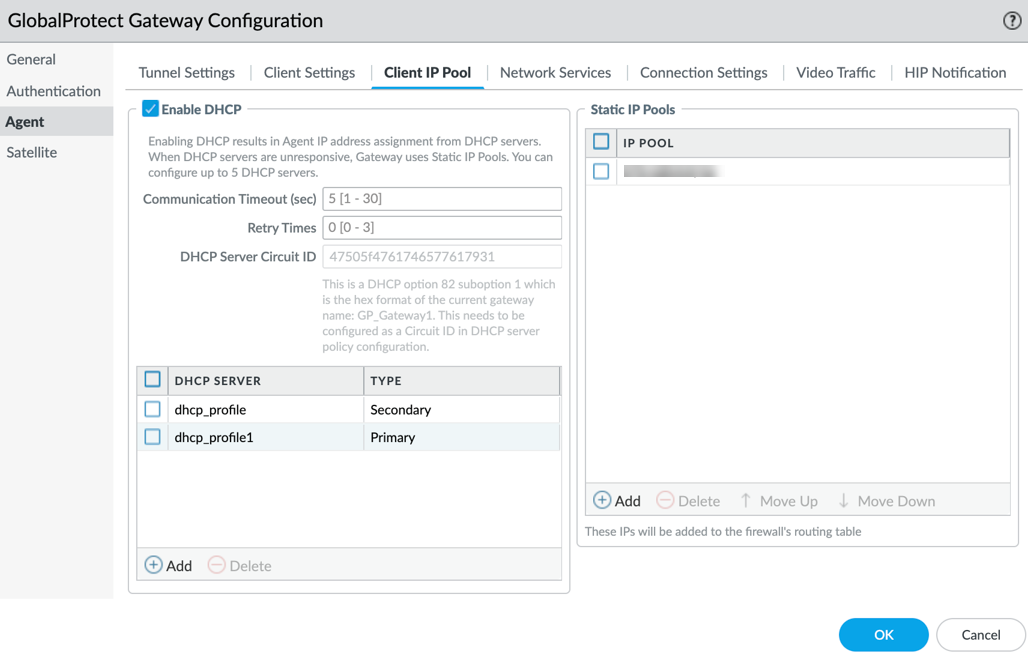
- Select NetworksGlobalProtectGateways<gateway config>AgentClient IP Pool.On the Client Pool tab, enable DHCP.Specify the Communication Timeout (in seconds) to set the number of seconds the GlobalProtect gateway and the DHCP server take to communicate and the process the IP address assignments. The default value is 5 seconds. The TCP Receive Timeout (sec) that you configure on the app settings of the GlobalProtect portal configuraion must be equal or greater than the DHCP Communication timeout.Specify the number of times the GlobalProtect gateway should retry to connect to the DHCP server when the communication timeout happens between the gateway and the DHCP server. The default value is 0.DHCP Server Circuit ID is autopopulated to configure the GlobalProtect gateway as the relay agent and to enable the gateway to receive IP addresses from the DHCP server and forward them to the endpoints when connected to the GlobalProtect app. The DHCP Server Circuit ID is the hexadecimal format of the current GlobalProtect gateway name.The DHCP Server Circuit ID should be configured as the Circuit ID while setting the DHCP server policy configuration.The DHCP Server Circuit ID should be configured as the Circuit ID while setting the DHCP server policy configuration.
![]() Select the DHCP server type from the displayed list of DHCP servers that you have configured. You can select servers as Primary and Secondary.When you set a DHCP server as secondary, it will act as the standby server for the primary DHCP server. If the primary server fails, the secondary will be used for DHCP requests after communication timeout and retry counts. If both the DHCP servers are primary, then the DHCP request will be sent to both the servers and the reply that received first will be taken into account.Click OK and commit the changes.
Select the DHCP server type from the displayed list of DHCP servers that you have configured. You can select servers as Primary and Secondary.When you set a DHCP server as secondary, it will act as the standby server for the primary DHCP server. If the primary server fails, the secondary will be used for DHCP requests after communication timeout and retry counts. If both the DHCP servers are primary, then the DHCP request will be sent to both the servers and the reply that received first will be taken into account.Click OK and commit the changes.View and Verify the DHCP-based IP Address Assignment Logs
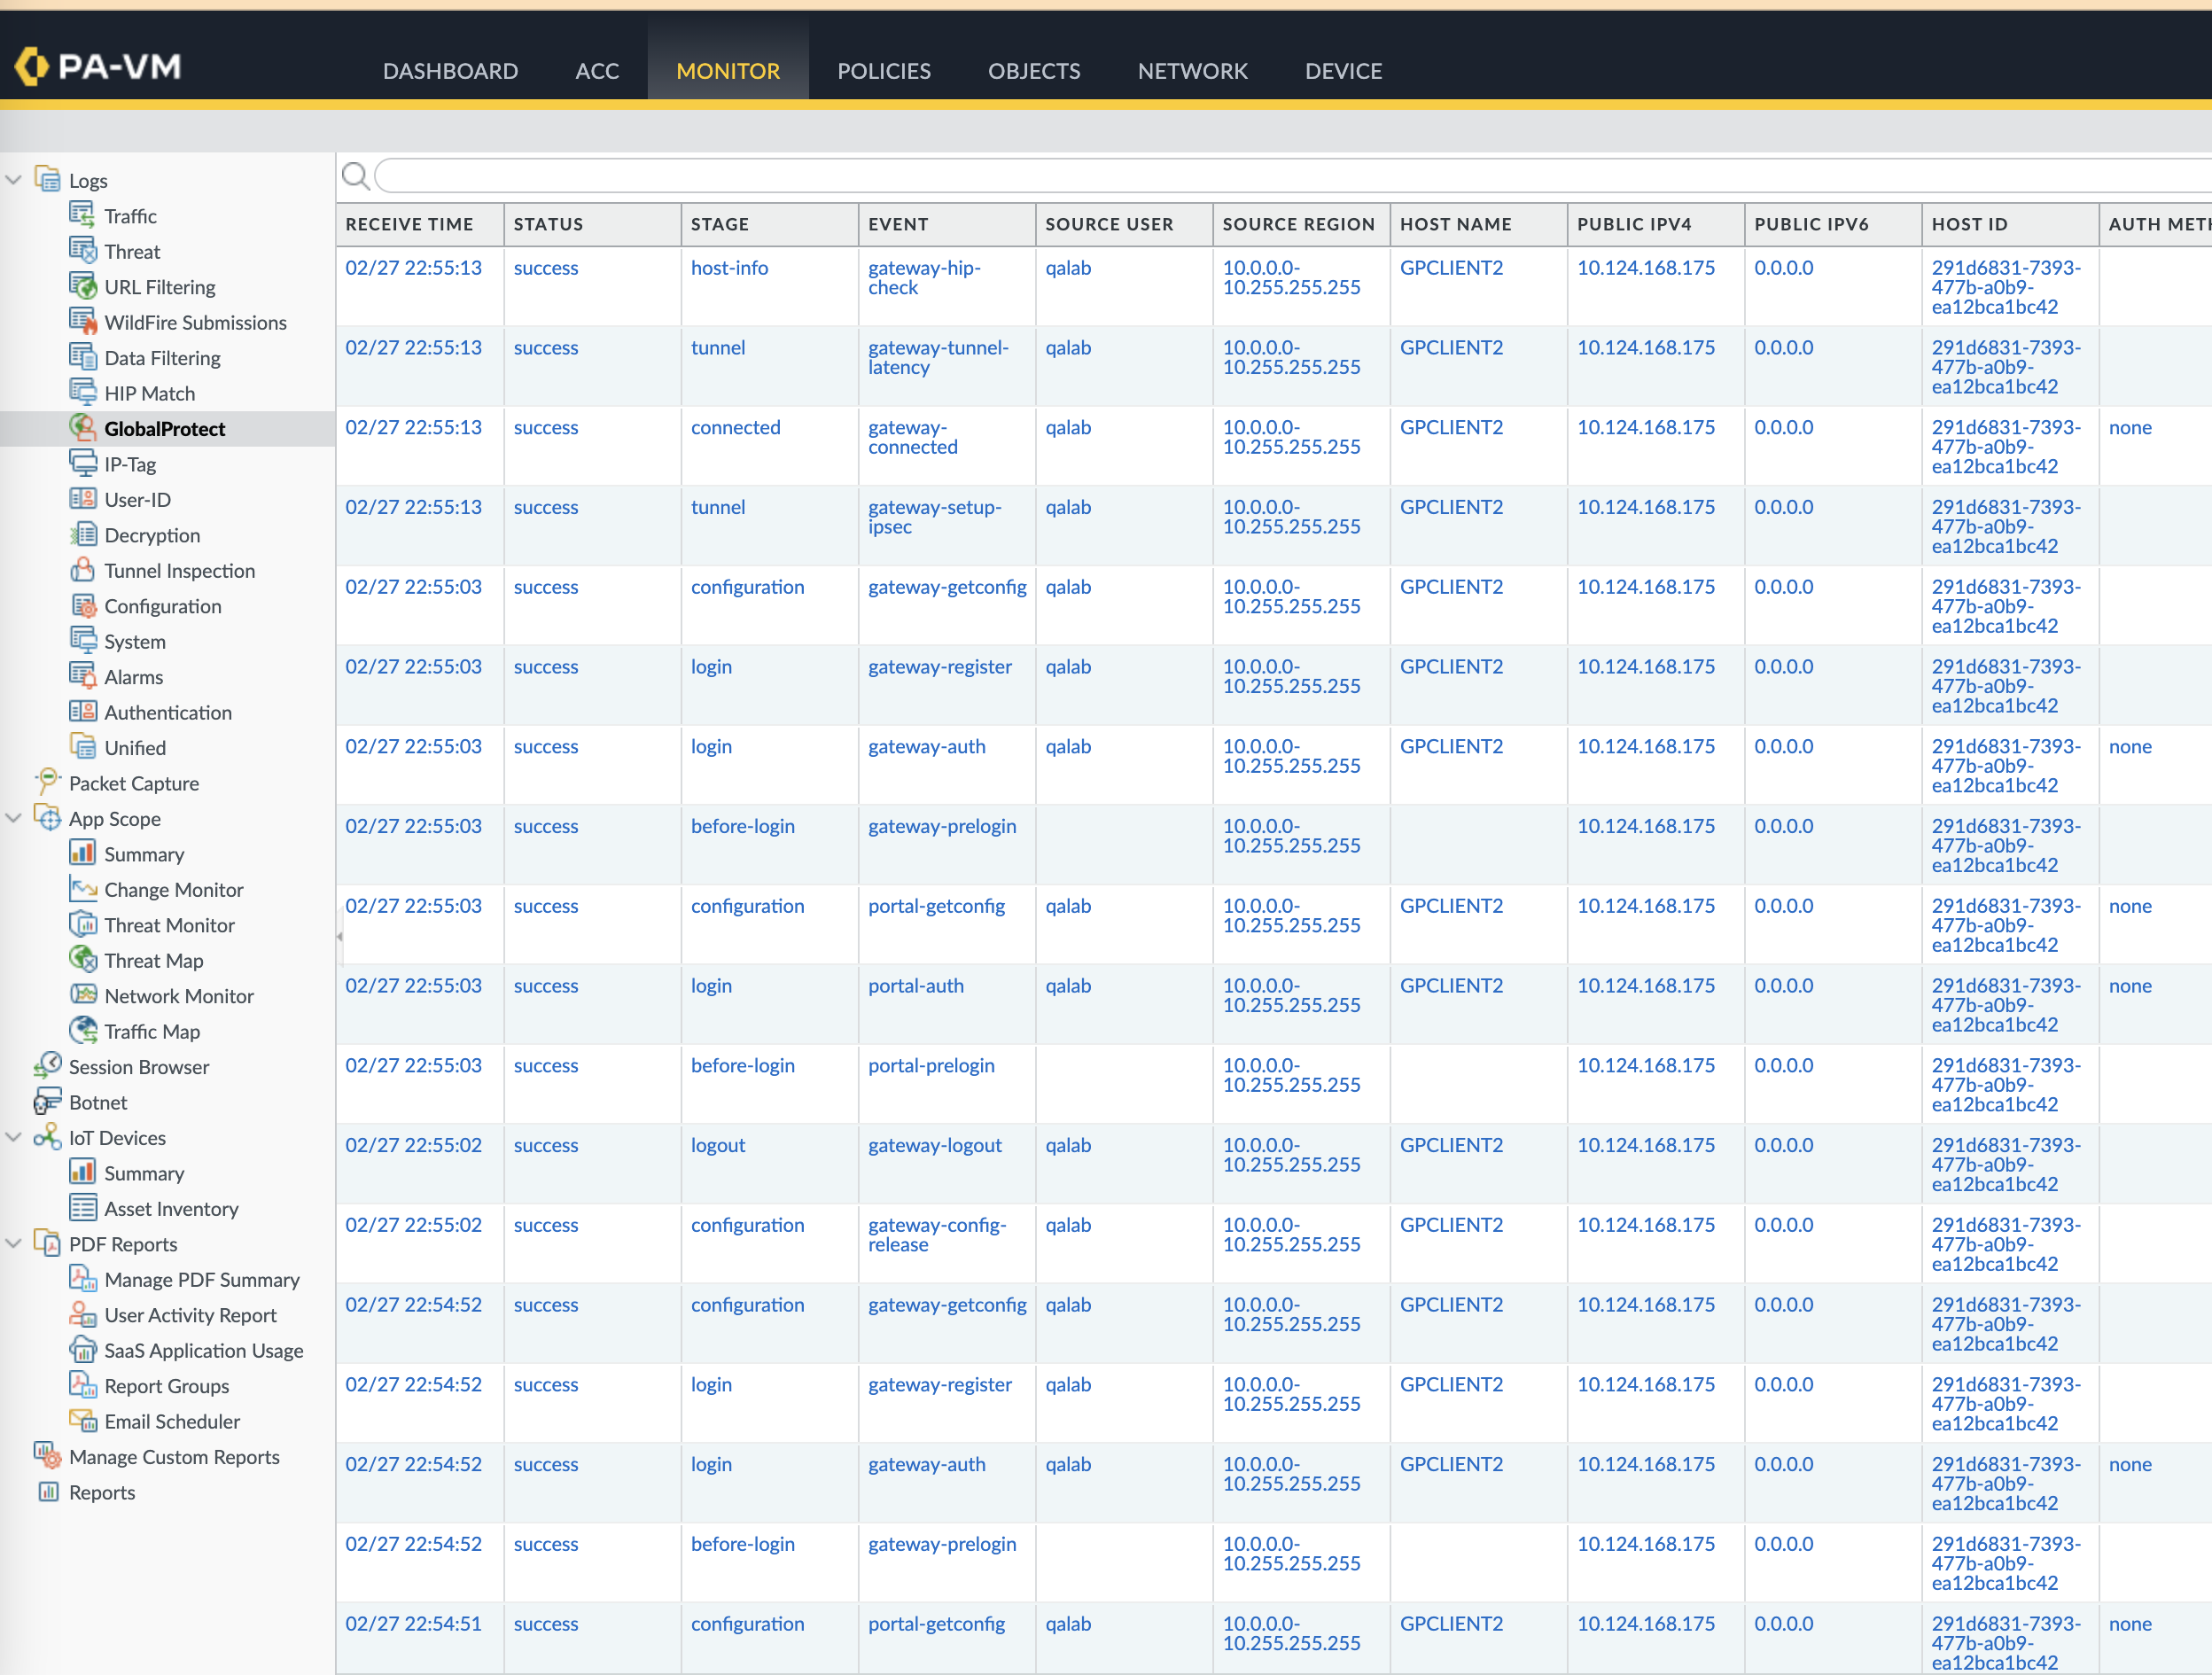
View the GlobalProtect logs ( MonitorLogsGlobalProtect page) to verify and troubleshoot the IP address assignment of the GlobalProtect gateway using the DHCP server.![]() You can see the following logs for DHCP using Command Line Interface.
You can see the following logs for DHCP using Command Line Interface.- less mp-log gpsvc.log
- less mp-log rasmgr.log
- less mp-log gp_broker.log
Configure Service Routes for DHCP Requests
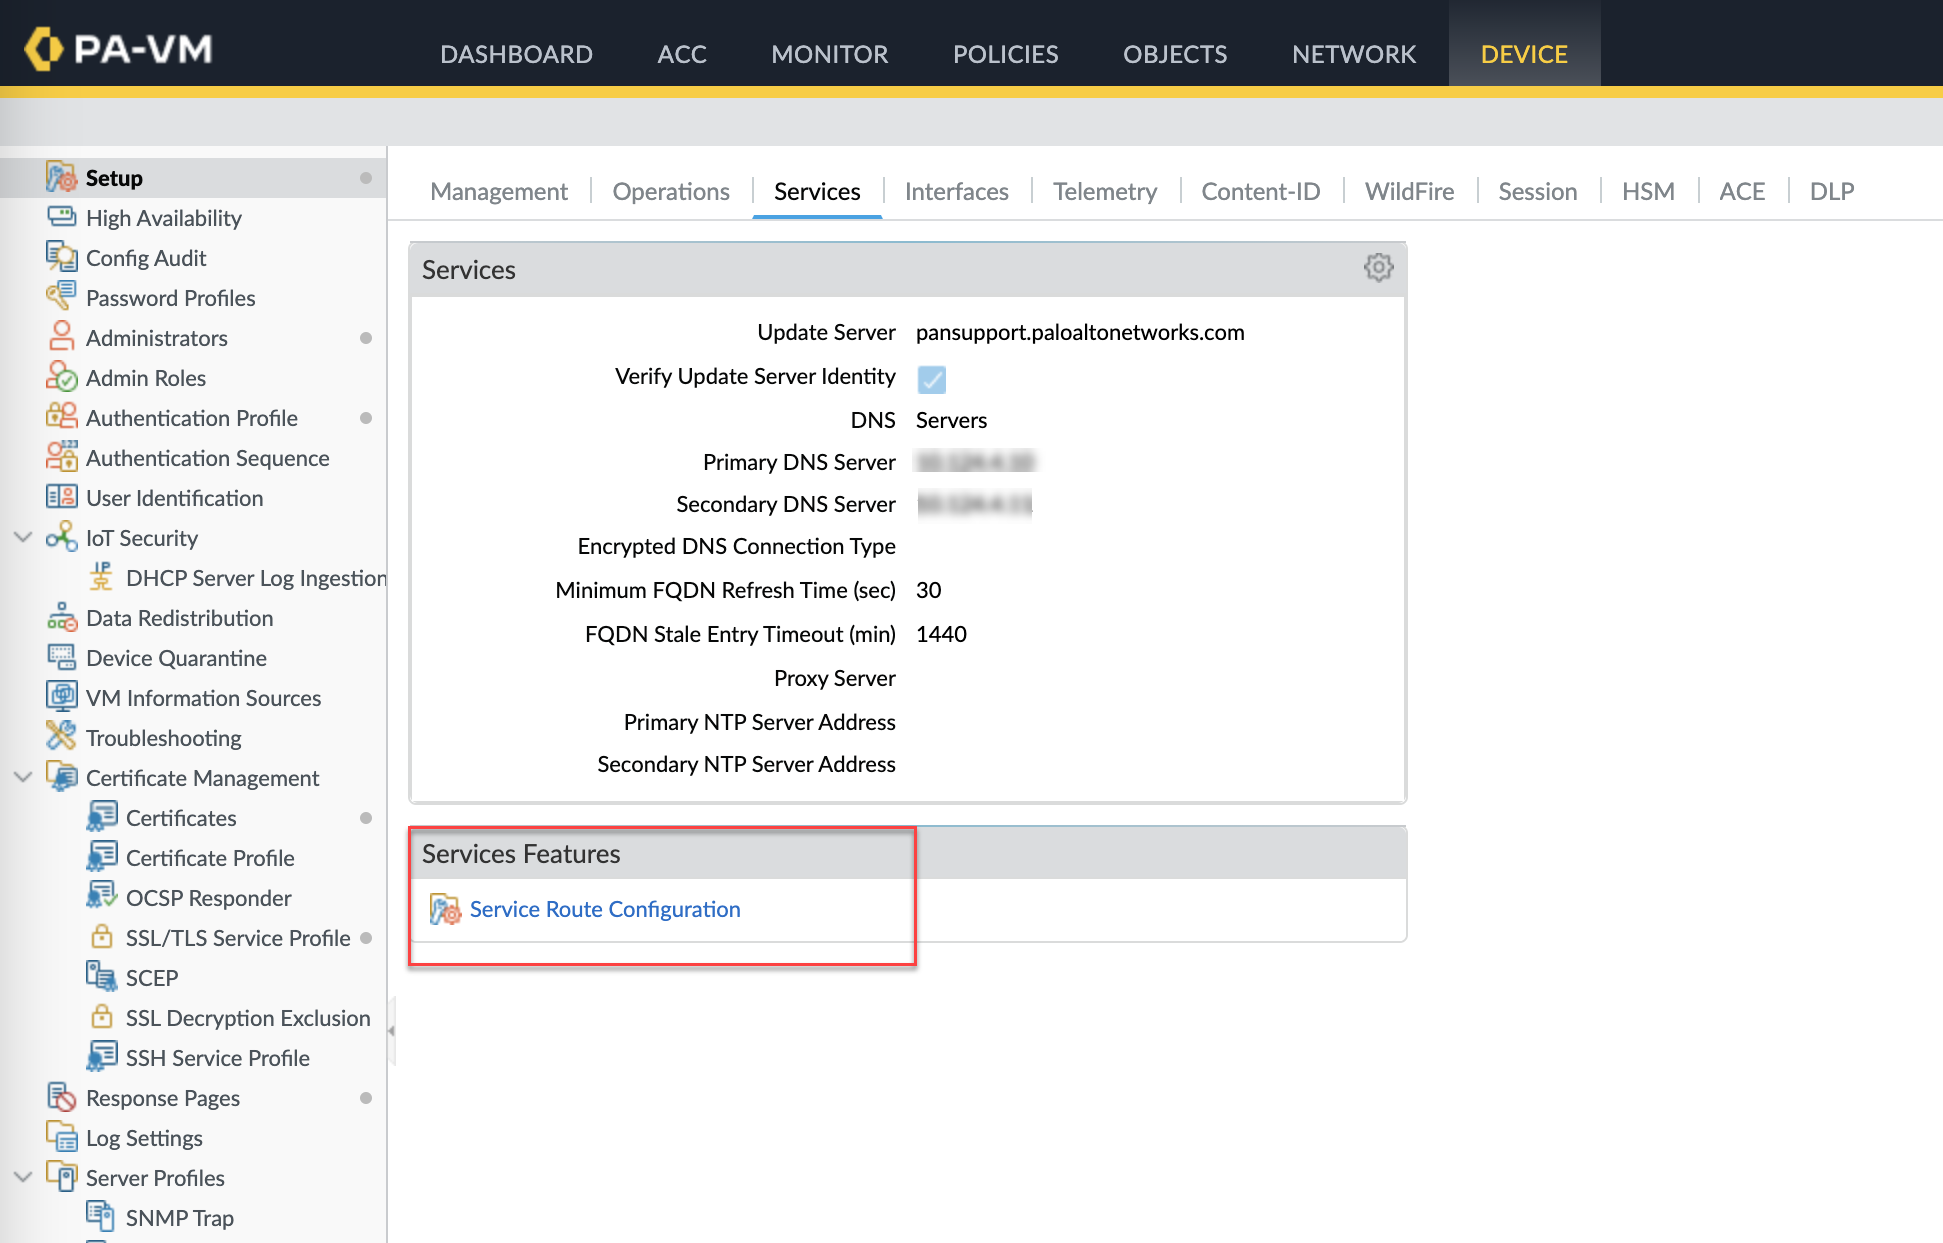
You can configure your customized dataplane as a service route for sending DHCP requests, if you do not want to use the default management interface for sending DHCP requests.Use the following procedure to configure a service route for DHCP requests:- Go to DeviceSetupServices.
![]() Click on the Services Route Configuration link.
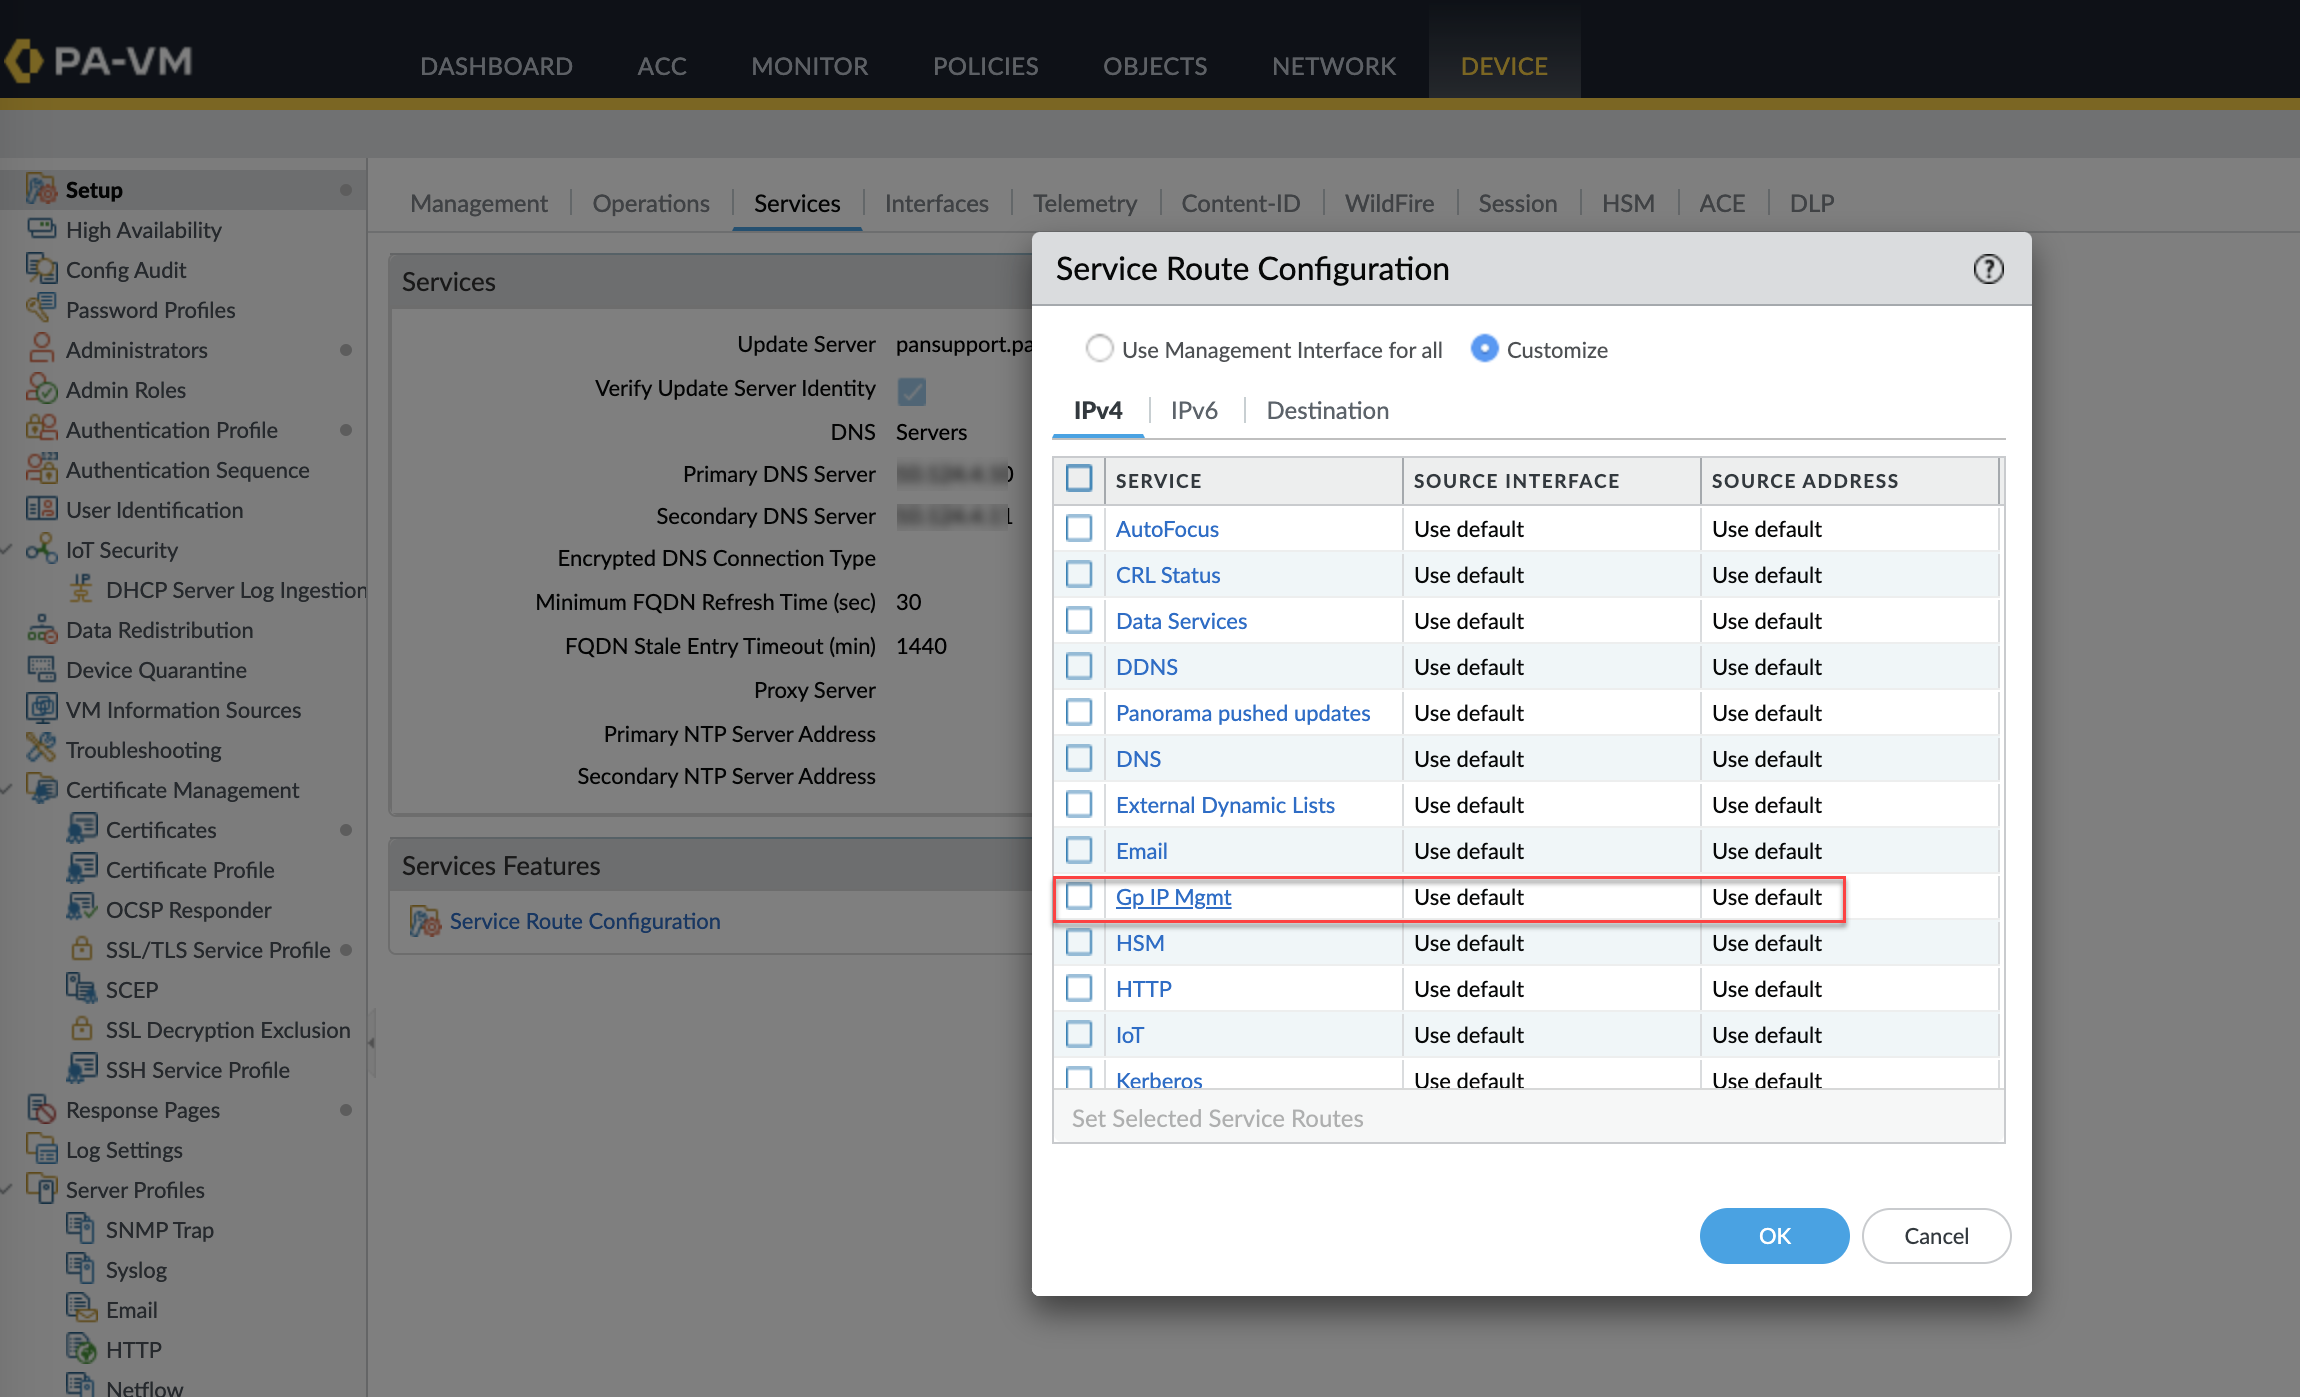
Click on the Services Route Configuration link.![]() Select Gp IP Mgmt and click OK. The Service Route Source pop-up window displays the default values.
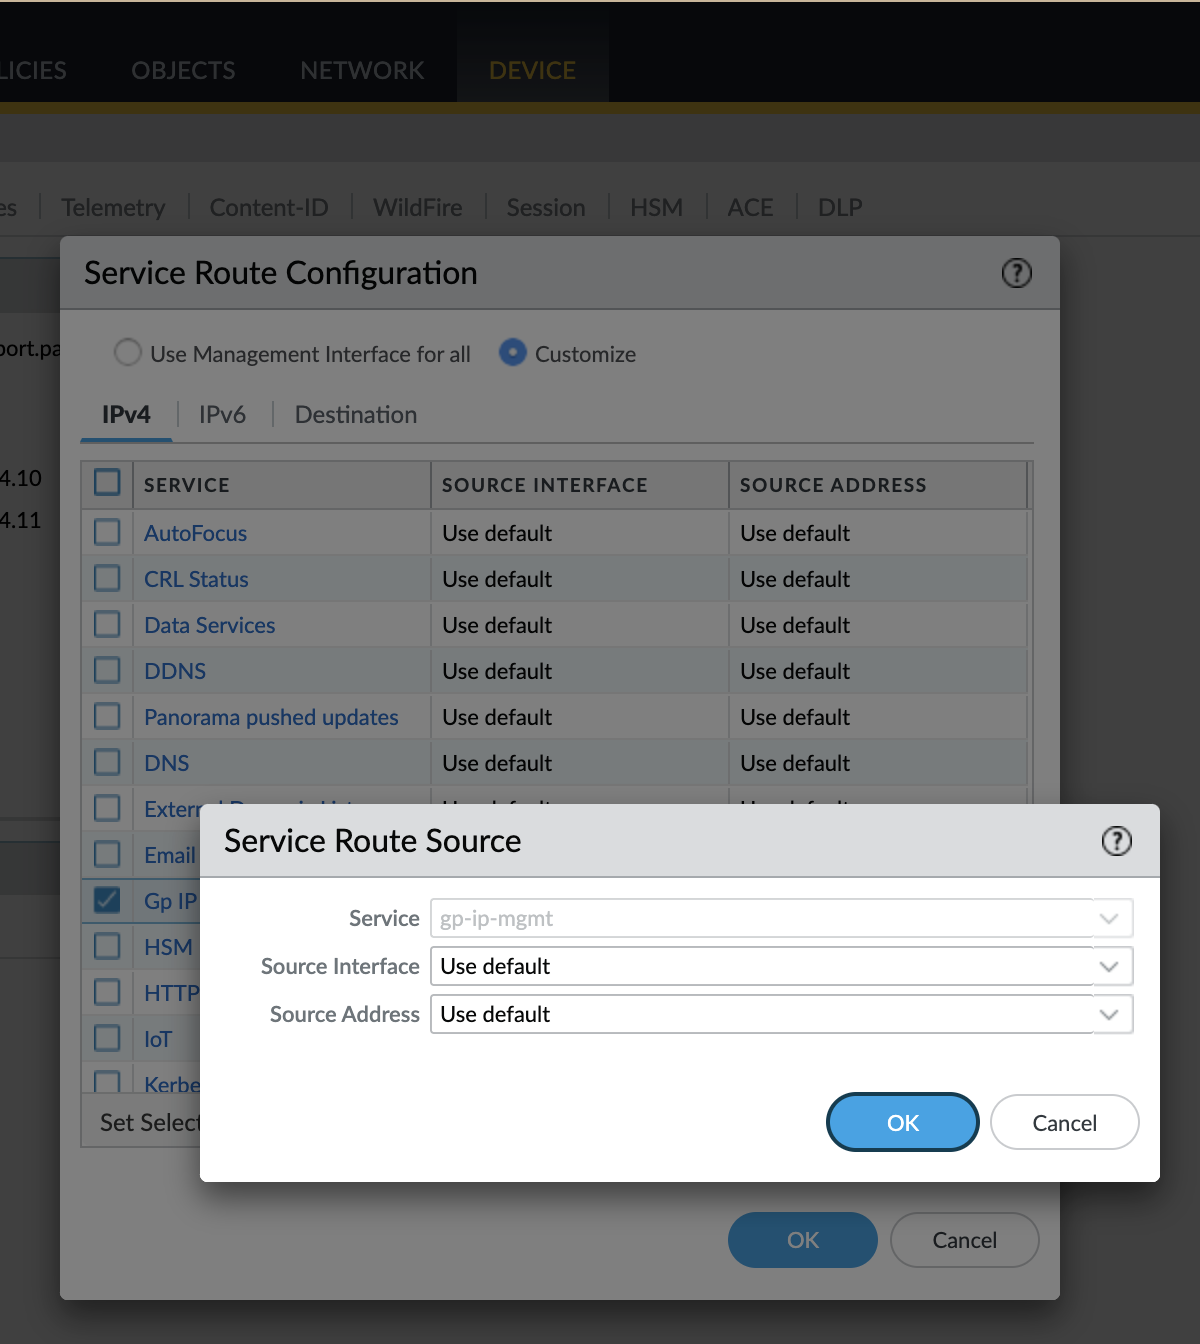
Select Gp IP Mgmt and click OK. The Service Route Source pop-up window displays the default values.![]() Specify the Source Interface and Source IP Address you want to configure for sending the DHCP requests if you do not want to use the management interface. For example, you can specify the source interface as Ethernet and related IP addresses as the interface.
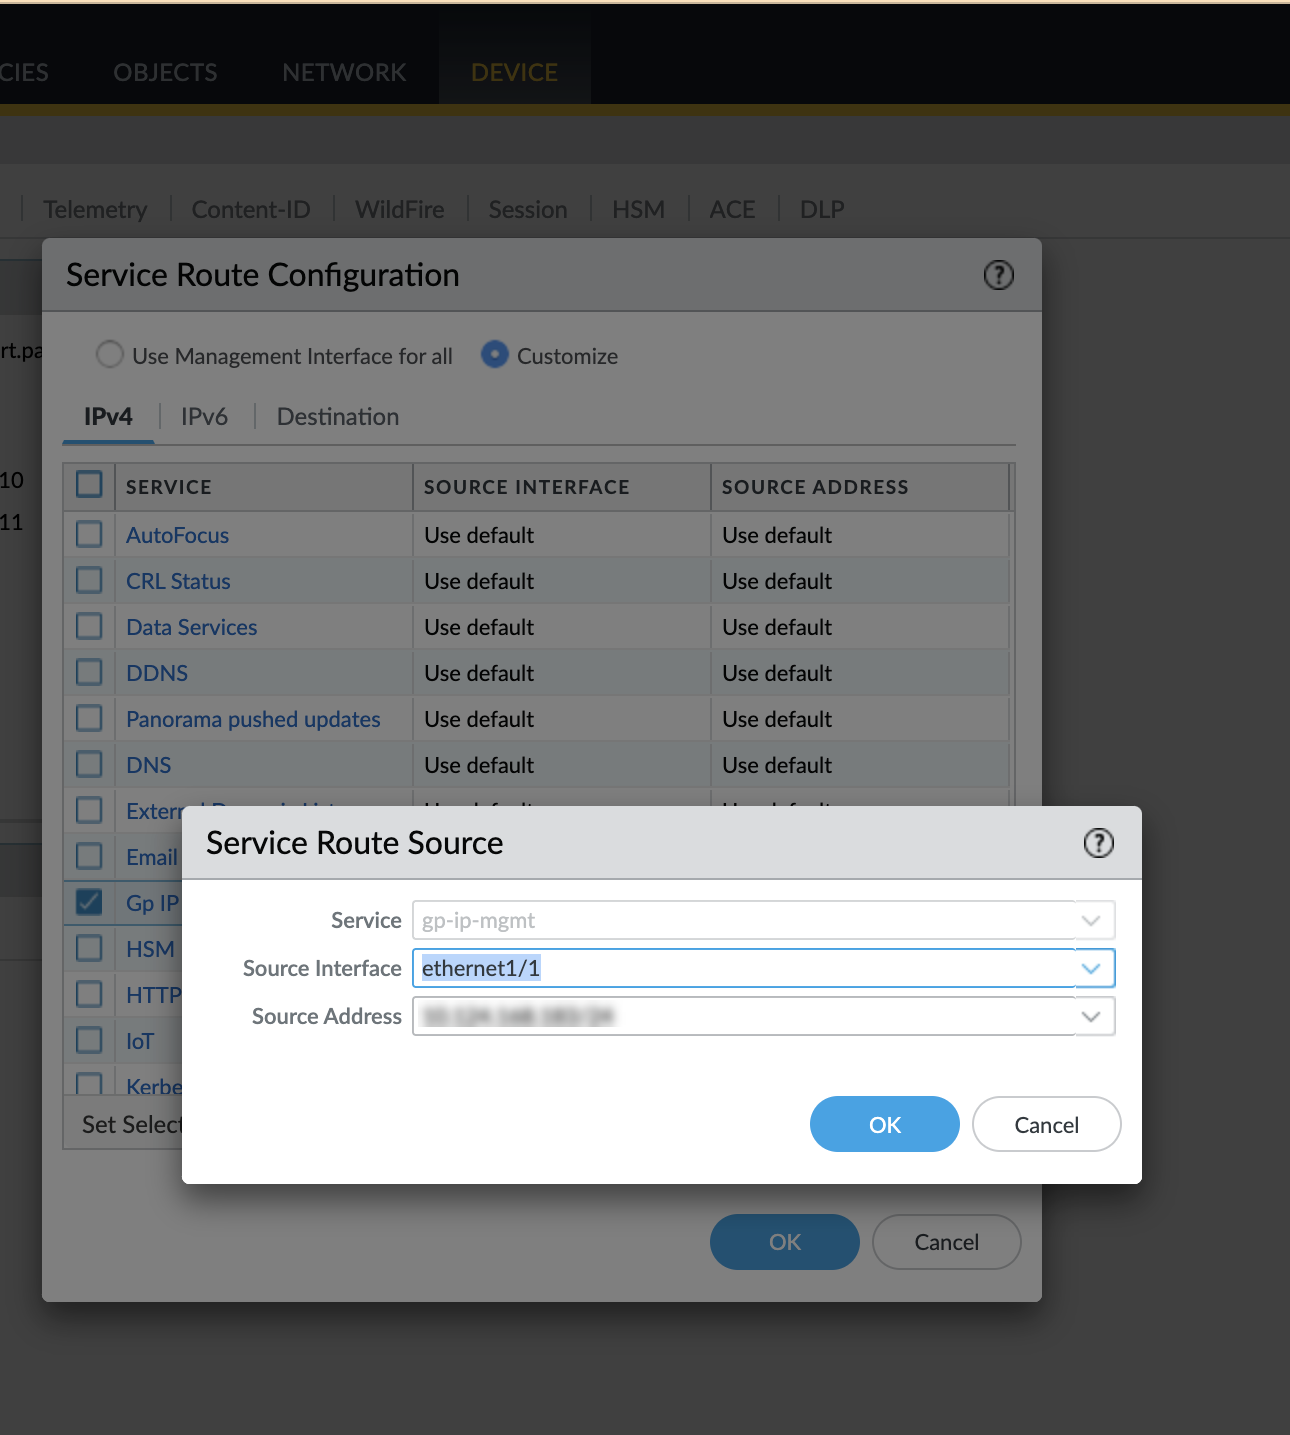
Specify the Source Interface and Source IP Address you want to configure for sending the DHCP requests if you do not want to use the management interface. For example, you can specify the source interface as Ethernet and related IP addresses as the interface.![]() You cannot select Any as the source interface while configuring service routes for DHCP requests.Click OK to save the configuration.Commit the changes.
You cannot select Any as the source interface while configuring service routes for DHCP requests.Click OK to save the configuration.Commit the changes.

