Prisma Access
Set Up the Agent Infrastructure for Dynamic Privilege Access
Table of Contents
Expand All
|
Collapse All
Prisma Access Docs
-
- 6.1 Preferred and Innovation
- 6.0 Preferred and Innovation
- 5.2 Preferred and Innovation
- 5.1 Preferred and Innovation
- 5.0 Preferred and Innovation
- 4.2 Preferred
- 4.1 Preferred
- 4.0 Preferred
- 3.2 Preferred and Innovation
- 3.1 Preferred and Innovation
- 3.0 Preferred and Innovation
- 2.2 Preferred
-
-
- 4.0 & Later
- Prisma Access China
-
-
Set Up the Agent Infrastructure for Dynamic Privilege Access
Learn how to set up the infrastructure for the Prisma Access Agent, including
setting up the domain name, DHCP infrastructure, and client DNS.
| Where Can I Use This? | What Do I Need? |
|---|---|
|
|
Configure infrastructure settings for Prisma Access Agent so that Prisma Access can provision your mobile user environment. Then, select the Prisma Access locations where your Prisma Access Agent users will connect
to.
You can also optionally enable SC-NAT support for Dynamic Privilege Access if you
have created service connections to access private apps in their data center or
headquarters location, or enable route summarization for Dynamic Privilege
Access to reduce the number of routes that are sent to the network.
Configure Infrastructure Settings
To enable Prisma Access for internet access only for users, Prisma Access
provides a default IP address pool and a cloud default DNS server. However, if
you want your mobile users to access internal resources at your headquarters,
data centers, or at remote network sites to which you onboarded to Prisma Access, you must allocate client IP address pools. Prisma Access
uses the IP address pools to assign IP addresses to your mobile users and set up the Prisma Access service
infrastructure.
Before you configure the infrastructure settings, ensure that you configure
at least one project. Otherwise, when you try to commit and push the
infrastructure settings, the commit will fail. For more information, refer
to Create a Project.
- In Strata Cloud Manager, select ConfigurationNGFW and Prisma AccessConfiguration ScopeAccess AgentSetupInfrastructure.If you're setting up the infrastructure for the first time, click Set Up Infrastructure Settings. Otherwise, edit the Infrastructure Settings.
![]() Add a hostname to the Domain Name for the service that Prisma Access Agents connect to.By default, users can access the service using an FQDN based on your hostname and the .epm.gpcloudservice.com domain.
Add a hostname to the Domain Name for the service that Prisma Access Agents connect to.By default, users can access the service using an FQDN based on your hostname and the .epm.gpcloudservice.com domain.![]() In Client IP Pool Allocation, Prisma Access provides a DHCP server that will manage the assignment of IP addresses to your endpoints for Dynamic Privilege Access.The project name and the location group ID from Prisma Access are part of the DHCP request. Each Prisma Access Agent connecting to a specific project is assigned an IP address from that project's IP subnet. When a user changes to a different project, a different IP address is assigned to the Prisma Access Agent from the project's IP subnet.
In Client IP Pool Allocation, Prisma Access provides a DHCP server that will manage the assignment of IP addresses to your endpoints for Dynamic Privilege Access.The project name and the location group ID from Prisma Access are part of the DHCP request. Each Prisma Access Agent connecting to a specific project is assigned an IP address from that project's IP subnet. When a user changes to a different project, a different IP address is assigned to the Prisma Access Agent from the project's IP subnet.![]() You can configure the following options:
You can configure the following options:- IP Lease Duration—Specify the amount of time (in seconds) for which the DHCP server allocates a network address to a Prisma Access Agent. The default IP address lease duration is 86,400 seconds.
- Lease Grace Duration—Specify the amount of time that the Prisma Access Agent can continue to use its IP address lease after the lease expires. The default lease grace duration is 14,400 seconds.
- Global DHCP Pool Summary—Select the IP pool on which you want to enable SC-NAT or configure and select the global summary IP pools for route summarization.
Save the infrastructure settings.Select Prisma Access Locations
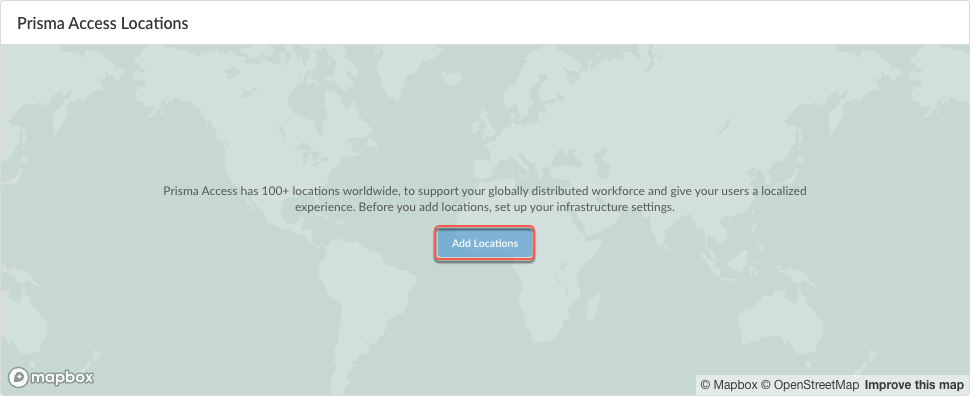
Select the Prisma Access locations where you want to support Prisma Access Agent users. The location groups are used for Dynamic Privilege Access.- In Strata Cloud Manager, select ConfigurationNGFW and Prisma AccessConfiguration ScopeAccess AgentSetupInfrastructure.If you are setting up the infrastructure for the first time, Add Locations. Otherwise, edit the Prisma Access Locations.
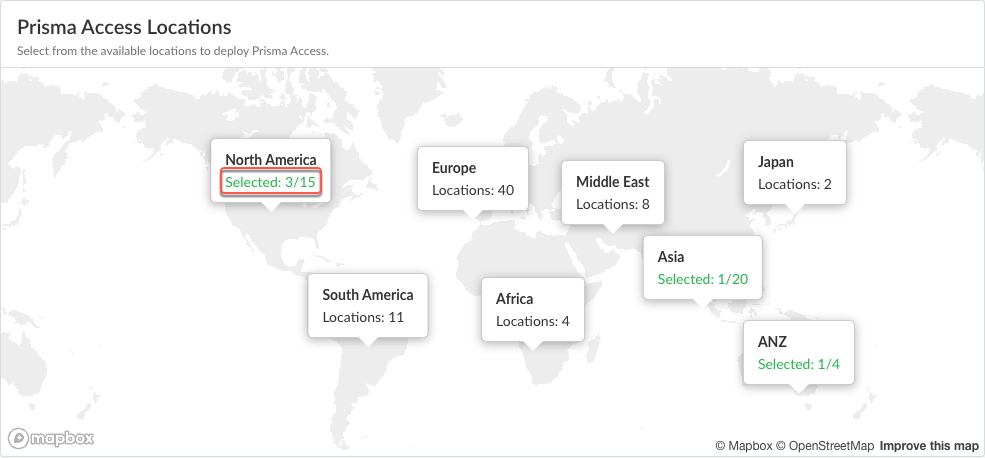
![]() Select the Prisma Access locations where your mobile users will connect to.Depending on your license agreement, you can select either Local or Worldwide locations. The map shows the regions where you can deploy Prisma Access for Users. In addition, Prisma Access provides multiple locations within each region to ensure that your users can connect to a location that provides a user experience tailored to the users’ locale. For the best performance, Select All. Alternatively, select specific locations within each selected region where your users will need access. By limiting your deployment to a single region, you can have more granular control over your deployed regions and exclude regions required by your policy or industry regulations.You can view the list of supported locations for Prisma Access Agent.The images in this section are provided for illustrative purposes only.
Select the Prisma Access locations where your mobile users will connect to.Depending on your license agreement, you can select either Local or Worldwide locations. The map shows the regions where you can deploy Prisma Access for Users. In addition, Prisma Access provides multiple locations within each region to ensure that your users can connect to a location that provides a user experience tailored to the users’ locale. For the best performance, Select All. Alternatively, select specific locations within each selected region where your users will need access. By limiting your deployment to a single region, you can have more granular control over your deployed regions and exclude regions required by your policy or industry regulations.You can view the list of supported locations for Prisma Access Agent.The images in this section are provided for illustrative purposes only.- Select an available region on the map.
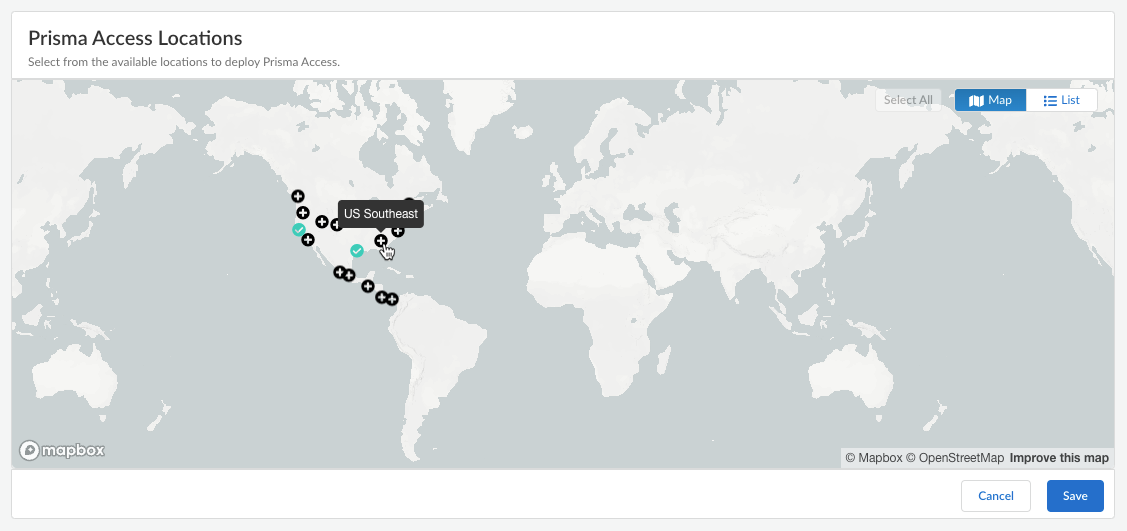
![]() Click the plus sign + on the locations that you want to add.You can switch between the Map and List views. You can also Select All locations.
Click the plus sign + on the locations that you want to add.You can switch between the Map and List views. You can also Select All locations.![]() In the list view, you can select from the list of available locations to deploy Prisma Access. You can select All sites within a region.
In the list view, you can select from the list of available locations to deploy Prisma Access. You can select All sites within a region.![]() Save your Prisma Access location settings.(Optional) Restrict access to your SaaS applications from unauthorized users.You can enable the egress IP allow lists for existing mobile user deployments and during new user onboarding. If you enable egress IP allow lists for existing Prisma Access deployments, Prisma Access migrates all the egress IP addresses already allocated for your locations to the egress IP allow lists. For new Prisma Access deployments, enable the egress IP allow list while onboarding the Prisma Access Agent mobile users. Every time you add a location or have an auto scaling event, you should retrieve the new egress IP addresses that Prisma Access allocates and add them to allow lists in your SaaS applications. You can then push the configuration to your Prisma Access deployment to confirm the egress IP allow lists allocated for your locations.
Save your Prisma Access location settings.(Optional) Restrict access to your SaaS applications from unauthorized users.You can enable the egress IP allow lists for existing mobile user deployments and during new user onboarding. If you enable egress IP allow lists for existing Prisma Access deployments, Prisma Access migrates all the egress IP addresses already allocated for your locations to the egress IP allow lists. For new Prisma Access deployments, enable the egress IP allow list while onboarding the Prisma Access Agent mobile users. Every time you add a location or have an auto scaling event, you should retrieve the new egress IP addresses that Prisma Access allocates and add them to allow lists in your SaaS applications. You can then push the configuration to your Prisma Access deployment to confirm the egress IP allow lists allocated for your locations.- Enable Egress IP Allowlist to display the IP addresses for onboarded Prisma Access locations.
![]() Copy and add the allocated addresses to the allow lists of your SaaS applications.Migrate to confirm the IP addresses allocated for the onboarded locations in Prisma Access.Retrieve the IP addresses for new onboarded locations or during an auto scaling event.
Copy and add the allocated addresses to the allow lists of your SaaS applications.Migrate to confirm the IP addresses allocated for the onboarded locations in Prisma Access.Retrieve the IP addresses for new onboarded locations or during an auto scaling event.- Select the Location name to find the new egress IP addresses allocated to the location.
- Add these IP addresses to the allow lists for your SaaS applications before you confirm them in Prisma Access.
- Save the allocated egress IP addresses.
Enable SC-NAT Support for Dynamic Privilege Access
Use SC-NAT support for Dynamic Privilege Access (DPA) if you use DPA and have created service connections to access private apps in your data center or headquarters location. Multiple projects in your DPA environment can experience IP address exhaustion if the IP addresses of the infrastructure subnet overlap. To fix this issue, Prisma Access can implement source NAT (SNAT) for IP addresses, which:- Lets Prisma Access map a single IP address for a mobile user accessing private apps using a service connection
- Provides you with SNAT for easy routing
- Eliminates IP Pool overlap
- Eliminates IP Pool IPv4 exhaustion between Prisma Access and your data center or headquarters location
DPA customers can onboard client locations to Prisma Access using service connections. However, multiple projects may have large IP pools on multiple data centers, leading to potential exhaustion of private IP pools. To solve this issue, Dynamic Privilege Access in Prisma Access offers support for SC-NAT with defined pools. Customers have the option to use SC-NAT instead of the infrastructure subnet in order to divide up the IP pools. If you enable SC-NAT for a service connection corporate access node (SC-CAN), SC-NAT will always be supported for that service connection.With DPA enabled, you can turn SC-NAT on (to use SC-NAT) or off (to use the Infrastructure Subnet) per project.- In Strata Cloud Manager, select ConfigurationNGFW and Prisma AccessConfiguration ScopePrisma AccessService Connections.
- Select a service connection from the Service Connections table.
- Click the check box for Data Traffic Source NAT.
- After you click the Data Traffic Source NAT check box, you see the mandatory IP Pool field. Enter the subnets for which you want to enable SC-NAT.
- Save your changes.
![]()
Enable Route Summarization for Dynamic Privilege Access
Where Can I Use This? What Do I Need? - Prisma Access (Managed by Strata Cloud Manager)
- Prisma Access 5.2 Innovation
- Minimum Prisma Access dataplane version: 11.2.3
- Prisma Access license with the Mobile User subscription
- Role: Superuser
For enterprises that have on-premises hardware with limited capacity, such as simple cloud routers that can accommodate only a few hundred routes, Prisma Access can summarize Mobile User (MU) routes when advertising the routes to the on-premises network. Route summarization minimizes the requirements on these devices by staying within the route capacity on the data center.To enable route summarization, you can configure global summary pools, which are lists of large IP pools that can be used across multiple projects. When a user connects to a project using the Prisma Access Agent and the agent is assigned an IP address within the range of a global summary pool, the Prisma Access service connection advertises the global summary pool instead of the smaller aggregate route.To help illustrate route summarization for projects, consider the following scenario:- You configure a global summary pool of 10.10.0.0/16 and enable the route summarization option on service connection SC-A.
- User-A connects to Project-A, which is assigned the IP project pool of 10.10.10.0/24. Upon connection, the Prisma Access Agent acquires the 10.10.10.10/32 IP address.
- User-B connects to Project-B, which is assigned the IP project pool of 10.10.11.0/24. Upon connection, the Prisma Access Agent acquires the 10.10.11.10/32 IP address.
- In this case, the service connection advertises only one subnet (the
global summary pool of 10.10.0.0/16) instead of the /24 aggregate routes
to the on-premises network through eBGP.
- Prisma Access won't summarize IP pools that are not part of a project.
- Project IP pools within a project can overlap, and global summary IP pools can overlap as well.
- The global summary pools should be large IP pools that contain the project IP Pools that are associated with multiple projects.
To enable route summarization for projects in Strata Cloud Manager:- Configure the project IP pools in the project settings in ConfigurationNGFW and Prisma Access <Snippet> ObjectsDynamic Privilege AccessProjects.Configure the global summary IP pools in ConfigurationNGFW and Prisma Access Configuration ScopePrisma AccessAccess AgentInfrastructure Settings.Enable route summarization in the service connection.
- Go to ConfigurationNGFW and Prisma AccessConfiguration ScopePrisma AccessService Connections.Select a service connection from the Service Connections table.Edit the Routing settings.
![]() Select Summarize Mobile User Routes before advertising.
Select Summarize Mobile User Routes before advertising.![]() Save the routing settings.Save the service connection settings.Perform an all admins push configuration to Prisma Access.
Save the routing settings.Save the service connection settings.Perform an all admins push configuration to Prisma Access.


