Prisma Access
Explicit Proxy Forwarding Profiles
Table of Contents
Expand All
|
Collapse All
Prisma Access Docs
-
- 6.1 Preferred and Innovation
- 6.0 Preferred and Innovation
- 5.2 Preferred and Innovation
- 5.1 Preferred and Innovation
- 5.0 Preferred and Innovation
- 4.2 Preferred
- 4.1 Preferred
- 4.0 Preferred
- 3.2 Preferred and Innovation
- 3.1 Preferred and Innovation
- 3.0 Preferred and Innovation
- 2.2 Preferred
-
-
- 4.0 & Later
- Prisma Access China
-
-
Explicit Proxy Forwarding Profiles
Use Explicit Proxy Forwarding Profiles to create easy-to-use forwarding rules to
define the direction of web traffic or deploy multiple PAC files at once.
| Where Can I Use This? | What Do I Need? |
|---|---|
|
|
Explicit Proxy Forwarding Profiles enable you to employ multiple PAC files to define
which traffic to forward to Prisma Access. Forwarding Profiles also give you the
option to create easy-to-use forwarding rules instead of dealing with the complexity
of authoring and maintaining a PAC file.
If you have site-based license only, you can setup explicit proxy using PAC File type
Forwarding Profiles.
Use Forwarding Profiles to Define Multiple PAC Files
- Create a Forwarding Profile.
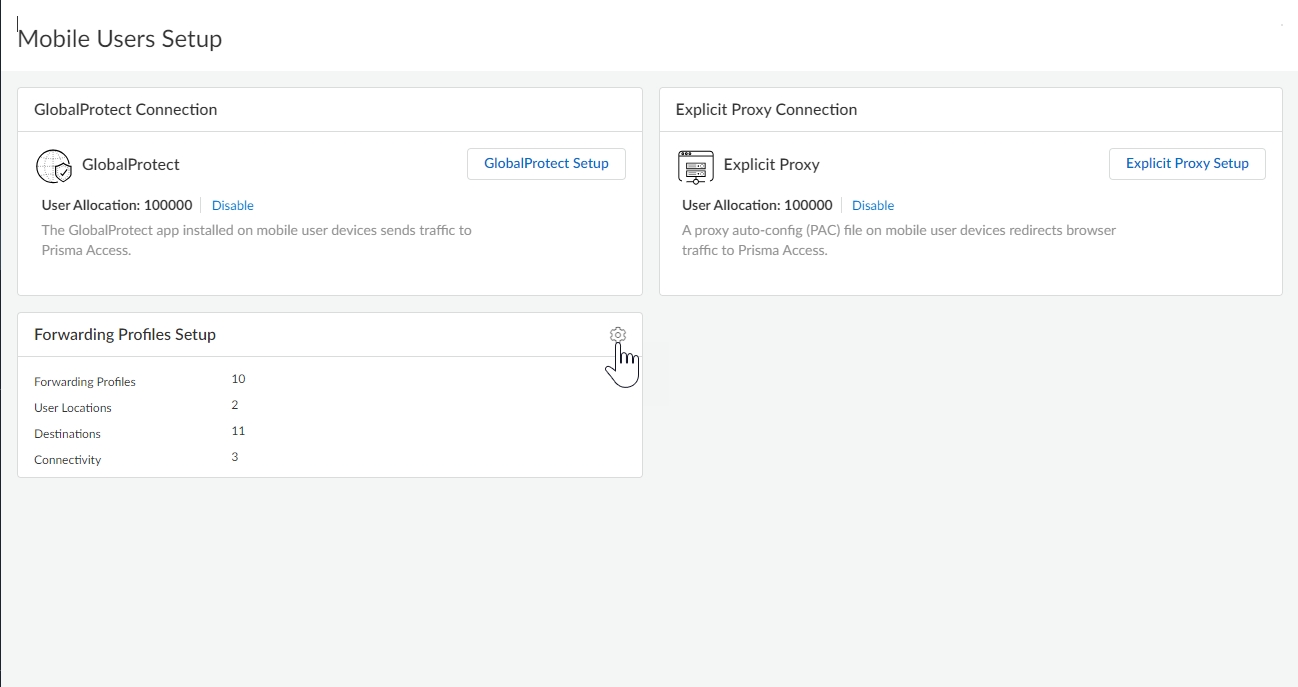
- From Strata Cloud Manager, select ConfigurationNGFW and Prisma AccessConfiguration ScopePrisma AccessMobile UsersForwarding Profiles Setup.
![]()
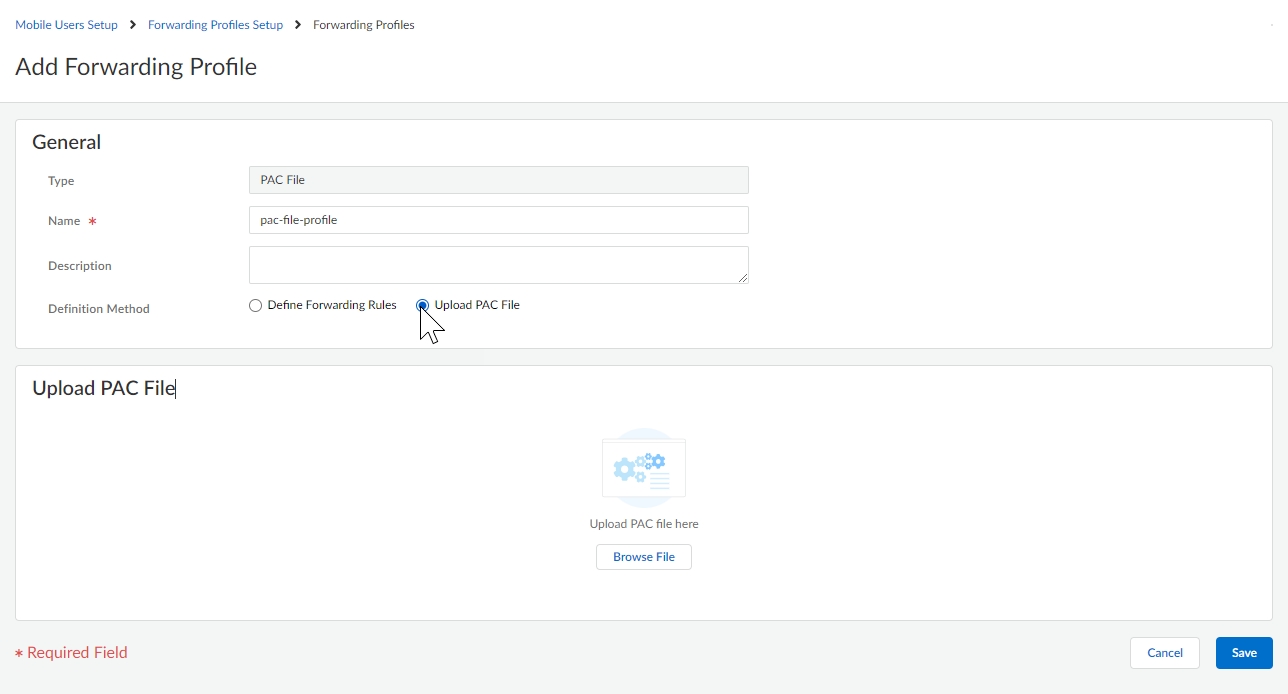
![]() Add Forwarding Profile.
Add Forwarding Profile.![]() Select PAC File.PAC File is for Prisma Access Explicit Proxy. GlobalProtect Proxy is for using GlobalProtect in Proxy Mode.Upload a PAC file.
Select PAC File.PAC File is for Prisma Access Explicit Proxy. GlobalProtect Proxy is for using GlobalProtect in Proxy Mode.Upload a PAC file.- Select Upload PAC File to upload an existing PAC file or create a PAC file using the PAC file guidelines.
![]() Browse file to browse your file system for the PAC file.Save the profile.Repeat the two previous steps to create another Forwarding Profile with a different PAC file.Both PAC files are now operating in your deployment simultaneously.Retrieve the PAC file URL.
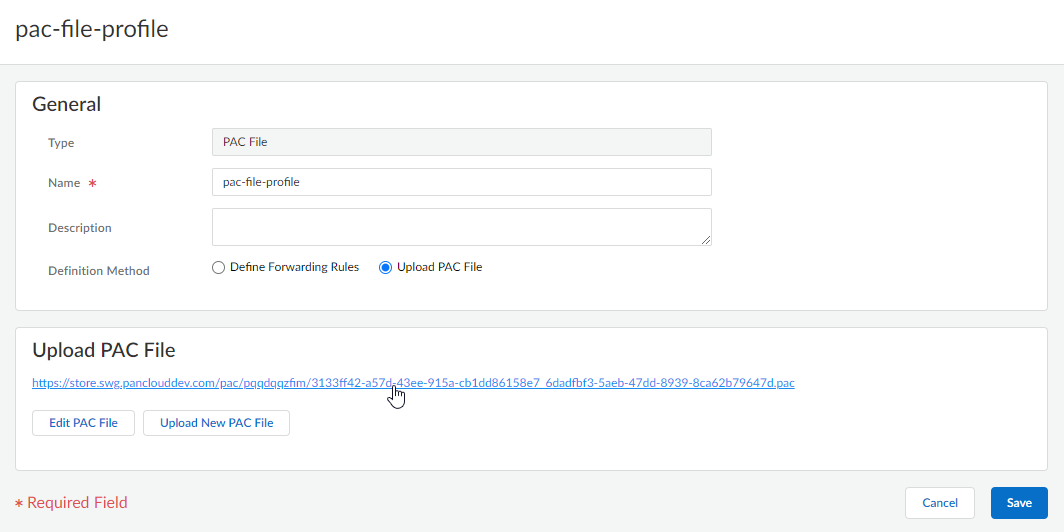
Browse file to browse your file system for the PAC file.Save the profile.Repeat the two previous steps to create another Forwarding Profile with a different PAC file.Both PAC files are now operating in your deployment simultaneously.Retrieve the PAC file URL.- Return to the profile to which you uploaded the PAC file.You should see the URL where the PAC file is hosted.
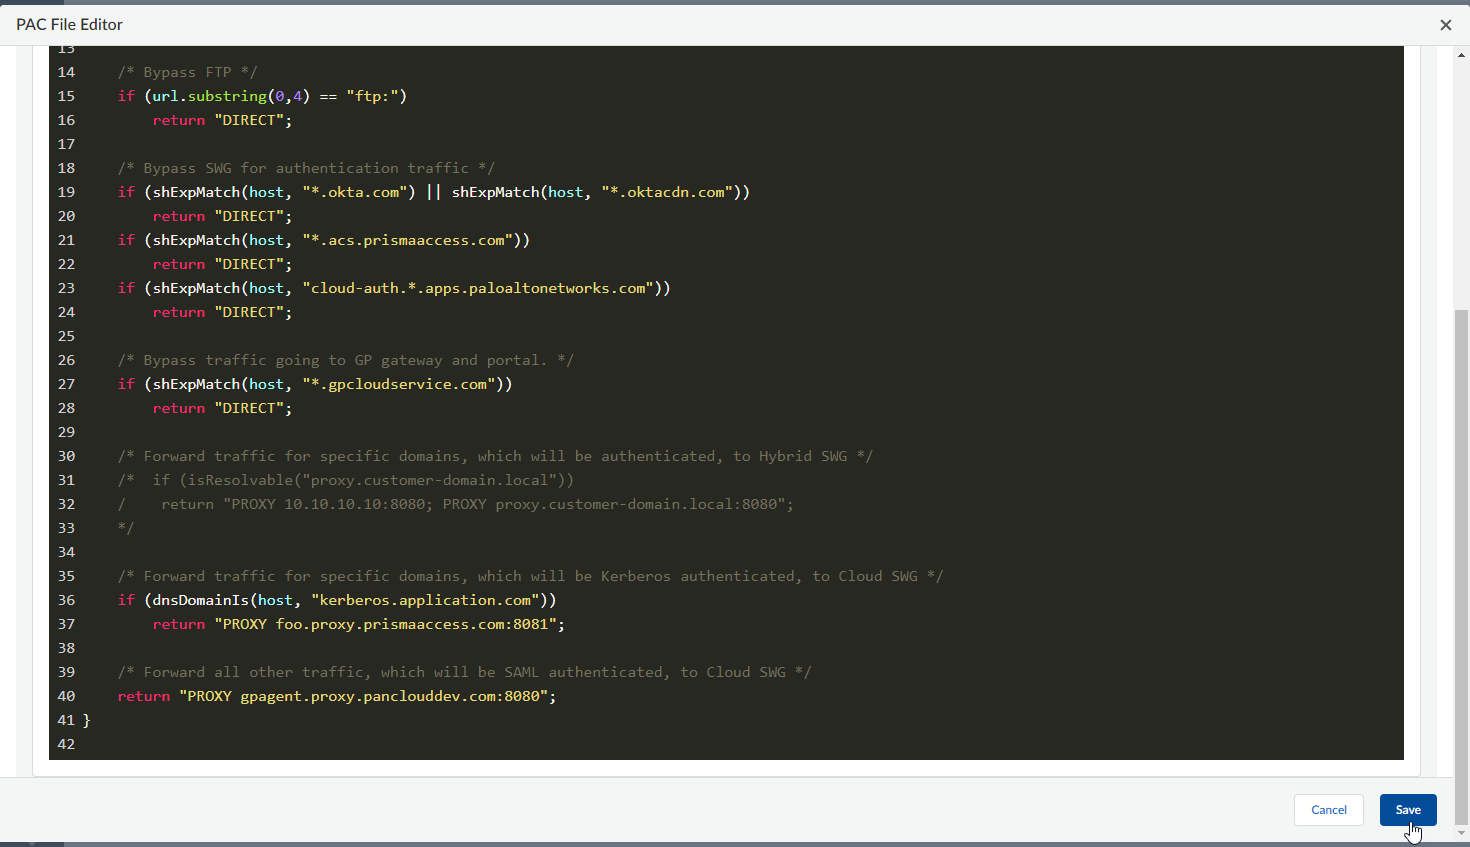
![]() (Optional) Edit the PAC file.To quickly make changes to the PAC file, You can edit it directly within the web interface
(Optional) Edit the PAC file.To quickly make changes to the PAC file, You can edit it directly within the web interface- From within the Forwarding Profile, Edit PAC File.Make changes and Save.
![]()
Define Which Traffic to Forward to Explicit Proxy with Forwarding Rules
Instead of authoring your own PAC file from scratch, you can create simple forwarding rules to generate a PAC file. - Create a Forwarding Profile.
- From Strata Cloud Manager, select ConfigurationNGFW and Prisma AccessConfiguration ScopePrisma AccessMobile UsersForwarding Profiles Setup.
![]()
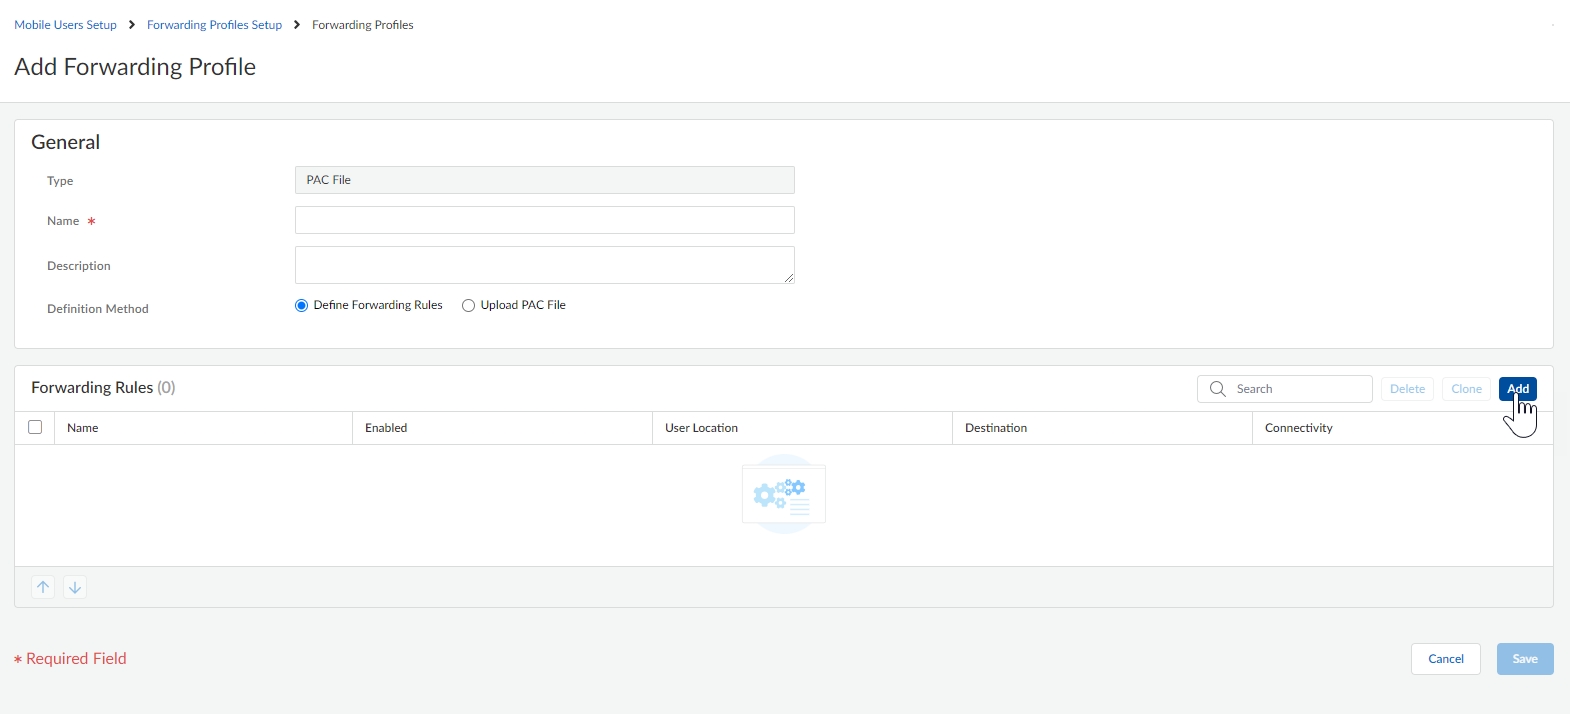
![]() Add Forwarding Profile.
Add Forwarding Profile.![]() Select PAC File.PAC File is for Prisma Access Explicit Proxy. GlobalProtect Proxy is for using GlobalProtect in Proxy Mode.Add a forwarding rule.
Select PAC File.PAC File is for Prisma Access Explicit Proxy. GlobalProtect Proxy is for using GlobalProtect in Proxy Mode.Add a forwarding rule.- Select Add.
![]() Complete the required fields:
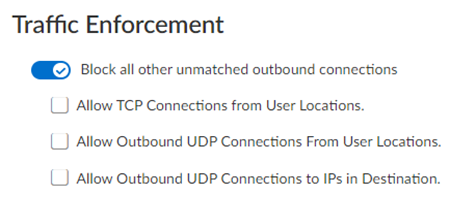
Complete the required fields:Name Name of the profile. User Locations Location of the users for which you're creating the forwarding rule. You can create custom locations from ConfigurationNGFW and Prisma AccessConfiguration ScopePrisma AccessMobile UsersForwarding Profiles SetupUser Locations. You can't use wildcard characters when configuring custom user locations based on IP address.Destinations Destination of the web traffic. You can select from predefined destinations, or you can create custom destinations from .ConfigurationNGFW and Prisma AccessConfiguration ScopePrisma AccessMobile UsersForwarding Profiles SetupDestinations. Connectivity Direct causes the traffic to bypass the proxy.Global Proxy causes the traffic to pass through the proxy.Select Add when done.Enable Traffic Enforcement if you want to block all outbound traffic (such as UDP) that does not match the forwarding rules. This option requires GlobalProtect agent version 6.3.1 and is disabled by default. If you have applications that need you to allow UDP connections, you can add these exceptions using User location or Destination objects.You can customize your block actions as follows:- Block all UDP outbound connections from the endpoints.
- Allow TCP from specific locations. For example, you can allow all TCP traffic from your office.
- Allow UDP from specific locations. For example, you can allow all TCP traffic from your office.
- If certain applications need UDP connections, you can allow outbound UDP connections to specific destinations.
![]() Save the profile with the forwarding rule you created.The profile appears in your list of Forwarding Profiles. When you open it, you will see a URL to the PAC file generated from the rule. View PAC file to see its contents.
Save the profile with the forwarding rule you created.The profile appears in your list of Forwarding Profiles. When you open it, you will see a URL to the PAC file generated from the rule. View PAC file to see its contents.Attach Forwarding Profiles to GlobalProtect App Configuration
You can use Forwarding Profiles to simplify configuration of your GlobalProtect App proxy. - Create a Forwarding Profile.
- From Strata Cloud Manager, select ConfigurationNGFW and Prisma AccessConfiguration ScopePrisma AccessMobile UsersForwarding Profiles Setup.
![]()
![]() Add Forwarding Profile.
Add Forwarding Profile.![]() Select GlobalProtect Proxy.Configure the Forwarding Profile by uploading a PAC file or creating forwarding rules.Add the Forwarding Profile to your GlobalProtect app proxy configuration.
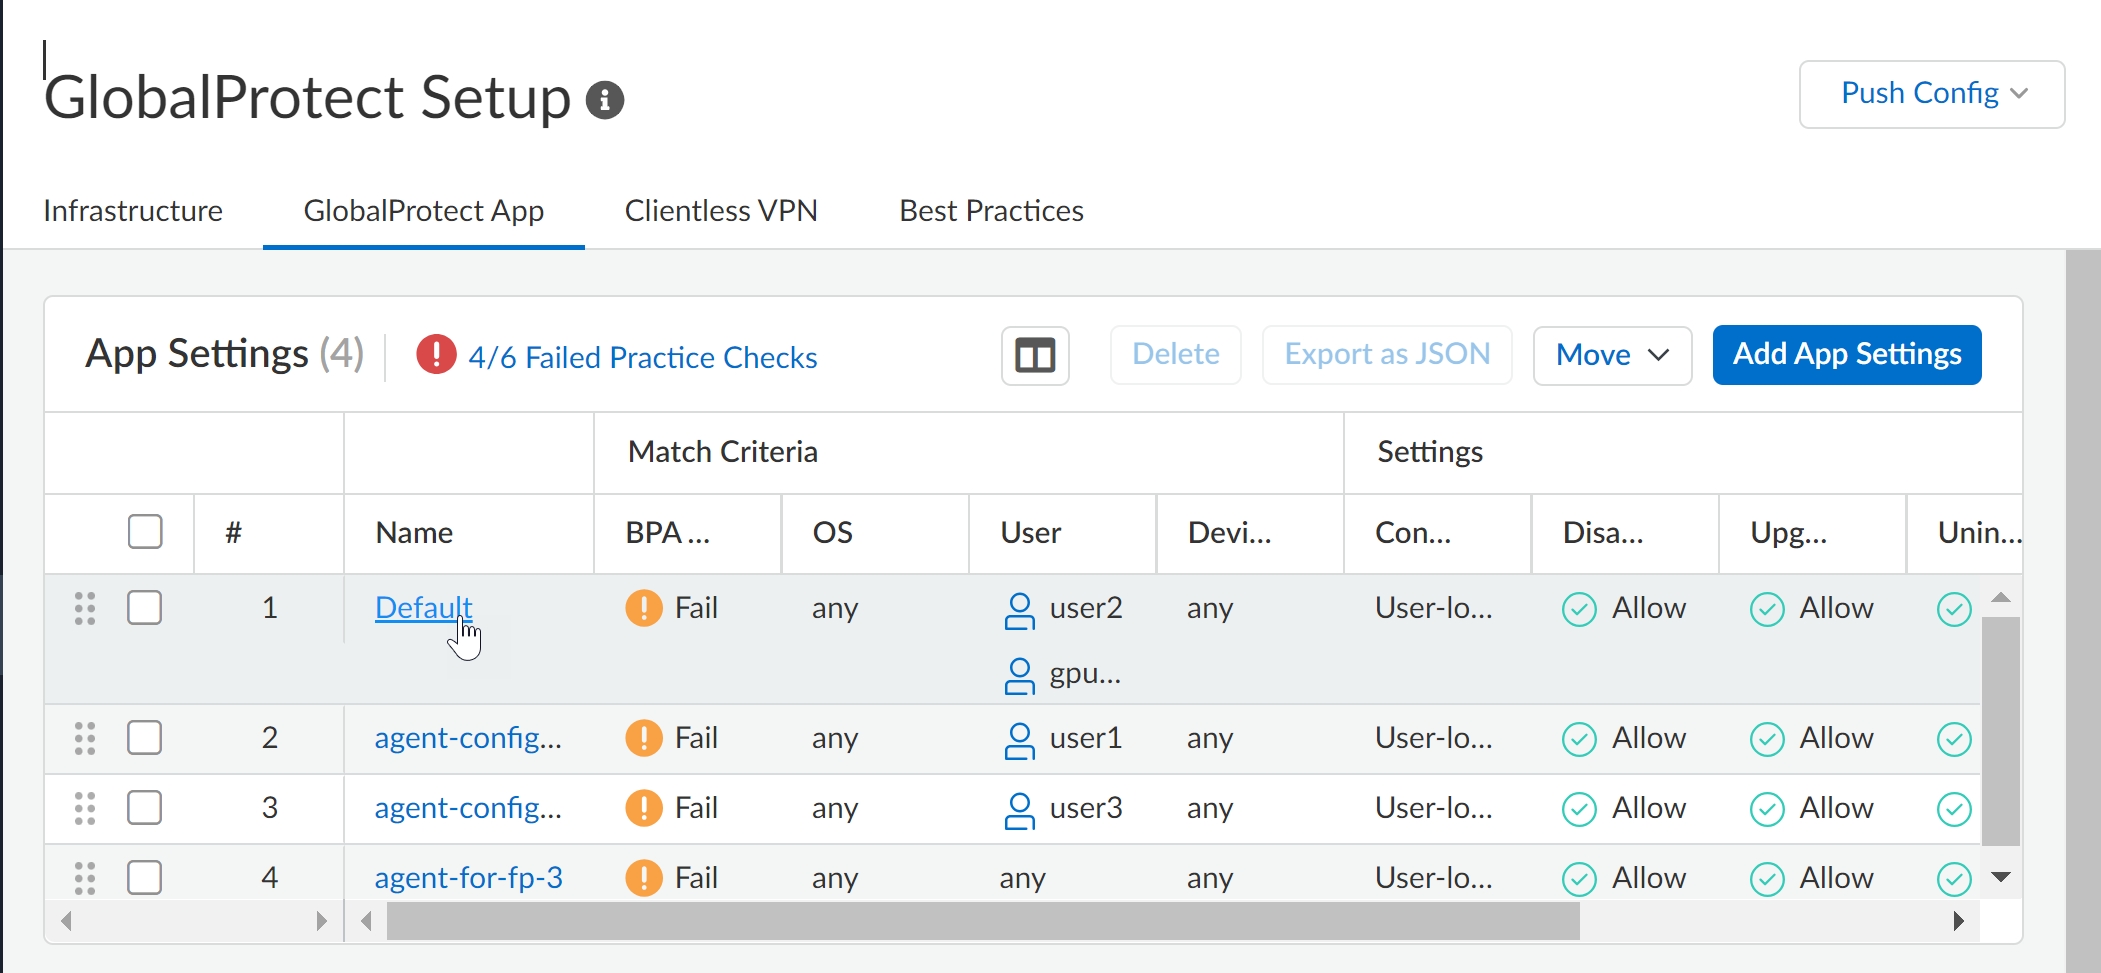
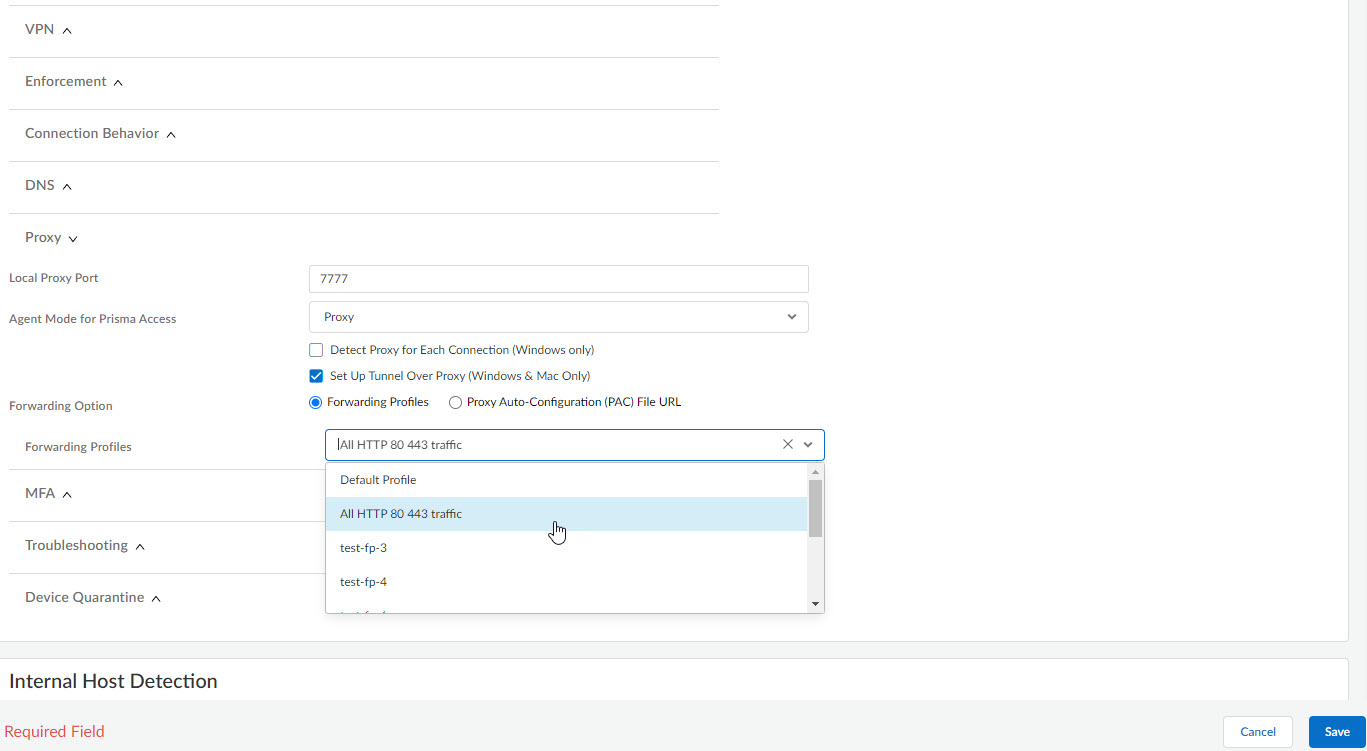
Select GlobalProtect Proxy.Configure the Forwarding Profile by uploading a PAC file or creating forwarding rules.Add the Forwarding Profile to your GlobalProtect app proxy configuration.- Select ConfigurationNGFW and Prisma AccessConfiguration ScopePrisma AccessGlobalProtectGlobalProtect App.Select a configuration file.
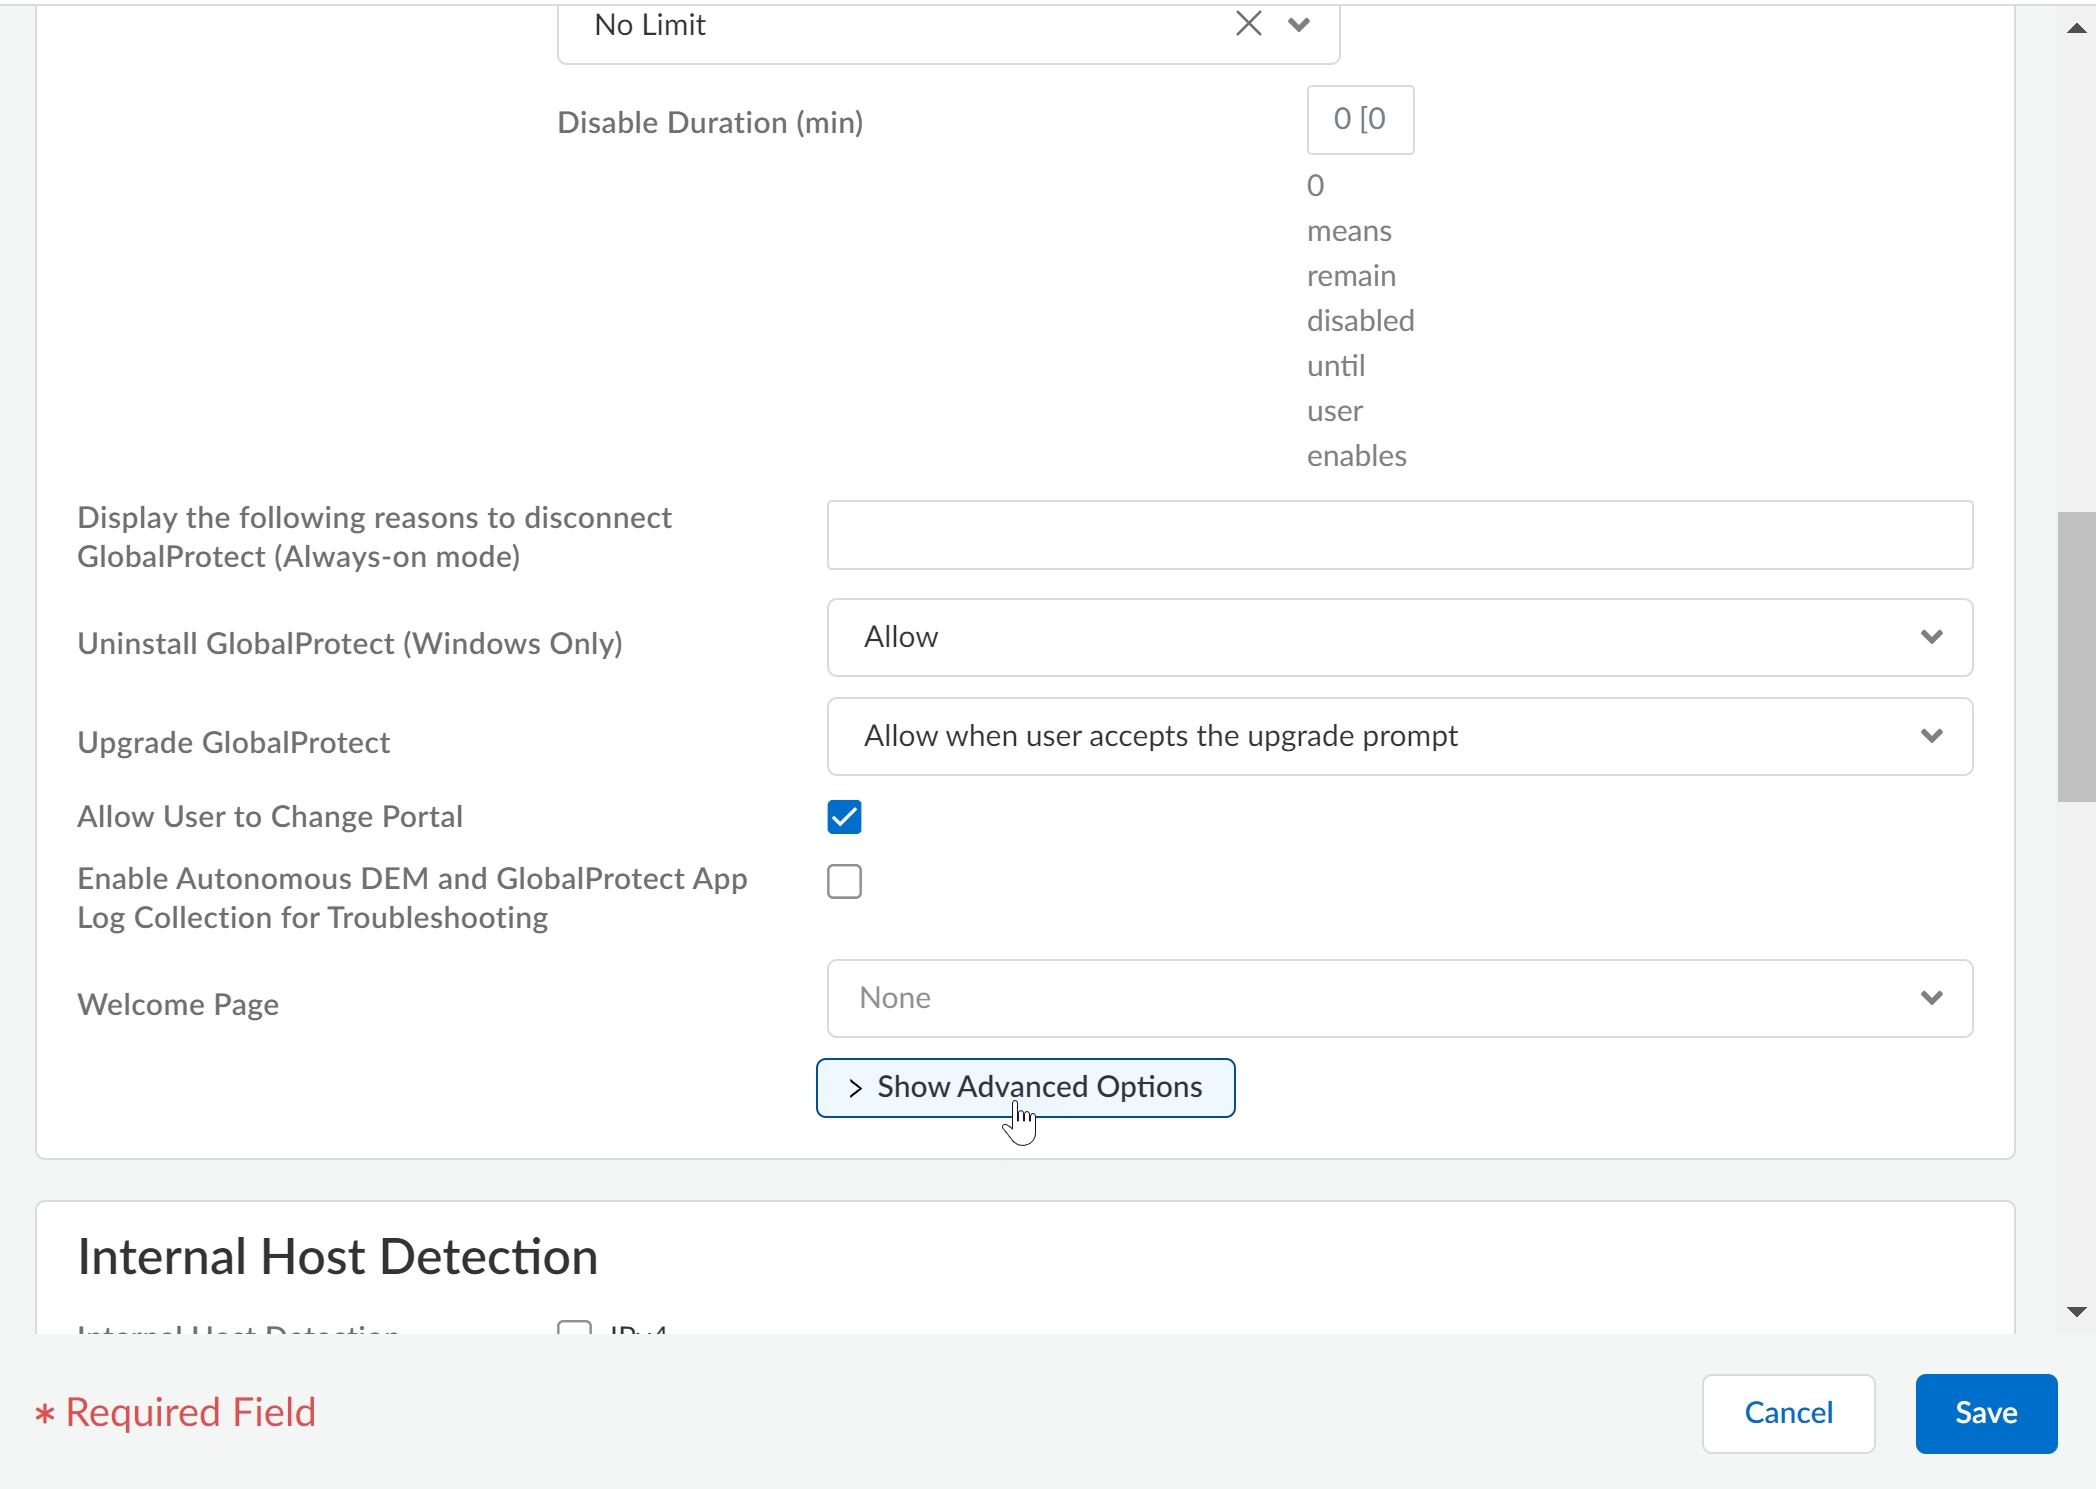
![]() Under App Configuration, Show Advanced Options.
Under App Configuration, Show Advanced Options.![]() Expand Proxy settings.Select either Proxy or Tunnel and Proxy depending on your GlobalProtect Agent modeYou can not add a Forwarding Profile if you select Tunnel mode.Select Forwarding Profiles and choose the Forwarding Profile you wish to use.
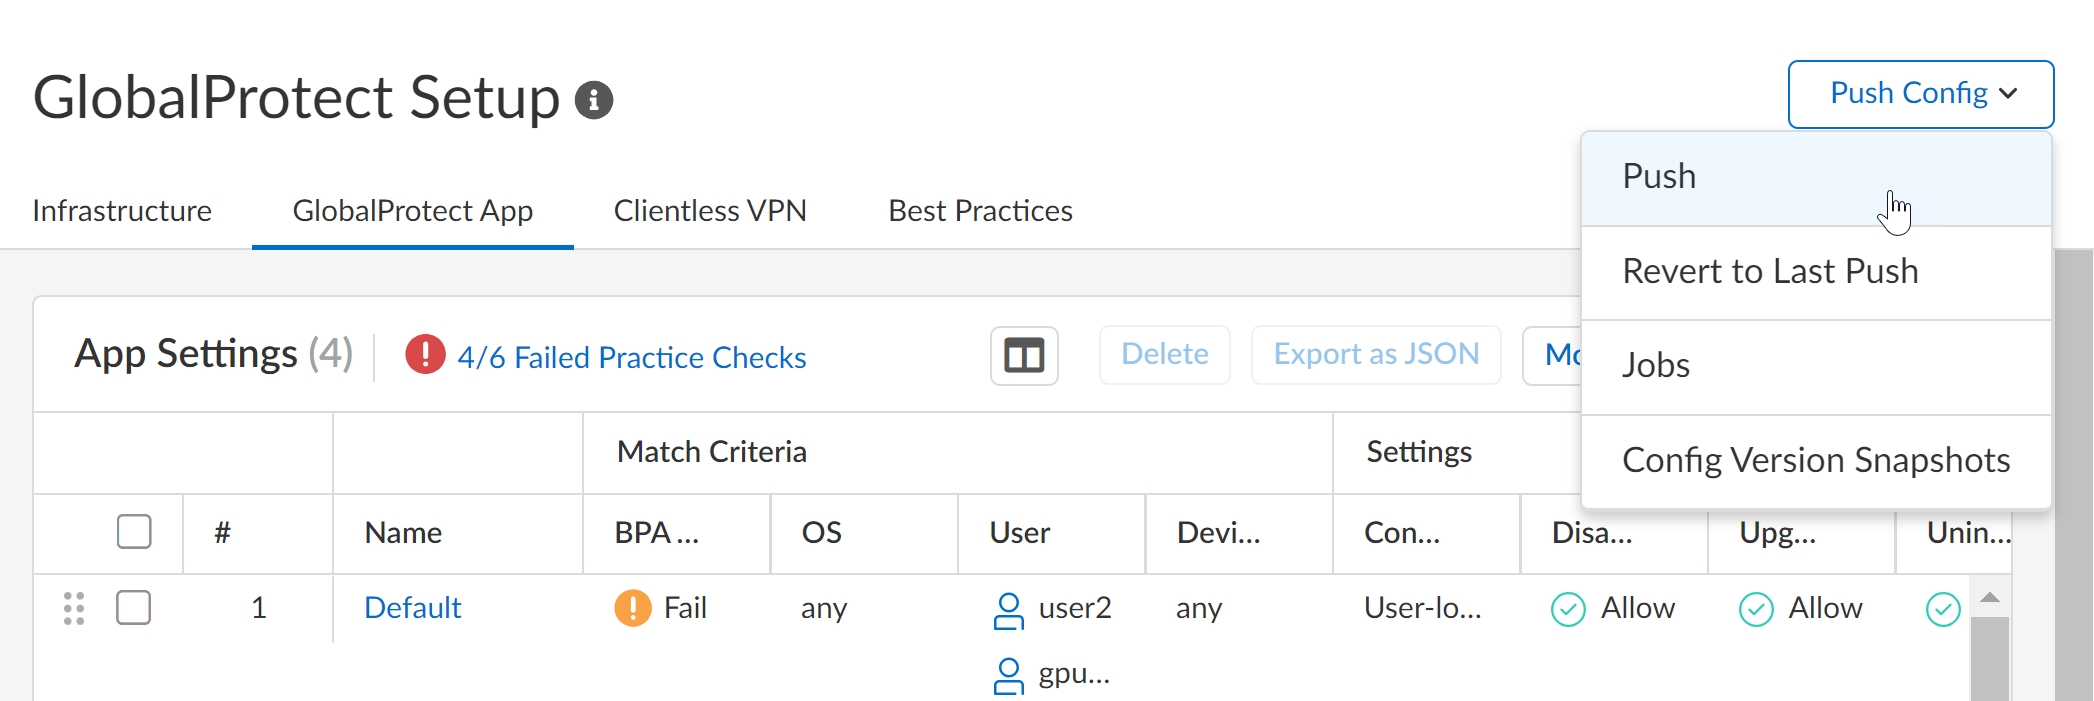
Expand Proxy settings.Select either Proxy or Tunnel and Proxy depending on your GlobalProtect Agent modeYou can not add a Forwarding Profile if you select Tunnel mode.Select Forwarding Profiles and choose the Forwarding Profile you wish to use.![]() Save your changes.Select Push ConfigPush.
Save your changes.Select Push ConfigPush.![]()

